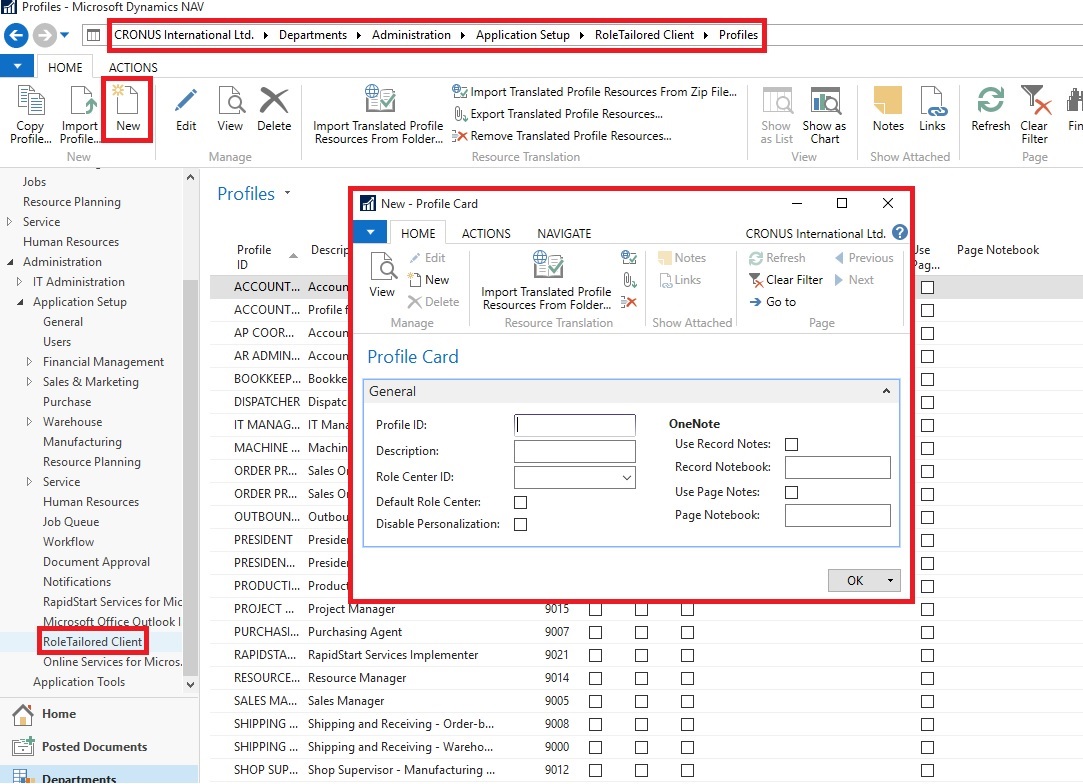
You use the Profile card to create profiles for end users. Each profile is associated with a Role Center. Profiles are typically based on job titles in a company.
To create a profile

- In the Profile ID field, enter a name that describes the intended role of the user.
- In the Owner ID field, click the AssistEdit button to view all available logins, and then select a Windows user.
- In the Description field, enter a description of the Profile ID, for example, Order Processor.
- In the Role Center ID field, click the AssistEdit button to view all available Role Centers. Select a Role Center.
- To make this Role Center the default for the profile, select Default Role Center.
- Click OK to save your changes.
The procedure for modifying an existing profile is the same, except you select an existing profile in the Profiles page instead of clicking New.
How to: Assign a User to a Profile
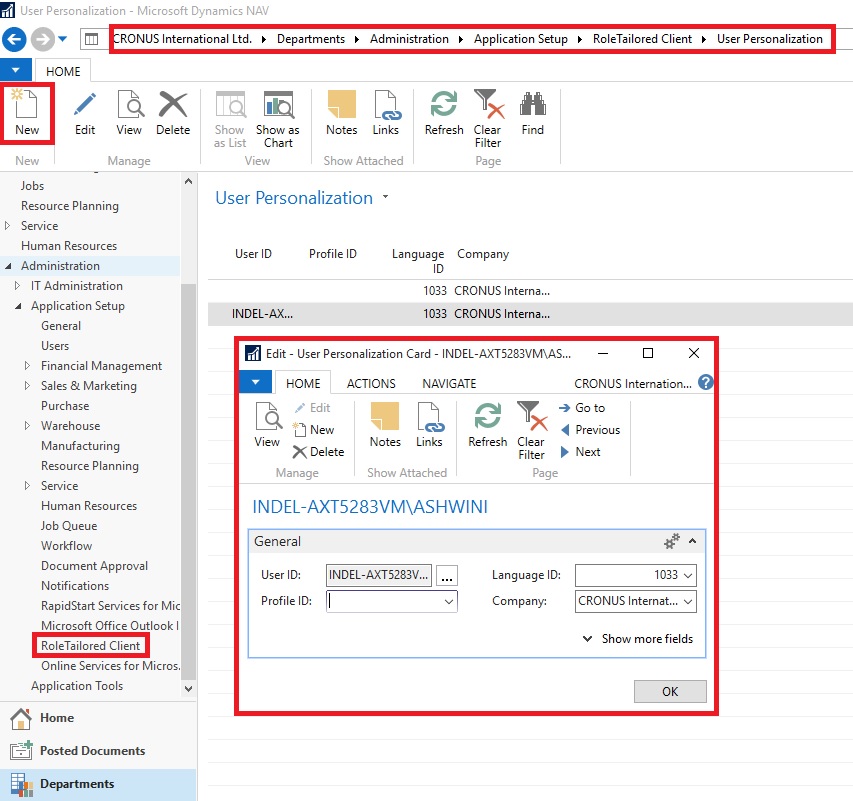
You use the User Personalization page to assign a user to a profile.
To assign a user to a profile

- In the User Personalization window, fill in the fields described in the following table.
| Field | Description |
| User ID | Choose the AssistEdit button to view all available user logins, select the relevant user, and then choose the OK button. |
| Profile ID | Select a profile ID that you have already created. Choose the AssistEdit button to view all available profiles. |
| Language ID | Select the appropriate language ID, or leave this field blank. |
| Company | Select a company from the Companies window. |
- Choose the OK button.
Note The Language ID and Company values are overwritten by user values when the user starts a session.
How to: Open Microsoft Dynamics NAV in Configuration Mode
To configure a profile, for example to customize the profile’s user interface, you must open the Microsoft Dynamics NAV Windows client in configuration mode.
To open the Microsoft Dynamics NAV Windows client in configuration mode
- At the command prompt, navigate to the root folder of the Microsoft Dynamics NAV Windows client. For example:
cd C:\Program Files (x86)\Microsoft Dynamics NAV\90\RoleTailored Client
- Type the following command:
Microsoft.Dynamics.Nav.Client.exe -configure -profile:"profileid"
Replace profileid with the name of the profile that you want to configure.
Important You must be the owner of a profile to open it in configuration mode
For example, to configure the Accounting Manager profile, use this command to open the Microsoft Dynamics NAV Windows client in configuration mode:
Microsoft.Dynamics.Nav.Client.exe -configure -profile:"Accounting Manager"
No comments:
Post a Comment