How to: Enable Encryption Keys
You can enable data encryption on the Microsoft Dynamics NAV Server instance that connects to the database.
- Open the Data Encryption Management Card, as path suggested in below Image.
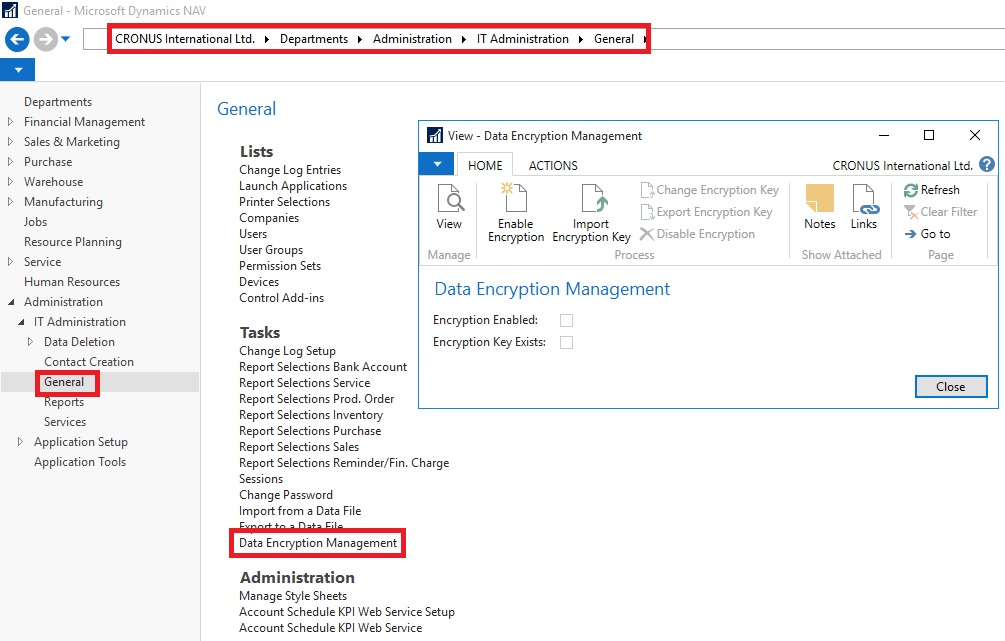
- Click on Enable Encryption in Process of Home tab.
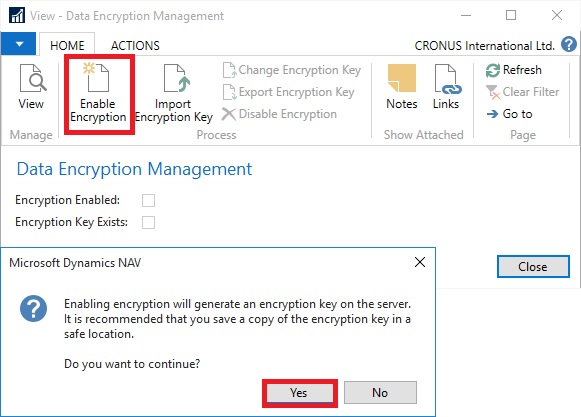
- On Confirmation Dialog box choose Yes.
- On further Confirmation of Password choose Yes.
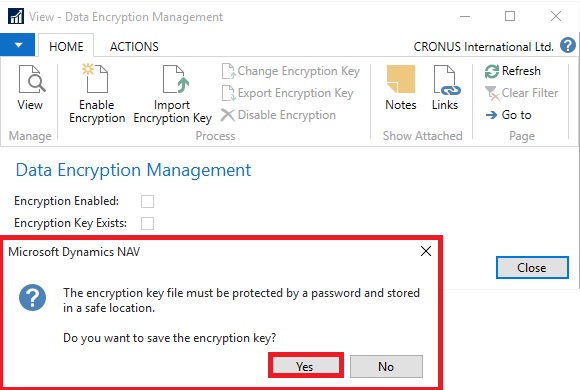
- Enter the Password as defined in Rule as shown in below Image.

- Upon entering Password choose OK to continue.
- Key is created with password protected and offered to Export.
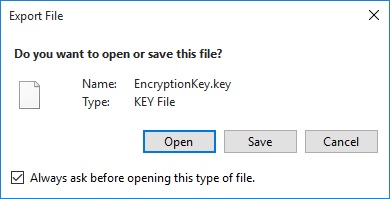
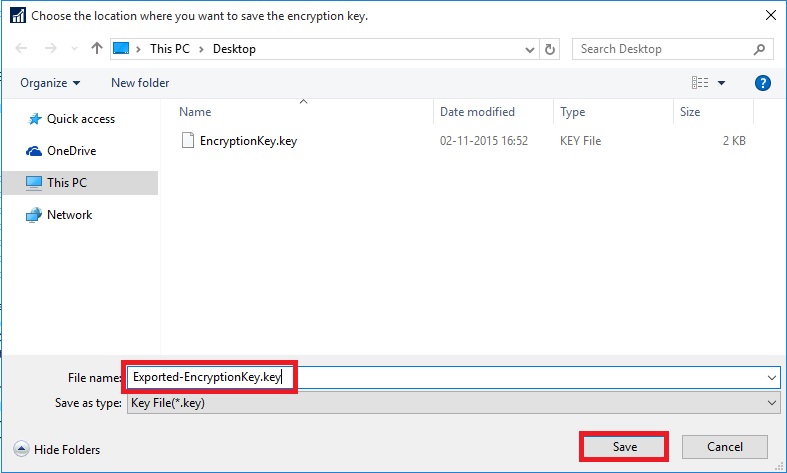
- Choose Save, and save it as Safe Location as you will require it again whenever you restore the database or Import Export the data. Please make sure you also store the password for further reference whenever required.
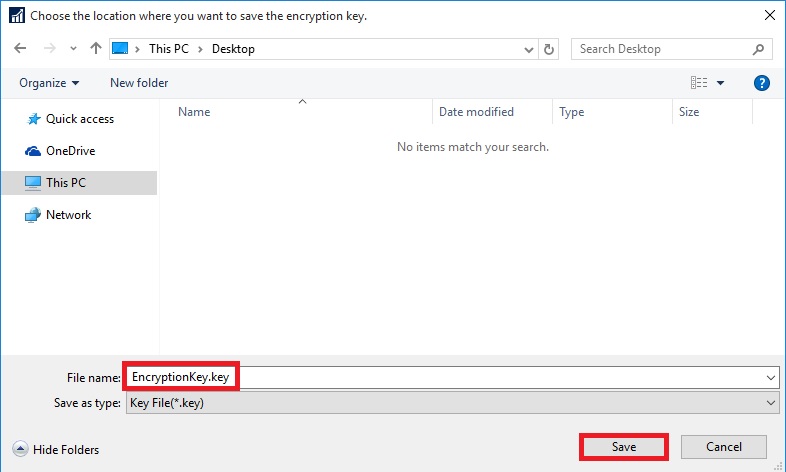
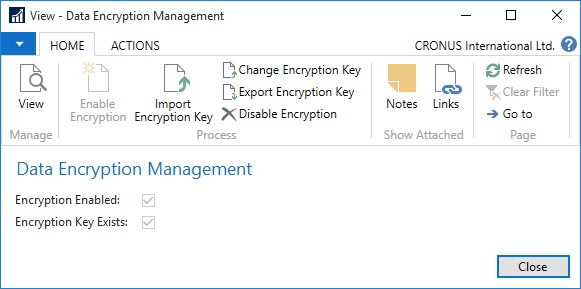
- Once Key is generated, you can see that the Encryption Enabled & Encryption Key Exists is checked TRUE.
- Also in Ribbon you will find the Change Encryption Key, Export Encryption Key & Disable Encryption is now enabled.
- If Microsoft Dynamics NAV is configured with multiple service tiers (Microsoft Dynamics NAV Server instances), then you must first enable encryption on one server instance, and then export the key and import to other server instances where you enable encryption.
If you export companies and other data that is secured by data encryption, then remember to also export the encryption key so that you can access the data after you import it into another database, for example when you restore a backup. Creating a backup of encrypted data involves the following high-level steps.
- Export the data from one database.
- Export the data encryption key.
- Import the data into another database.
- Import the data encryption key.
How to: Export and Import Encryption Keys
Note: You cannot generate different keys within one multiple-server instance environment.
Exporting an Encryption Key
You export an encryption key to make a copy of the key or so that it can be imported on another server instance.
Exporting an encryption key stores the encryption key that is used by the current server instance to a file on your computer or network.
To export an encryption key
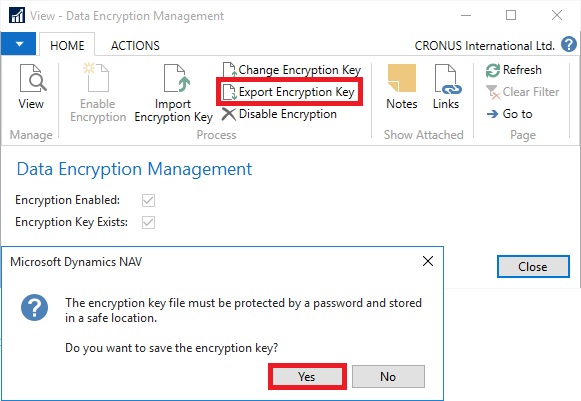
- On the message about saving the encryption key, choose Yes.
- In the Set Password window, enter the password that will protect the exported key file, and then choose OK.

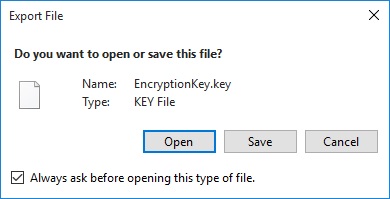
- In the Export File window, choose Save, choose a safe location where the key file is stored, and then choose Save.
Importing an Encryption Key
You can import an encryption key to a server instance from an encryption key file that was exported from another server instance or saved as a copy when the encryption was enabled.
You cannot import an encryption key on a server instance that already includes an encryption key. In this case, you must change the encryption key instead.
To import an encryption key
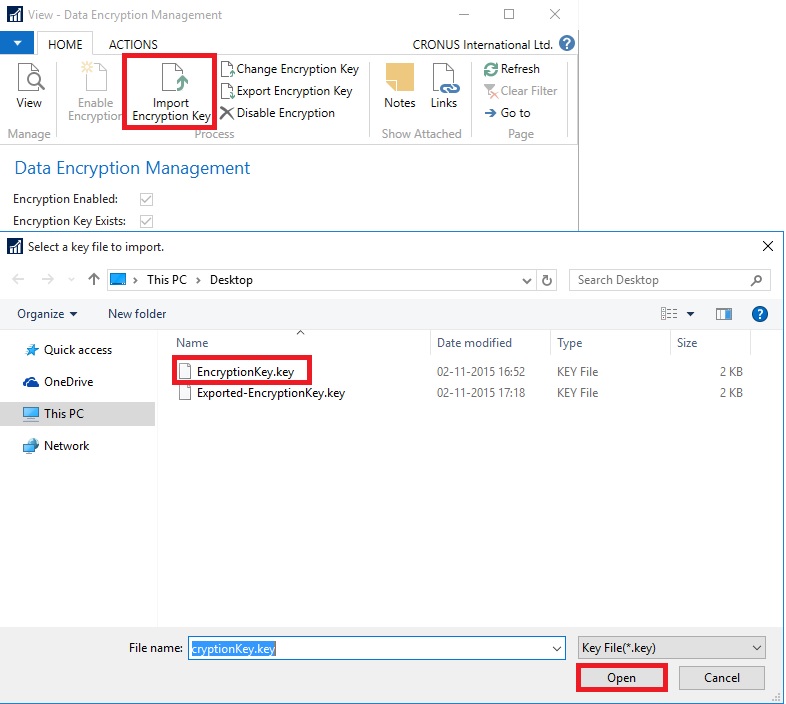
- On the Home tab, in the Process group, choose Import Encryption Key.
- In the Select a key file to import window, choose the encryption key file, and then choose Open.

- In the Password window, enter the password that protects the key file, and then choose OK.
Changing an Encryption Key
If a server instance already has an encryption key, then you can replace the current encryption key with an encryption key that is stored in an encryption key file that was exported from another server.
To change an encryption key
- On the Home tab, in the Process group, choose Change Encryption Key.
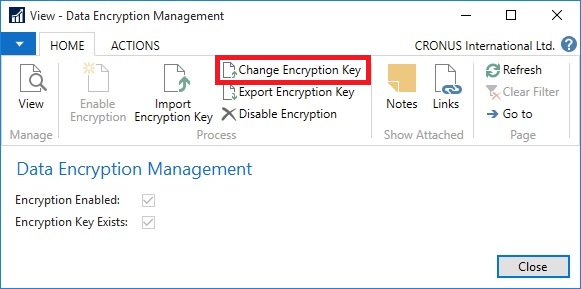
- In the Select a key file to import window, choose the encryption key file, and then choose Open. Same as in above process.
- In the Password window, enter the password that protects the key file, and then choose OK. Same as in above process.
[…] Bron : Ashwini Tripathi Lees meer… […]
ReplyDelete