Showing posts with label Data. Show all posts

Wednesday, 3 August 2016

Save General Journals as Standard Journal in Navision

Do you Know you can save the General Journal as Standard Journal and retrive edit and post it later.

Many of time we pass entries of same Nature, Like Rent, Salary, Bills etc.. just an example you can decide upon which entries you post frequently and club it as Standard Journal to save your time.

You can create once and retrive it every month or when ever required and Post it in future/later.This can serve you as template for future use.

Let us see how we can use this feature.

StdGen-1

Open your General Journal.

Make entries which you do oftenly. Don't put Postng Date & Document No. Complete your all entries.

Next we will save this as Standard Journal for future use.

From Action choose Save as Standard Journal.

StdGen-2

Give Code & Name for your Journal Template.

If Amounts are fixed every time you can enter them too and while Save choose Save Amount.

No Let us review the entry that we saved.

From Action Choose Get Standard Journal.

This will display you all Saved Standard General Journals.

StdGen-3

Select the required Journal Code and Click on Edit.

StdGen-4

This is what is Saved in your Standard Journal.

Let use return to the Standard Journal List.

Select desired/ earlier saved Std. Journal and Click on OK.

StdGen-5

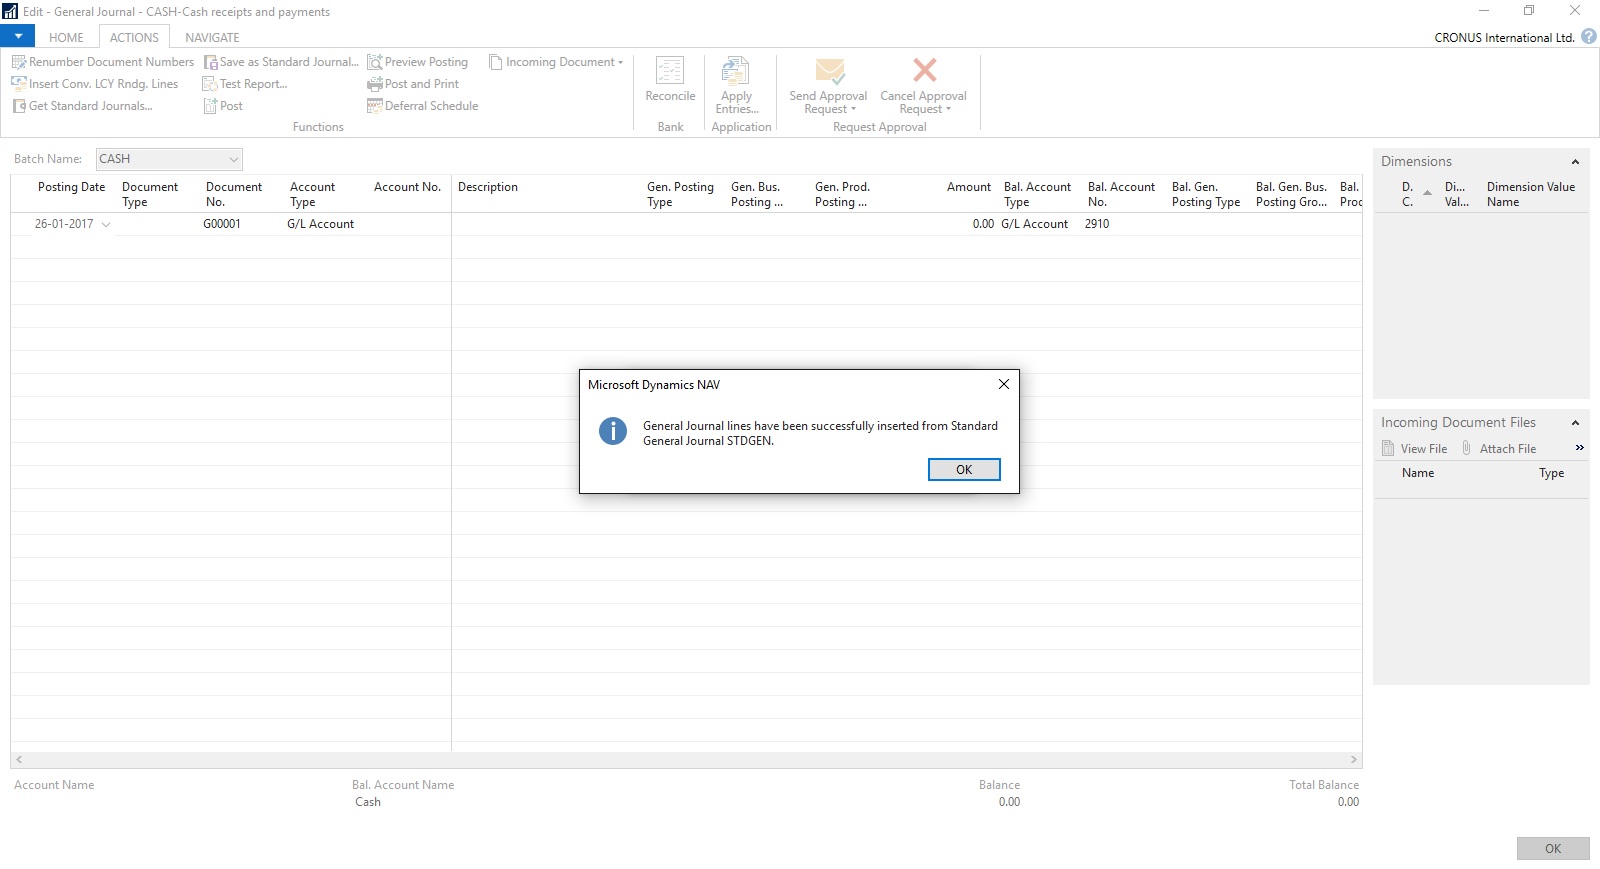
Confirmation of Std. Journal retrived and Journals created in General Journal Page.

StdGen-6

Your General Journal gets populated with values you saved to Std. Journal.

Have you Noticed, Posting Date as your Work Date and Next Document No. from your assigned No. Series is populated Automatically.

StdGen-7

Fill the Amount and any other required fields and Post the Journal.

Next time when again you wish to post similar entries just retrive it and continue.

Thats all for todays Post, What you are waiting for give it a try.

I will comeup with more details in my upcoming Posts, till then keep exploring and Learning.


Tuesday, 2 August 2016

Creating Views - to Save Filtered Lists in NAV

Do you Know you can save the Page as View with filters.

Many of time we access to Page and apply same set of Filters to fetch our data. You can save the same for quick retrival of data applying the filters automatically in future access.

You save the Page with Filters as View.

Let us see small example how to achieve it.

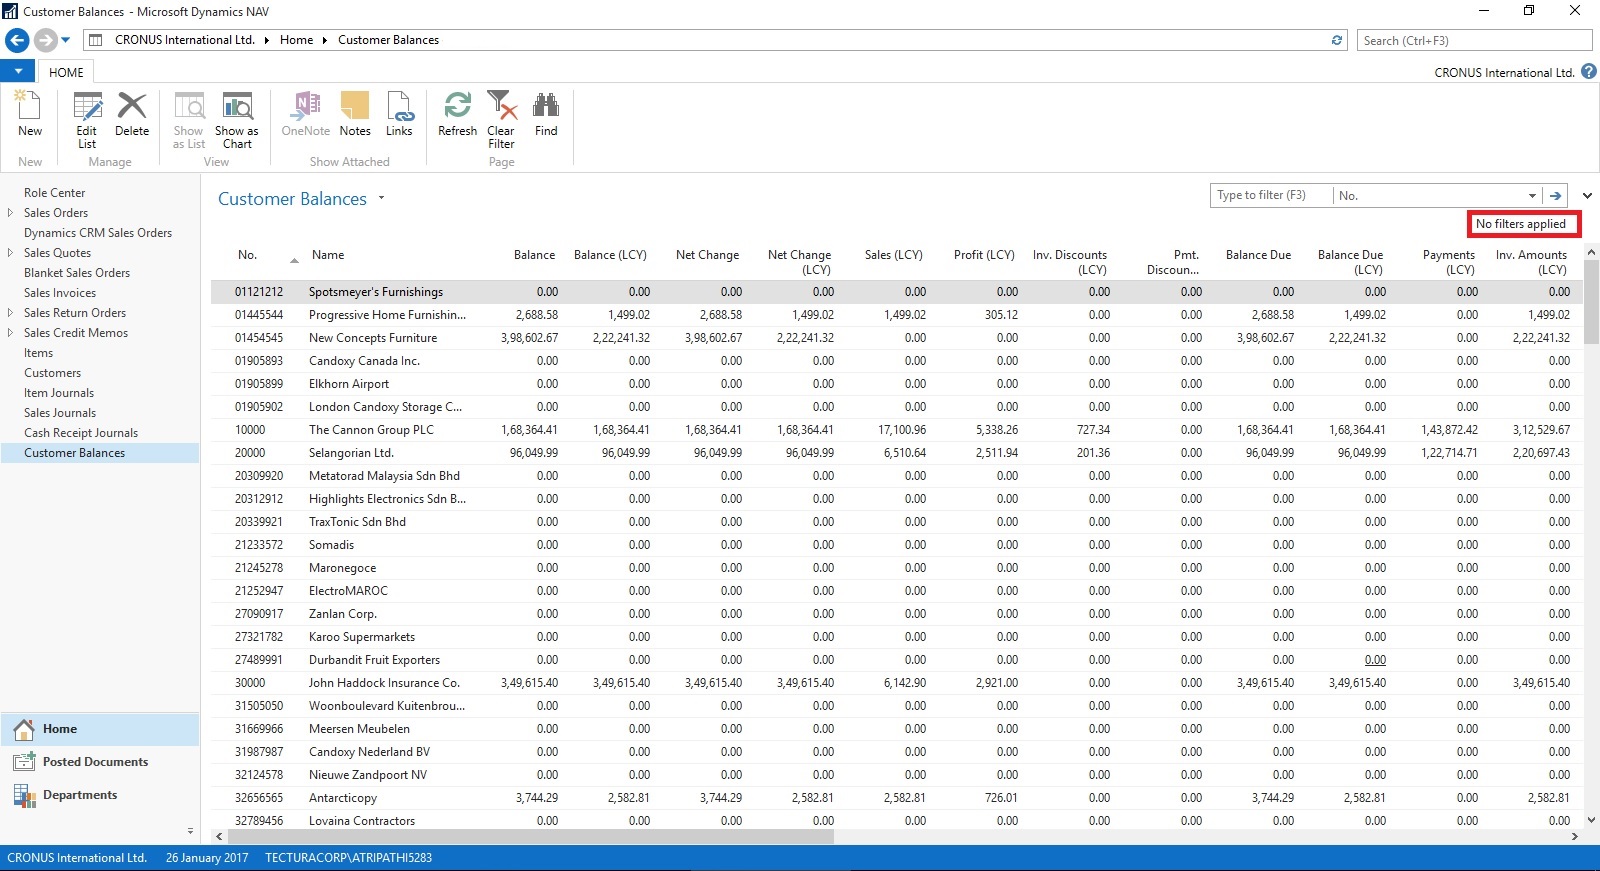
First we will open the List Page in my case i am having one customized Customer List.

FilteredView-1

Suppose this is the Page which i use for Balances Retrival each month and on daily basis.

I Enter Filter as Balance > 5000 & Current Month Filter whenever i wish to check balances for my reporting or followup purpose.

For Date Filter i use (-CM..CM) sothat when i open this view next month it takes the appropriate Filter for that month.

FilteredView-2

Click on the Page Name post applying all the required Filters.

Select Save View as.

Give the Name for the View.

Select the Location to save the View.

On Confirmation respond as Yes.

FilteredView-3

Your View will be Saved, You can create as much Views as desired using different Filters.

FilteredView-4

Small and good Feature.

What you are waiting for give it a try.

I will comeup with more information in my upcoming posts, till then keep exploring and learning.


Tuesday, 31 May 2016

Plug & Play - Power BI and Jet Enterprise in NAV 2016

This is where Power BI and Jet Enterprise really shine – they have the ability to understand NAV because they have little bundles of interpretation packs that can interpret NAV for you!

Checkout more via below shared link :-

http://www.catapulterp.com/plug-and-play-power-bi-and-jet-enterprise-in-nav-2016/

Tuesday, 26 April 2016

Exposing & Consuming the Web service from & inside Navision – Part-2

Continuing from my previous post. Find the link to access the same in case you missed it.

Exposing & Consuming the Web service from & inside Navision – Part-1


Step 1: Create a XML Port to Export Data in XML Format using XMLPort and save at some specified Location.

Here we will be creating just for demo purpose simple XMLPort for Exporting Data from Navision Database in XML Format.

WebServiceUsage-2

We are using very simple structure for our XMLPort.

Make sure you set the properties accordingly as we are exporting the data in XML Format.

WebServiceUsage-3

Save the XMLPort at available id and suitable name.


Step 2: Create a Codeunit to call XML Port and retrieve data in XML Format in Text Variable.

Here we will create a Codeunit with few helpful functions which will call the XMLPort to Export the data and save in temp file.

Further retrieve the data from the file in XML Format.

Return the data retrieved above to the calling program/ function.

To start with let us start with creating some Global Variables.

WebServiceUsage-4

Next we will add one Function as below.

WebServiceUsage-5

Next we will add one more Function as below.

WebServiceUsage-6

Save the Codeunit at available Id and suitable Name.


Step 3: Expose/Publish the Codeunit as web service.

Open Web Services Page and add your Codeunit created above. Use your relevant ID on which you saved your Codeunit.

WebServiceUsage-7


Tick the Published to Expose the Codeunit as Web Service.

Rest in my Next post.

To Be Continued……

Sunday, 24 April 2016

Exposing & Consuming the Web service from & inside Navision – Part-1

Introduction

Today in reply to one of my reader I am giving here steps how we can Export data using XMLPort and transfer data outside Navision using Web Services.

Lets discuss about the technology before I jump to the solution.

Few full forms which may help understanding while reading this post.

W3C - Web Services Architecture Working Group.

SOAP - Simple Object Access Protocol.

REST - Representational State Transfer.

WSDL - Web Service Description Language.

UDDI - Universal Description, Discovery & Integration.

AWS - Arbitrary Web Services.

XML - Extensible Markup Language.

HTTP - Hypertext Transfer Protocol.


What is Web Service?

W3C defines Web Service as : A software system designed to support interoperable Machine-to-Machine interaction over a network.

Web service can be defined as service offered by an electronic devices to another electronic devices, which communicate with each other over www.

W3C defines web services has an interface described in a machine-process able format WSDL.

Other systems I with the web service in a manner prescribed by its description using SOAP messages, typically conveyed using HTTP with an XML serialization in conjunction with other web-related standards.

Later W3C extended the definition:-

REST - compliant web services, in which the primary purpose of the service is to manipulate representations of web resources using a uniform set of stateless operations.

Arbitrary Web Services -  the services may expose an arbitrary set of operations.

WebServiceUsage-1-2

UDDI  defines which software system need to be contacted for which type of data.

Once the system is discovered to be contacted, the contact is established using SOAP.

Service provider system validate the request by referring the WSDL file, process the request and send the data using SOAP protocol.


Web Service is a method of communication that allows two software system to exchange the data over the internet.

  • Two systems may use different software which could be using different programming languages.

  • Almost all type of software interpret XML tags.

  • Web Services can be used to exchange data between two systems in form XML files.


WebServiceUsage-1-3

XML is used to tag the data.

SOAP is used to transfer the data.

WSDL is used to describe the services available.

UDDI lists what service are available.

Human to machine communication is utilized for machine-to-machine communication, used for transferring machine readable files such as XML & JSON formats.

Web services use SOAP over HTTP protocol, facilitating to use your existing low-cost internet for implementing Web Service.

Rules for communication between two different systems:

All the rules are defined in WSDL file.

  • How request to be send from one system to another.

  • What all parameters need to be send while requesting data.

  • What structure to be used for generating data (Normally data is exchanged in XML format) which is validated against .xsd file.

  • What errors to be generated in case of failure of rule communication set.


Web Services that uses Markup Language:

  • JSON-RPC

  • JSON-WSP

  • Web template

  • Web Service Description Language (WSDL)

  • XML Interface for Network Services (XINS)

  • Web Services Conversation Language (WSCL)

  • Web Services Flow Language (WSFL)

  • WS-Meta data Exchange

  • Representational State Transfer (REST)

  • Remote Procedure Call (RPC)

  • XML Remote Procedure Call (XML-RPC)


No more theories lets come to our point.

There are other ways too to achieve the same, but here I am specific to the requirement to which I am answering.

Requirement is the Data in XML format file will be transmitted using Web Service, We will be using Navision Exposed Web Service to Export data using XMLPort and then send the content by consuming another Web Service exposed in Dot Net which will retrieve the XML content and update in some other system.

Assumption is these two endpoints can be two separate databases in same domain or two different companies of same organization operating at two different location sharing information via Web Services.

For the demo purpose I will be using Navision to publish the service for exporting the data and retrieve the data using Web Service exposed in Dot Net.

Since I have not in depth knowledge of Dot Net codes, so I have asked my college to prepare the Web Service for me and I am simply using it to show how we can do it.

Here I will be getting this done through below 5 Steps.

WebServiceUsage-1

Next Post in this Series will contain:

Step 1: Create a XML Port to Export Data in XML Format using XMLPort and save at some specified Location.

Step 2: Create a Codeunit to call XML Port and retrieve data in XML Format in Text Variable.

Step 3: Expose/Publish the Codeunit as web service.


Next Post in this Series will contain:

Step 4: Create a DLL to use as Add-in to consume the Web Service itself in Navision.


And the Final Post in this Series will contain:

Step 5: Create a Codeunit to test Retrieve the data using above DLL and Send data in XML Format using another Web Service exposed in Dot Net.


Please follow my upcoming post for Walkthrough to get above 5 steps done.

To Be Continued..........


Wednesday, 20 April 2016

Financial Statements and Data Warehousing (Jet Reports)

Learn how a data warehouse makes creating financial statements from multiple systems fast and easy by storing all of your data in a single place that is optimized for end user reporting.

Video-1
http://jetreports.wistia.com/medias/018bcsea5n?embedType=iframe&videoWidth=640

Video-2
http://jetreports.wistia.com/medias/93wgjbfxep?embedType=iframe&videoWidth=640

Monday, 18 April 2016

Assisted Setup (Data Migration) - Madeira

Login to Madeira using your credentials.

From Home page Action Tab Ribbon choose Assisted Setup & Tasks.

AssistSetup-1.1

From Assisted Setup Window select Migrate Business Data Task to continue.

AssistSetup-2.1

From Welcome Screen select Next.

AssistSetup-3

Here you can choose source using which you want to Import Data using Assist Edit Button.

AssistSetup-4

Select Import from Excel option and say OK.

AssistSetup-5

Select Download Template file.

AssistSetup-6

Save the File to desired path.

AssistSetup-7

From Settings Select the Templates you wish to Apply to your Data for Customer, Vendor & Item and choose close to proceed.

AssistSetup-8

Below is the format of Template downloaded in above step. Fill in the data to Import.

AssistSetup-9

When we don't select any template in above step for Customer, Vendor & Item will give confirmation message as below. Choose Yes to proceed.

AssistSetup-10

From next screen Select choose button to specify the Excel file which we prepared in above step using downloaded Template.

AssistSetup-11

This will fetch the data from the file and show you no of records in each table which is going to be imported.

AssistSetup-12

Here if you are familiar with the Rapid Start you can select Advance and perform action accordingly or can skip and proceed to Next Step by selecting Next. Here I am selecting Advance to show the screen.

AssistSetup-13

Confirm with Yes to proceed.

AssistSetup-14

Your Package page will open as shown in above screen, choose Apply Package and handle any import issue with the data to complete the step.

AssistSetup-15

Confirm with Yes to continue.

AssistSetup-16

After processing it will show the status of data, review and fix the issues to continue.

AssistSetup-17

You can drilldown and review the issues and take required steps to proceed with issue fixing and importing of data. Here I choose close to return to previous step of simple import without using Package option.

AssistSetup-18

Select Next to continue with next step.

AssistSetup-19

After processing it will show status of data and errors in data. Say OK to continue.

AssistSetup-20

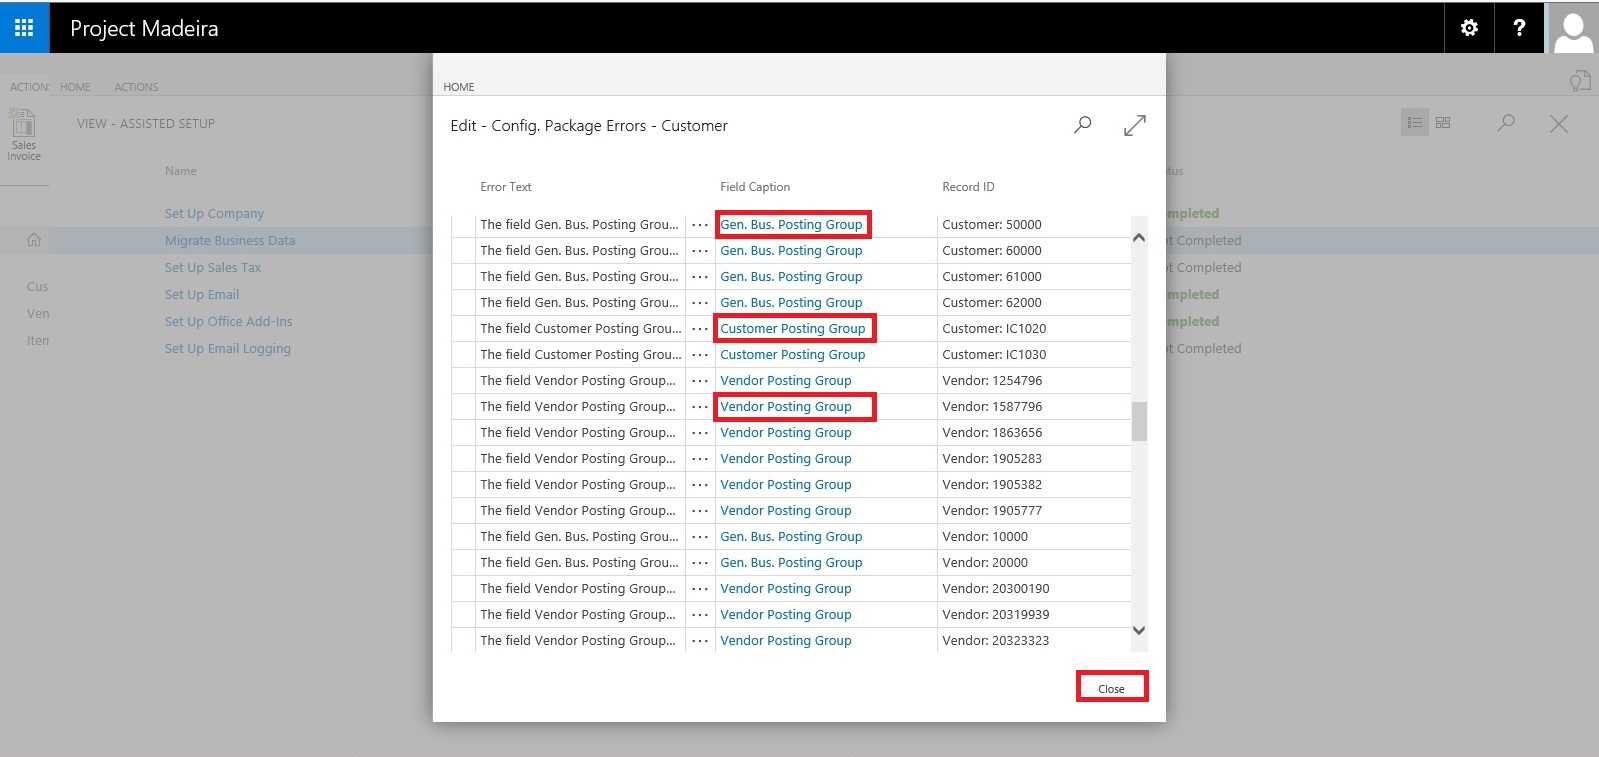
Here we can choose Show Errors to review the Errors.

AssistSetup-21

We find that in my data most of the issues is related to Gen. Bus. Posting Group, Customer Posting Group, Vendor Posting Group, etc... We can fix these issues later, so just respond Close to continue with Next step.

AssistSetup-22

Our data is now Imported with errors, we will take care of issues with data as reviewed above. Respond Finish to complete this step & Process.

AssistSetup-23

Now you can see this step is marked as completed in Status.

Our data is imported we will access the data and fix the issues accordingly.

I will come up with more details in my upcoming posts.

Till then keep exploring and Learning.


Assisted Setup – Madeira

When you want to explore Project "Madeira" on your own, you can always go back to the Getting Started tour. See in cubes area marked.

AssistSetup-1

At Home page you will find the Assisted Setup & Tasks action. See in Ribbon marked in above screen.

Here you see a list of assisted setup that can help you getting started.

AssistSetup-2

You can migrate data such as vendors, customers, and items from your existing financial system using the Migrate Business Data assisted setup. Once you are done with this piece you are good to go ahead exploring more.

Depending on your need, check if the other assisted setup can help you in any manner.

In the Assisted Setup window, you will find the followings:


ASSISTED SETUP

Set Up Company: - Creates a new trial company for you to enter data and try out Project "Madeira". If you went through the Getting Started tour this step is probably already completed.

Migrate Business Data: - Lets you import your existing company data such as vendors, customers, and items from Excel or QuickBooks.

Set up Sales Tax: - Gets you started with default tax groups and assigning tax area codes that you can assign to customers and vendors in order to automatically calculate sales tax in sales or purchase documents.

Set up Email: - Gets you ready for sending email messages directly from sales orders or contacts in Project "Madeira".

Set up Office Add-Ins: - Sets up the ability to use and launch Project "Madeira" from Outlook.

Set up Email Logging: - Sets up the capability to log email correspondence in Project "Madeira" to follow up on interactions.


Will come up with more details in my upcoming posts.

Till then keep exploring and learning.


Thursday, 31 March 2016

Microsoft Power BI – Part X

Continuing from my previous post. Today we will downloading the dataset into Excel from Power BI Online for analysis.

In case you have missed my previous posts here I present the link to all previous posts below.


Microsoft Power BI – Part – I

Introduction to Power BI and Creating Report from Excel Data, Local Files.

Microsoft Power BI – Part – II

Introduction to few Features of Power BI

Microsoft Power BI – Part – III

Power BI Desktop, Creating Dataset & Reports from In Premise Database installation

Microsoft Power BI – Part – IV

Power BI Gateway usage

Microsoft Power BI – Part – V

Scheduling Refresh of Dataset & Report created using In Premise Database

Microsoft Power BI – Part – VI

Power BI Content Pack

Microsoft Power BI – Part – VII

Power BI Mobile App

Microsoft Power BI – Part – VIII

Power BI Content Pack

Microsoft Power BI – Part – IX

Power BI Publisher for Excel


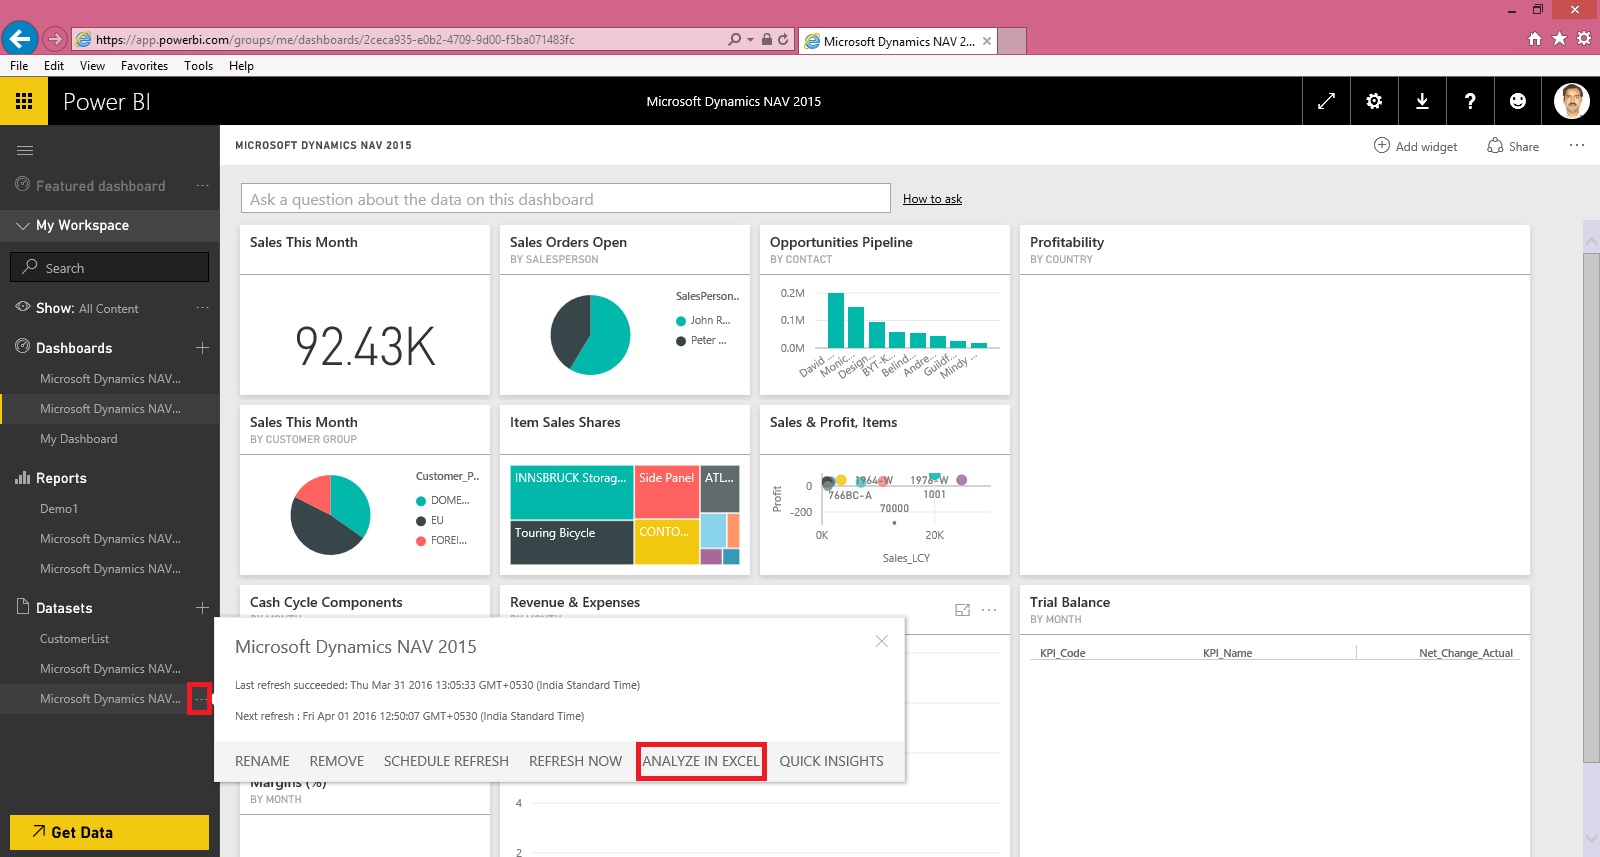
Login to Power BI using your credentials.

PowerBI-111

Select the Dataset which you wish to analyse, click the three dots on right and from appearing menu choose ANALYZE IN EXCEL.

PowerBI-112

You will be prompted for Analyse in Excel (preview). If you are running first time please install it.

At the same time you will be prompted for (.odc) MS Office Data Connection file to save/open.

Save and then open the File in Excel.

PowerBI-113

On opening the file you will be prompted for security concern Enable to allow it.

PowerBI-114

You will be able to see Pivot Table Fields, containing all of the Tables available in the Dataset.

PowerBI-115

Now you can play with your data to analyse and create Pivot, Charts and share with others or you can Pin back your result to Power BI Dashboards using concept we used in our previous post.


That’s all for today, I will come up with more features in my future posts.

Till then keep practicing & Learning.