With data driven alerts in Power BI, you can now get notifications when a metric you care about on your dashboard exceeds a set threshold.
Alert notifications will be sent to you as an email, and appear in your notification center on the web and in mobile apps.
You can set alerts for your numeric tiles featuring cards and gauges only. You have control over how often you want to be notified about your data, and whether you want to receive an email when your data goes beyond the limits you set.
Only you can see the alerts you set, even if you share your dashboard.
Alerts only work on data that is refreshed. When data refreshes, Power BI looks to see if an alert is set for that data. If the data has reached an alert threshold, an alert is triggered.
Alerts only work with numeric data types.
Alerts only work on data that is refreshed. They do not work on static data.
Today we will see how to work with Alert feature in Power BI.
Login to your Power BI using your credentials.
Switch to your Dashboard.
I have one ready to use dashboard from my previous post to show Alert feature I am using the same.
As discussed above it works only for Numeric & Gauges Tiles only, for others you will not get even the Alert option.
Luckily I have one on my Dashboard, if want to learn how to create Numeric Tiles or more details on working with Power BI you can refer to any of my previous posts on Power BI. However you can find here one direct Link to the topic in question.
You see I have selected my Numeric Tile in below screen shot.
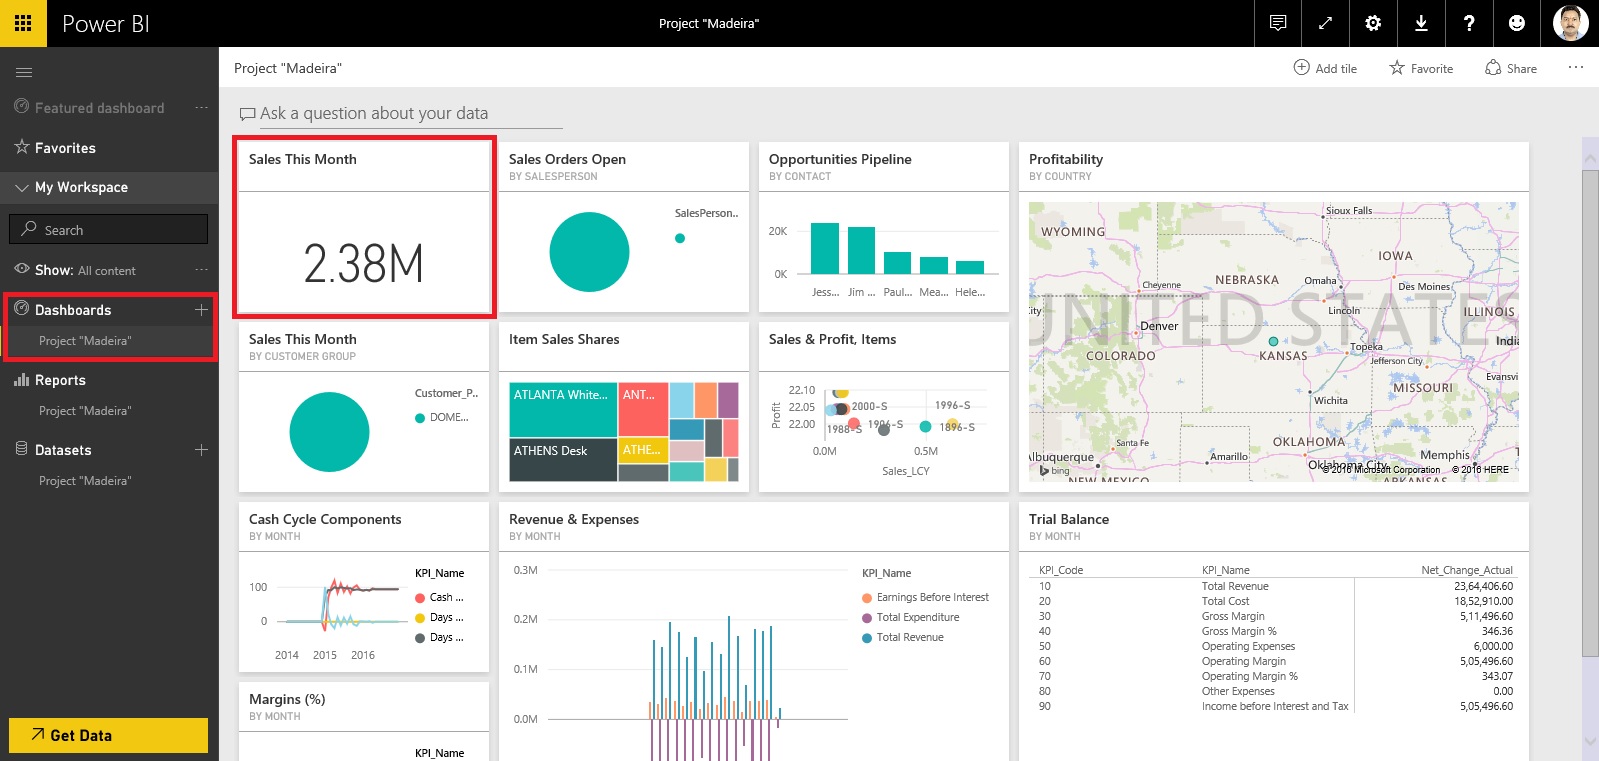
How to Set Data Alerts:
From a dashboard tile, select the ellipses.
Select the bell icon to add one or more alerts.
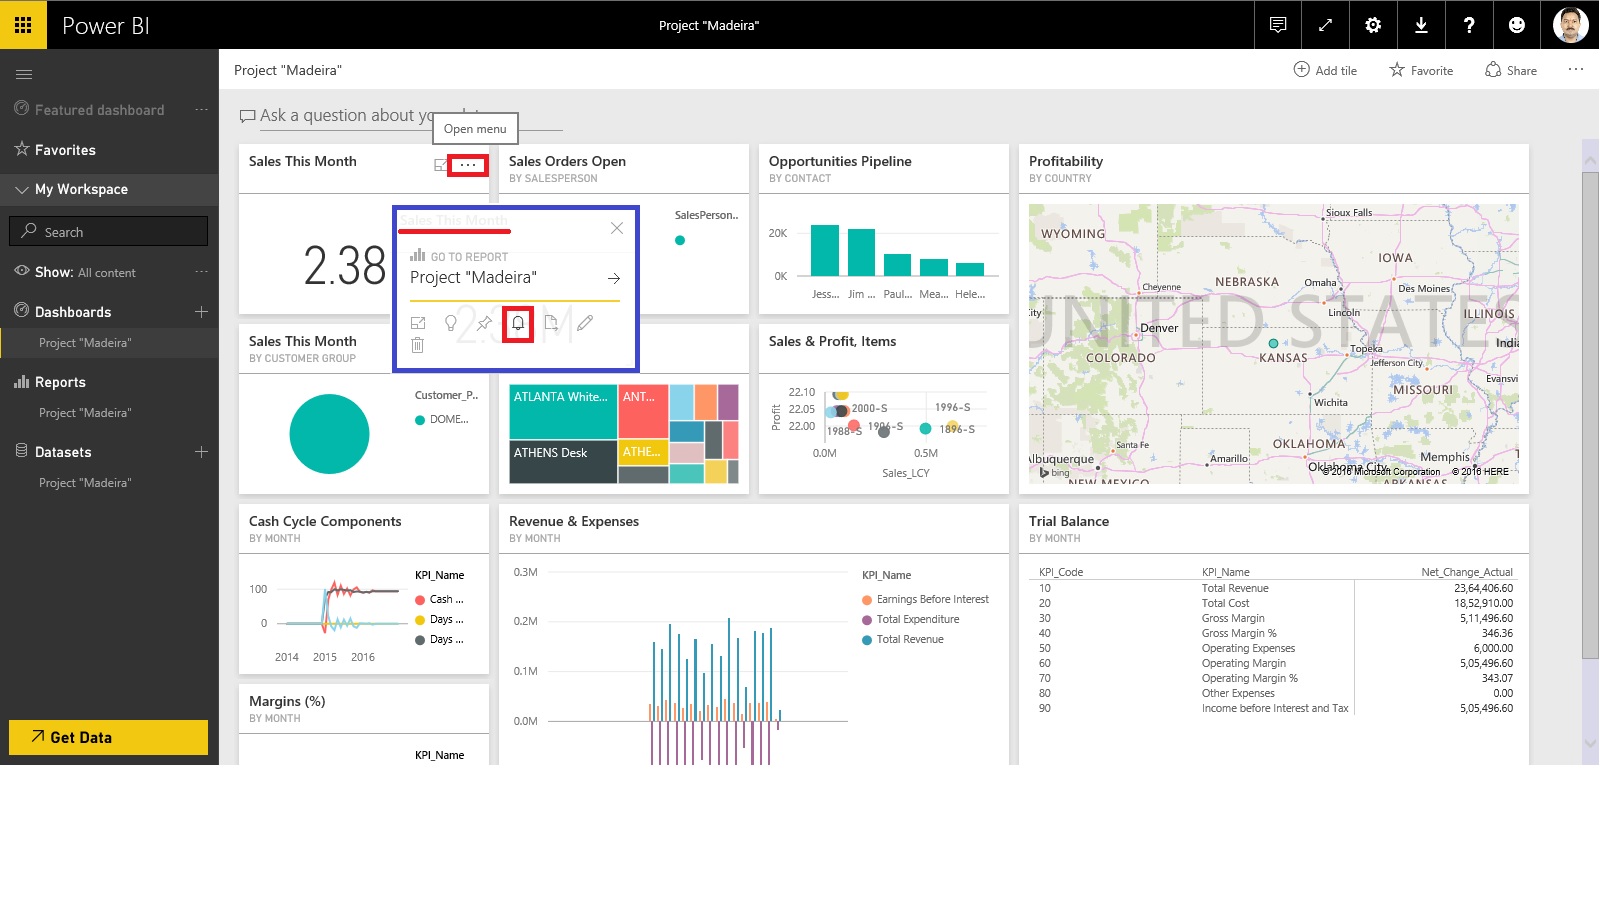
Click on Add Alert Rule.
To start, ensure the Active slider is set to ON, and give your alert a title.
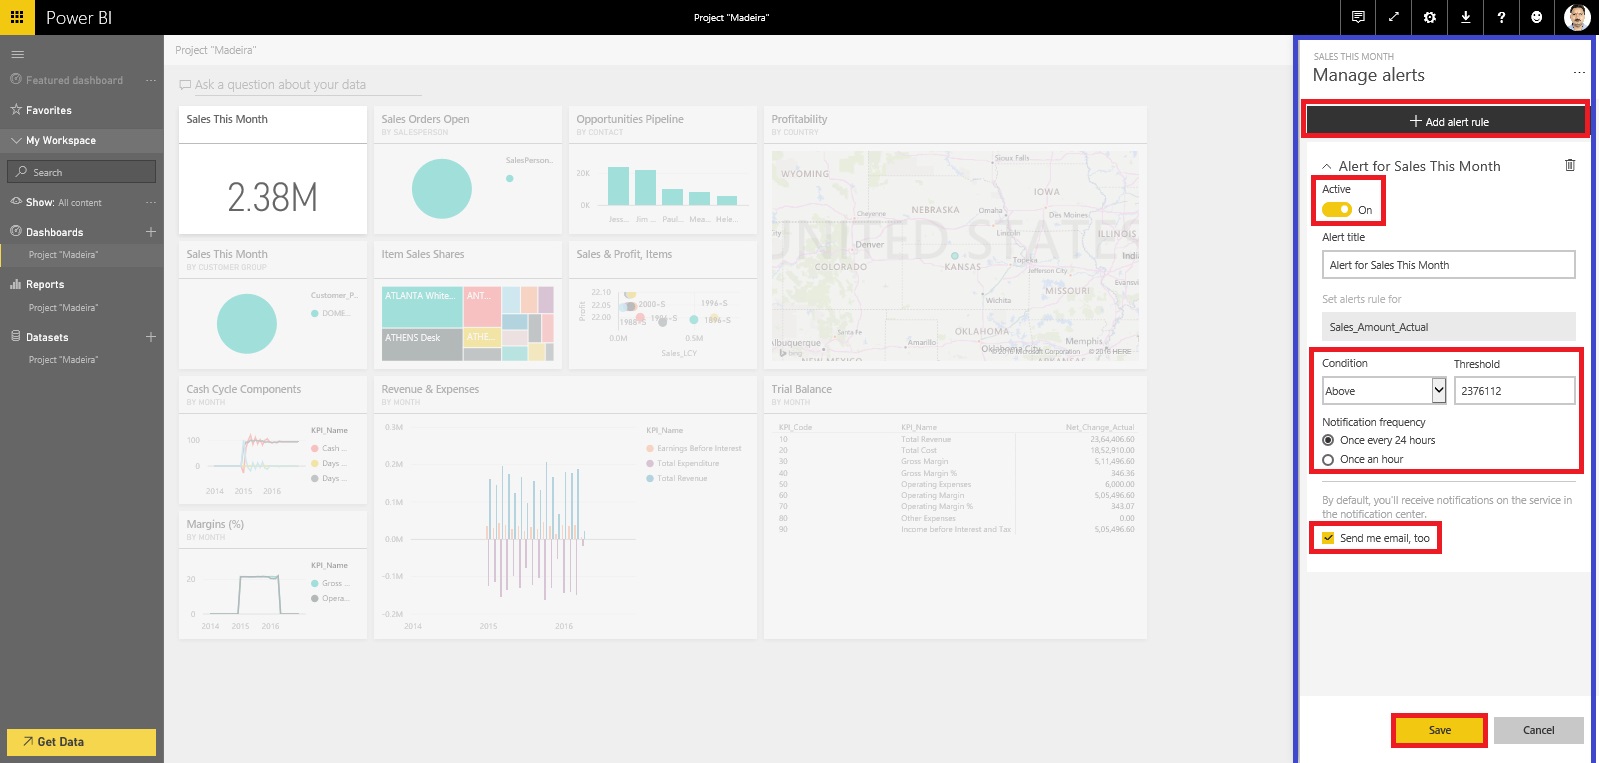
Set your Condition, Threshold, and Notification Frequency also don’t forget to tick on send me mail too.
Click on Save to save your Alert.
Receiving alerts:
When the data being tracked reaches one of the thresholds you've set, several things will happen.
Power BI checks to see if time have lapsed or more than depending on the option you selected since the last alert was sent.
As long as the data is past the threshold, you'll get an alert every hour or every 24 hours depending on option you selected.
If you've set the alert to send you an email, you'll find something like as shown in below screen, this in your Inbox.
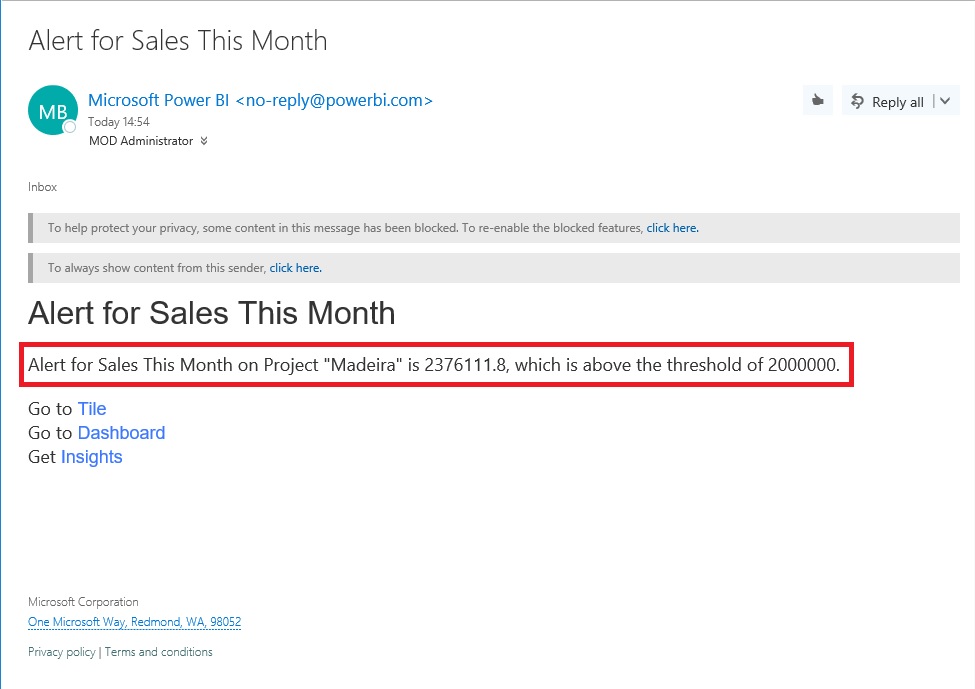
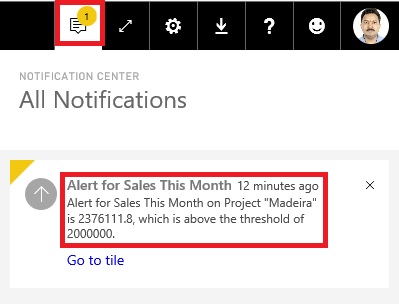
Power BI will add a message to your Notification center and adds a new alert icon to the applicable tile as shown in below screen.
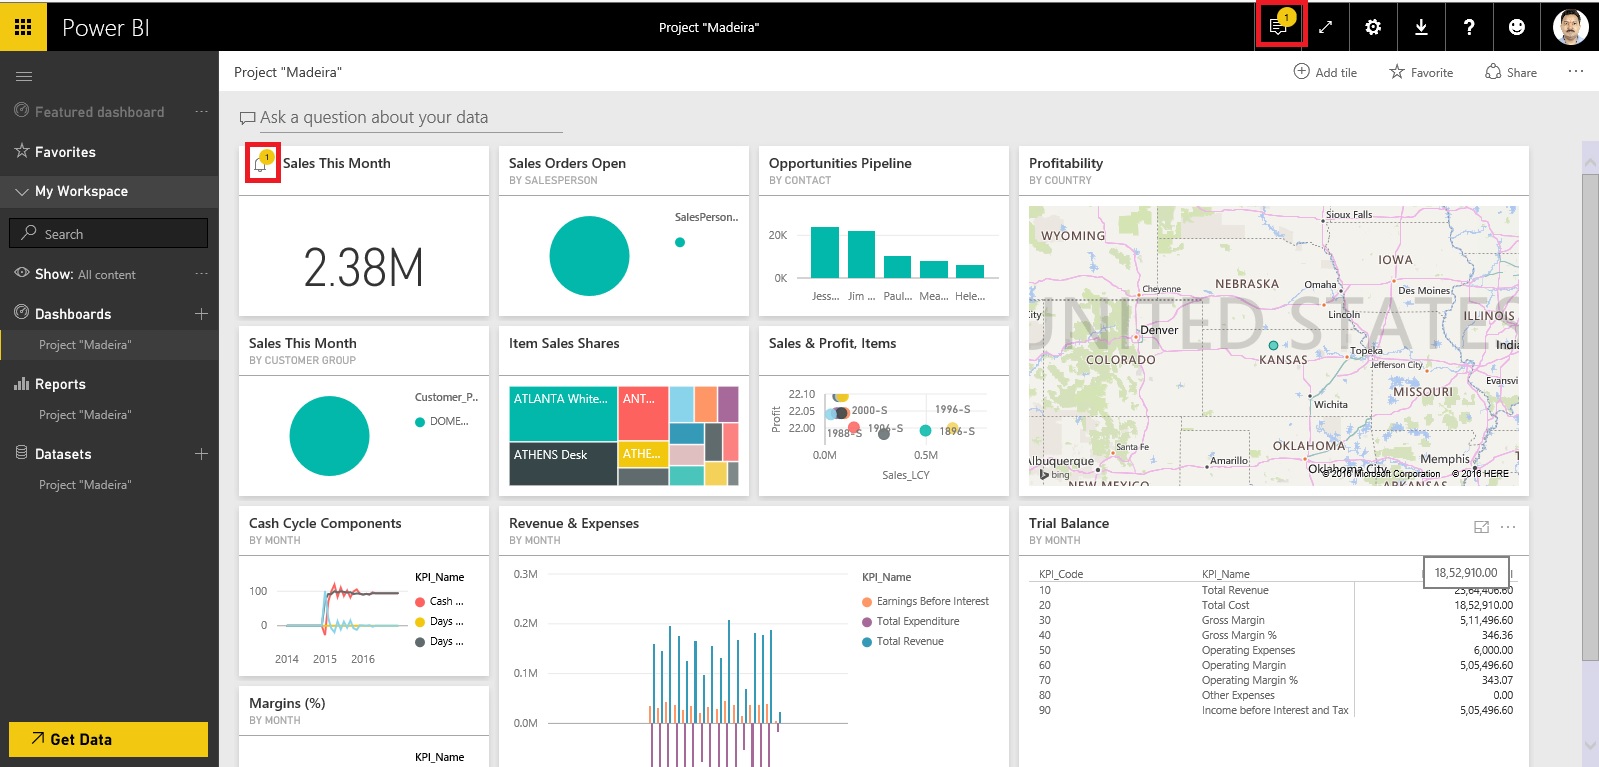
Access to your Notification.
Manage alerts:
There are three ways to manage your alerts:
From the dashboard tile
From the Power BI Settings menu
On an individual tile in the Mobile App
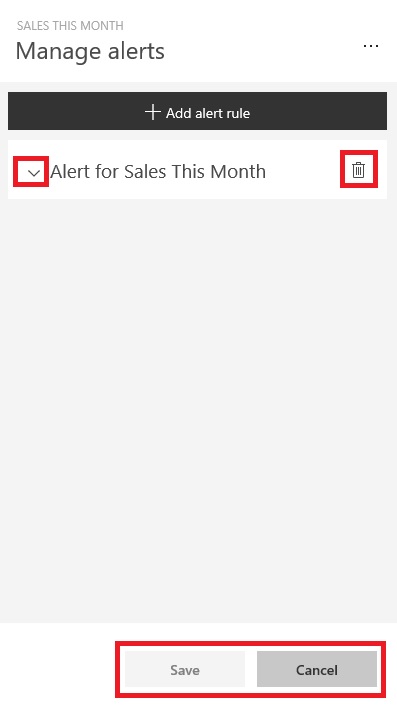
As we have seen above how to create Alerts follow same steps to access Alert Window.
At the Left click on Expand make Necessary Modifications and save.
At the right select the trashcan to delete the Alert.
Select cancel to return to previous window.
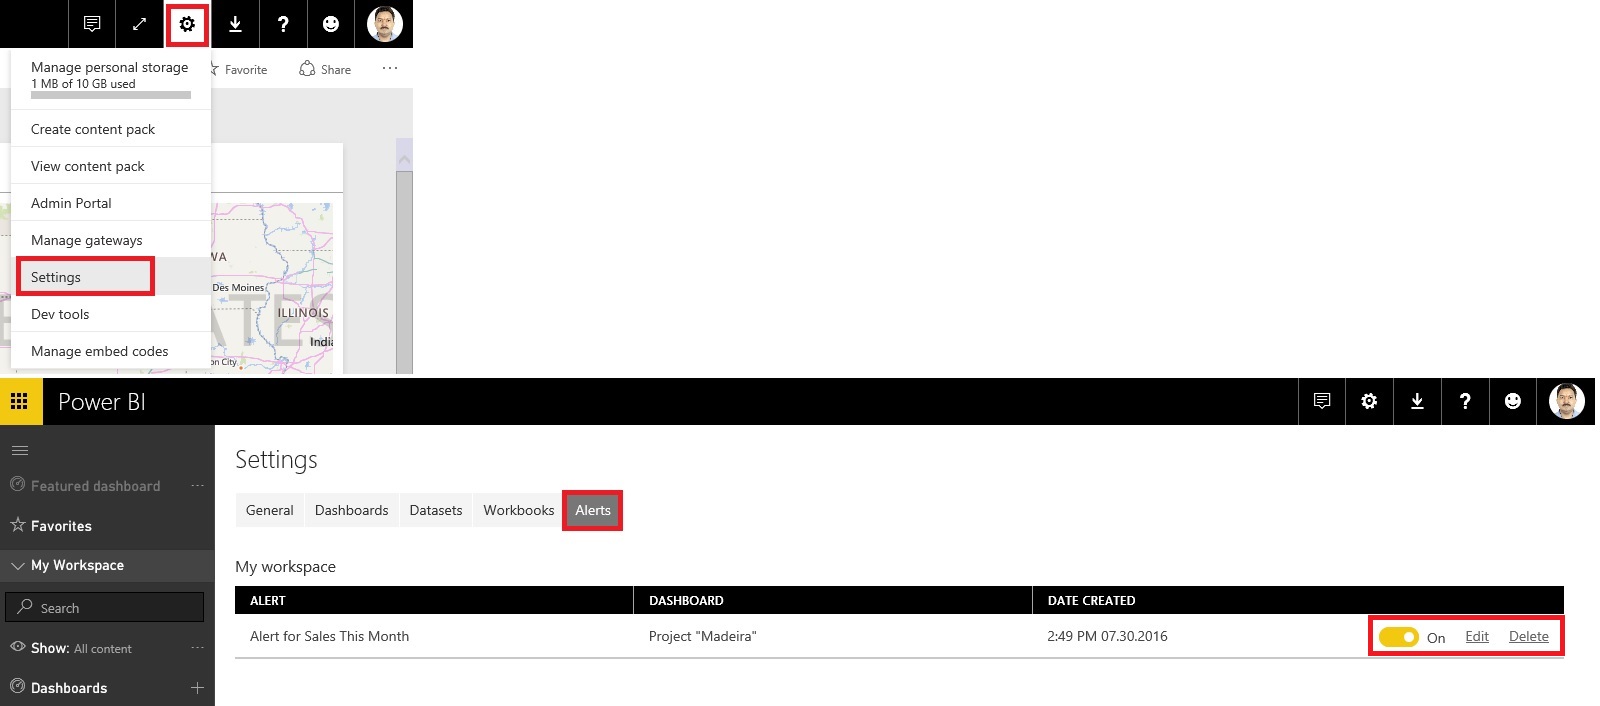
From here you can turn alerts on and off, open the Manage alerts window to make changes, or delete the alert.
That’s all for today.
I will come up with more details in my upcoming posts.
Till then keep exploring and learning.
No comments:
Post a Comment