Its valid question same came to my mind also when i heard about new Release.
Then i tried to explore a bit about it and got an information about some exciting features introduced with it. I will discuss as i progress with my evaluation and exploration with these features.
Here i am giving bit overview about some features and limit to Installation topic in this post. If you wish to know more you will have to wait for my next few upcomming posts.
As per Jet Report Sources:
Jet Professional 2017 makes sharing your reports easier than ever before!
Reporting with (and without) the Jet add-in for Excel
The Jet Web Portal is an online interface that provides an easy-to-manage repository for your organization’s reports.
Using the web interface and Office 365 Online, you can allow any of your network users – whether they have Excel and the Jet add-in installed or not – to view reports directly from their web browser.
Jet Mobile for Jet Enterprise
Jet Professional integrates with the Jet Mobile web client – allowing you to log into one site to see and run all your reports - and to see all of your business intelligence dashboards.
And... Jet Mobile for Jet Enterprise includes many new features - making your dashboards more powerful and even easier to use.
What's New?
Publishing to the Jet Web Portal
The Jet ribbon within Excel includes the ability to publish your reports to the Jet Web Portal. The Jet Web Portal provides a manageable repository for your organization’s reports. All your users – whether they have Excel and Jet Professional installed or not – can run and view reports directly from their web browser.
What is Jet Web Portal
Jet Professional 2017 represents a new way to manage, run and view your business reports. Designed for today’s always-connected, always-moving workforce, Jet Professional 2016 introduces a new Information Management System that allows business users access to their business reports using virtually any device through a simple web interface.
As a user, you don’t need to install anything to run and view reports. Within the Jet Web Portal, you can quickly find the report that you’re after, specify report parameters, run the report to get up-to-the-minute data and view it in Excel Online.
With features like sharing, search, version control and report permissions, Jet Professional 2017 is a complete report management system.
Will comeup with more detailed about new features in my upcomming posts.
Let us move to Installation part.
To get the installation file go to this link : https://www.jetreports.com/support/product-downloads/
After downloading you will get the Jet Professional Installation Files.Zip, extract it.

Befor you start installation make sure no Excel instance is running on your system.
I am doing simple one system Instalation, will come up with more details and other options later.
Double click to Setup file to begin with installation.

If you have Activation code enter it or you can continue and activate later.

Select instalation type as desired, i am installing All Components.

Select the features you want to install, since i am performing complete install, so i am accepting all as suggested by default.

Select the Account to run the service, and don't forget to select Add rules to Windows Firewall. Rest all as default suggested.
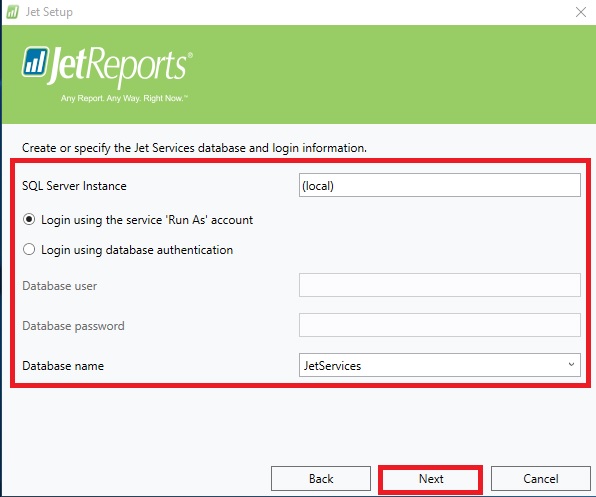
Select the SQL Instance for Jet Service Database and login method.
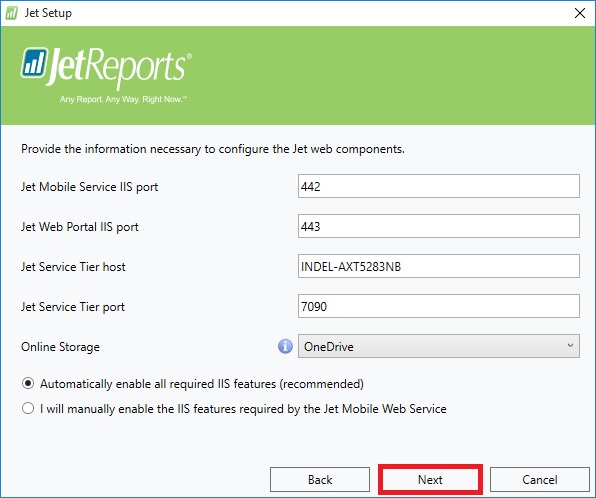
Select desired ports and host detail or accept as suggested as default.

Enter Jet Service Tier details or accept suggested as default.
Now your pre-configuration part is completed. Click on Install to proceed with Jet Components Instalation.
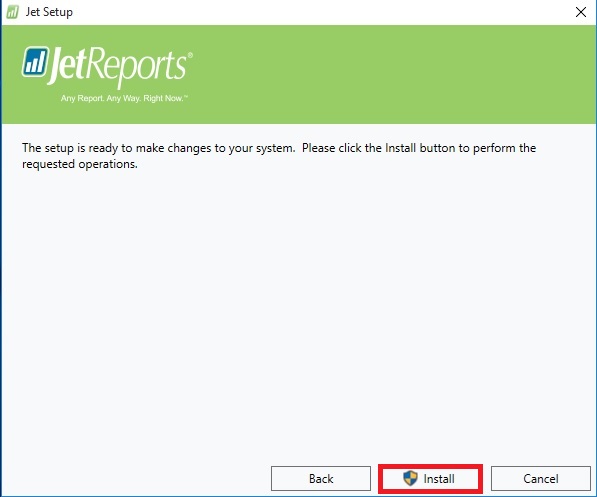
Click on Install to proceed.

Click on Finish to exit Instalation wizard, your Jet is now installed with above provided configuration.

Next Step is to Activate your Jet Professional.
From Jet Tab on Ribbon select Activate Jet Professional.
choose the desired option.
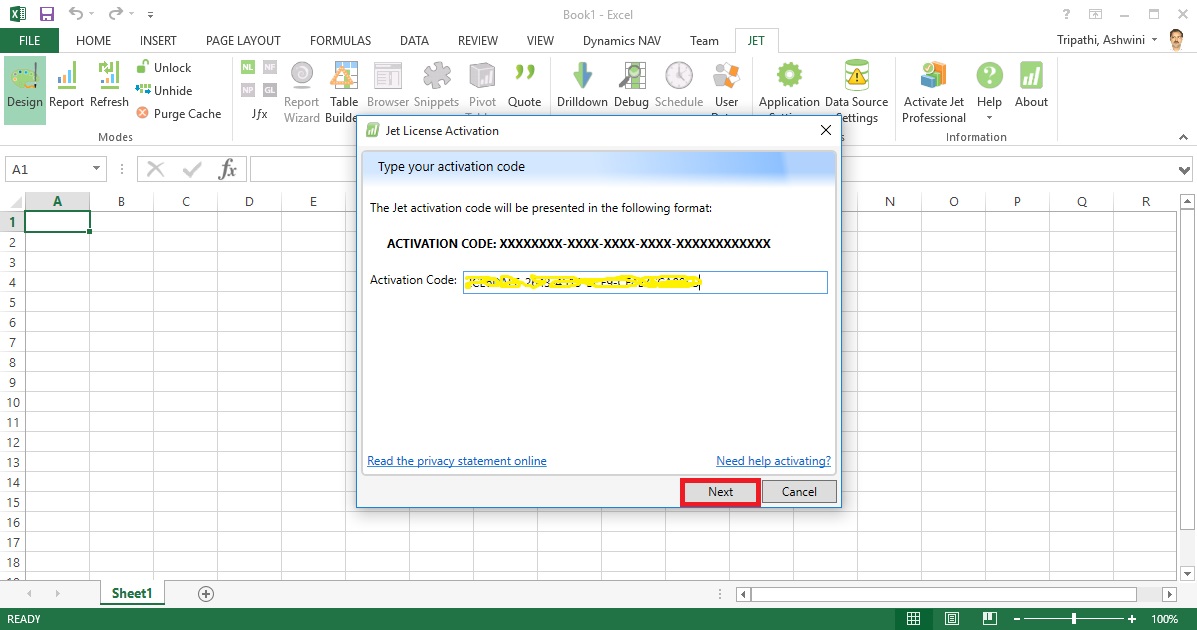
Enter your activation code and click on Next.

Copy the message and send to the mentioned e-mail id and click Next.

Close to exit.
Wait for the Activation Token, it may take upto 24 hours to receive mail with this code.
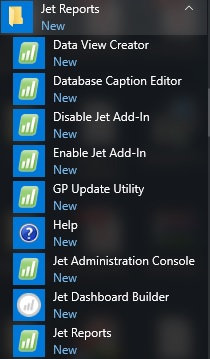
If you check your Start Menu you will find these components got installed.
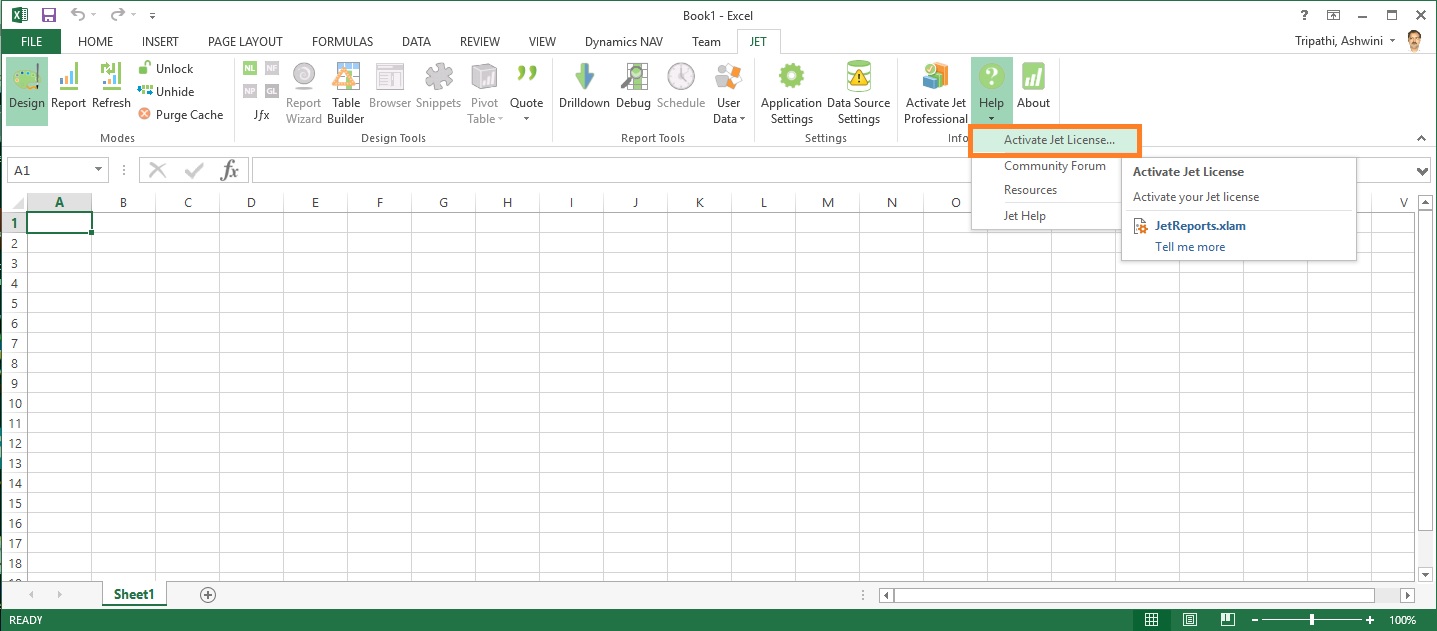
Once you receive your Tocken.
Launch Excel, From Jet Tab, Click on Help from ribbon and select Activate License.
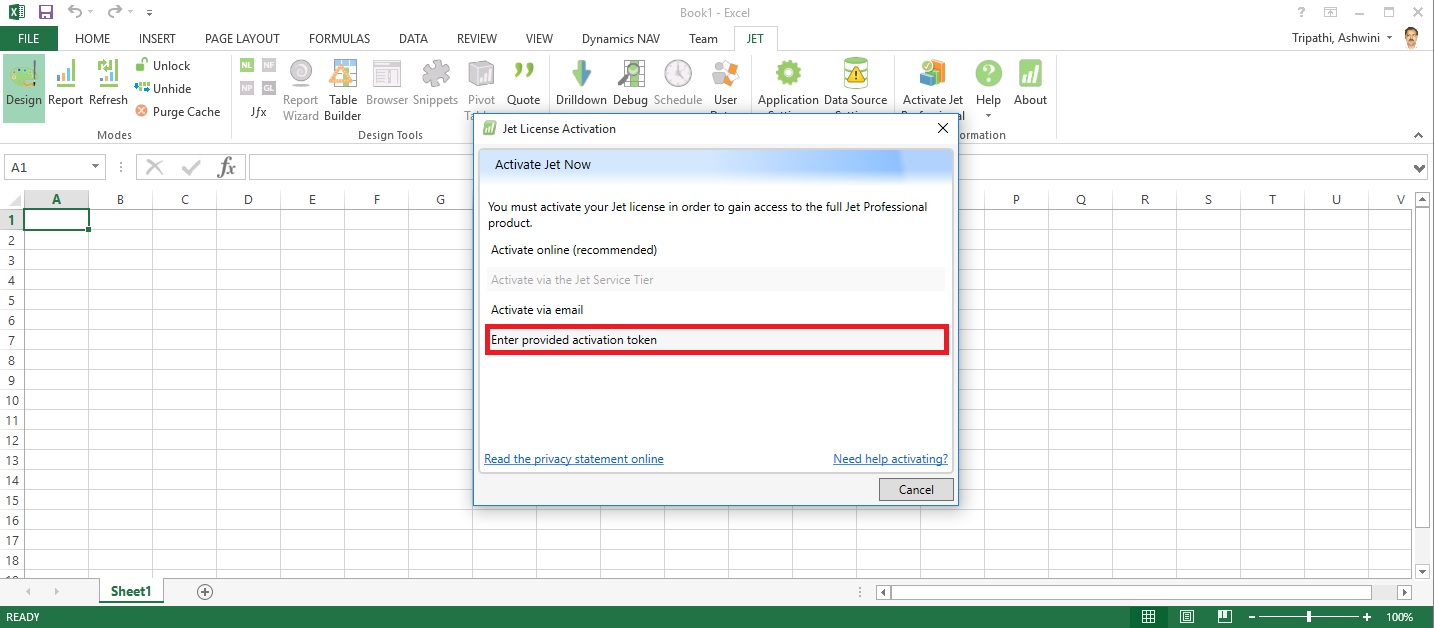
Select Enter provided Activation token.
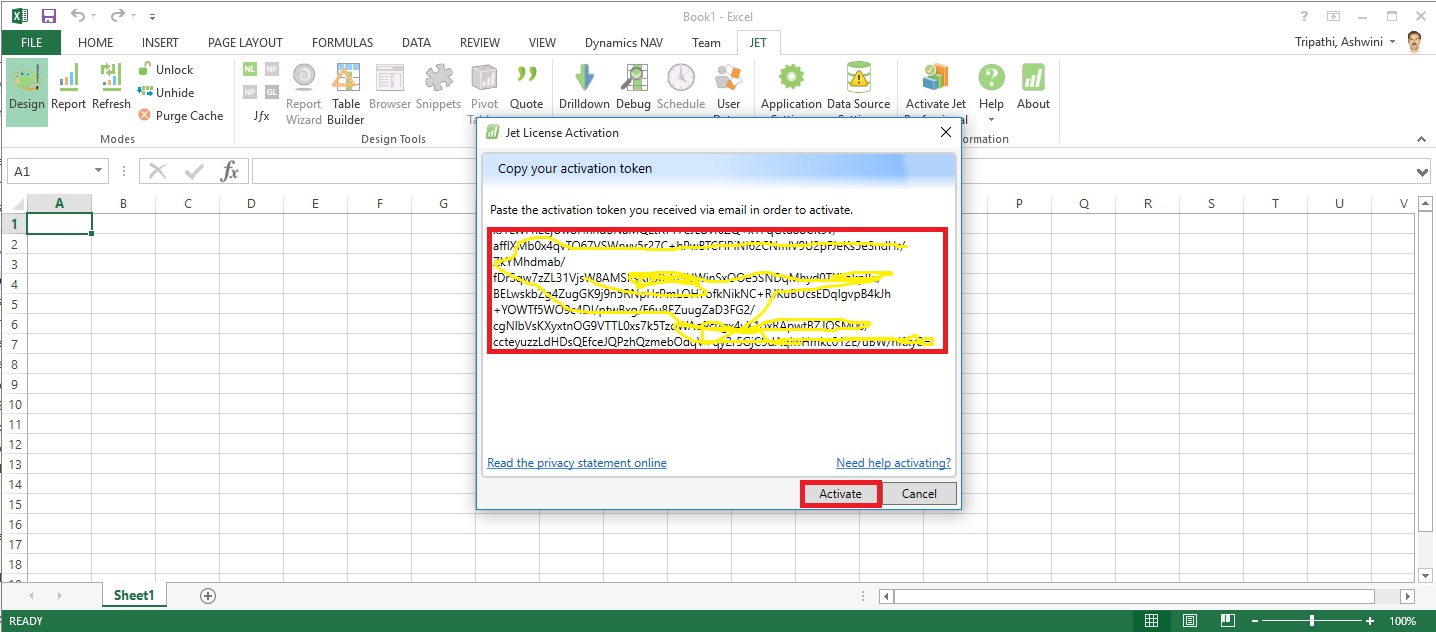
Copy the Token you received via mail here and click on Activate.
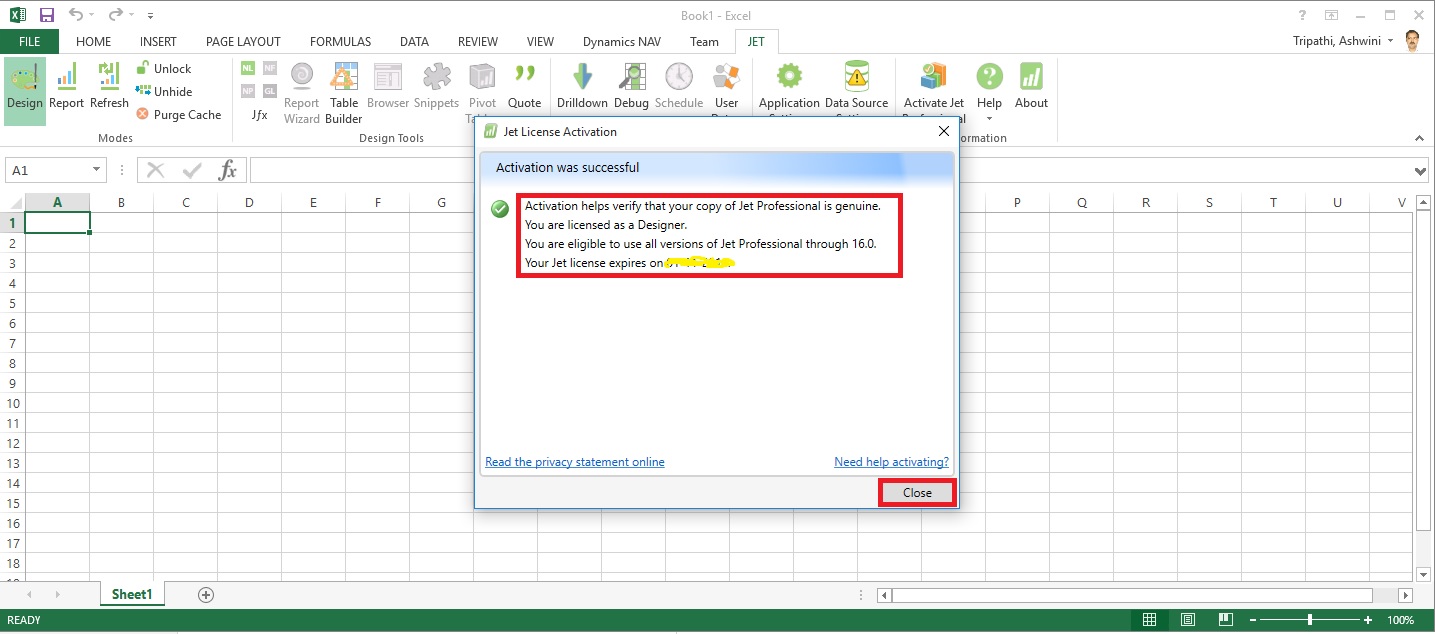
If every thing is fine you will receive the Activation Successful message.
Now you are ready to start with using Jet Professional.
I will come up with more details on this in my upcomming posts till then keep exploring and learning.
This comment has been removed by the author.
ReplyDelete