Showing posts with label Office Integration. Show all posts

Sunday, 31 July 2016

Configuring Single Sign-On using Office 365 on Navision 2016

Today we will see how we can enable Single Sign-On using Office 365 for Navision 2016.

Before we start we should have Virtual Machine ready on Azure with Navision 2016 installed, Certificates and Nav User is configured. Endpoints are open so that web client can be used from outside Virtual Machine on internet.

It should be hosted on Public IP, then only we will be able to configure it.

For details regarding Azure Subscription you can see my earlier post here.

For details regarding Creating Virtual Machines you can see my earlier post here.

You also need Office 365 Subscription ready for use and you can use the AD of same to configure your Single Sign-On.

Let us start with Admin console of office 365. Click on Azure AD this will create Management Console to work with AD.

SingleSignOn-1

Enter your details and click on Next.

SingleSignOn-2

Enter your details and click on Next, Finally Sign Up.

SingleSignOn-3

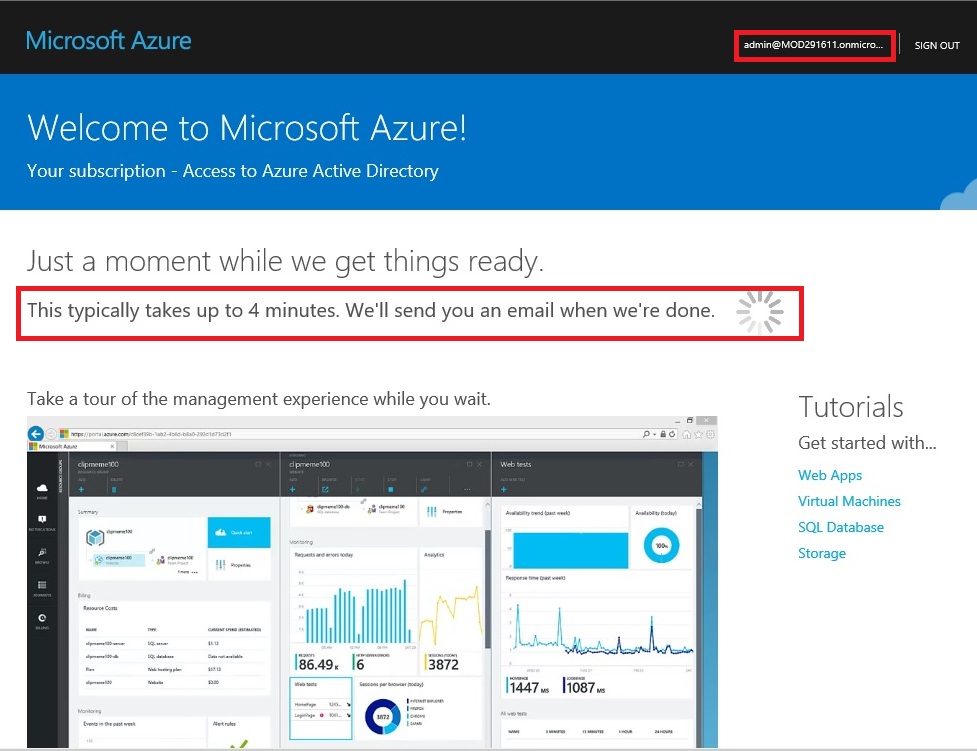
It will take few minutes to configure and make it available for you.
SingleSignOn-4

Once your Subscription is ready click on Start Managing my Service.

SingleSignOn-5

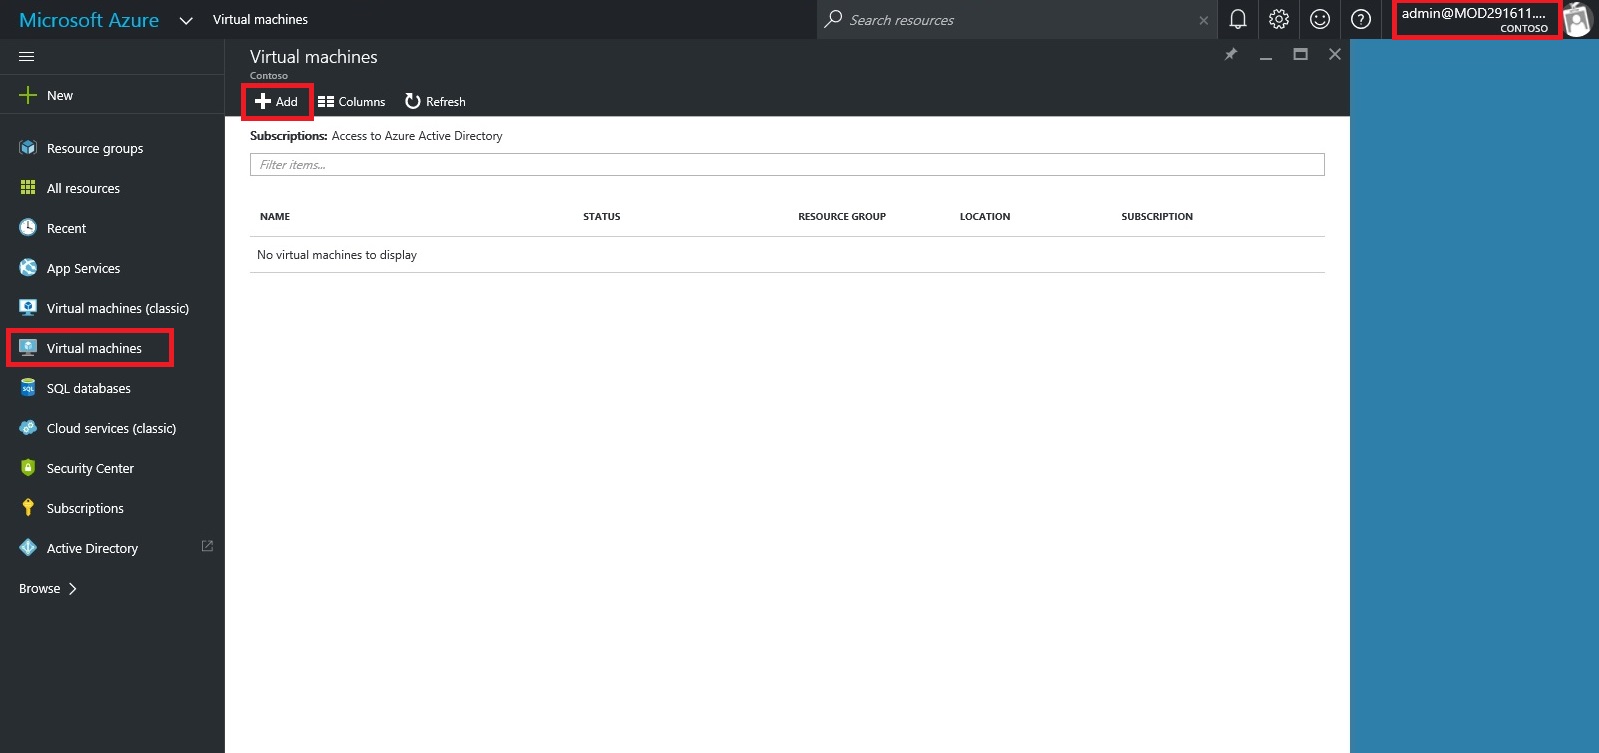
From Management Console click on Virtual Machine, if you dont have already to create one for you.
SingleSignOn-6

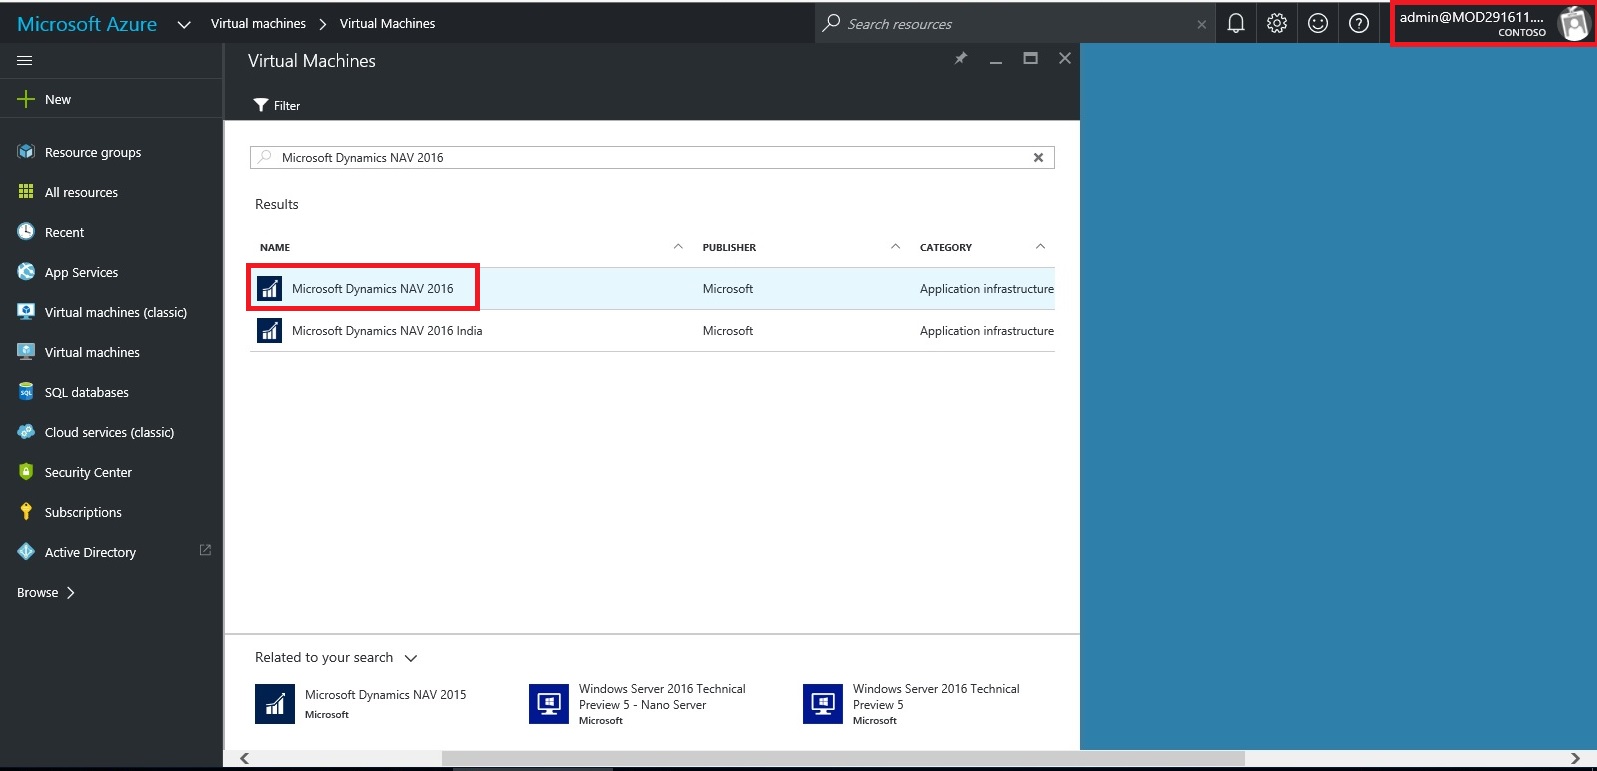
Select the Virtual Machine in Search for Microsoft Dynamics Nav 2016.

SingleSignOn-7

Select the approprite Virtual Machine from the List.
SingleSignOn-8

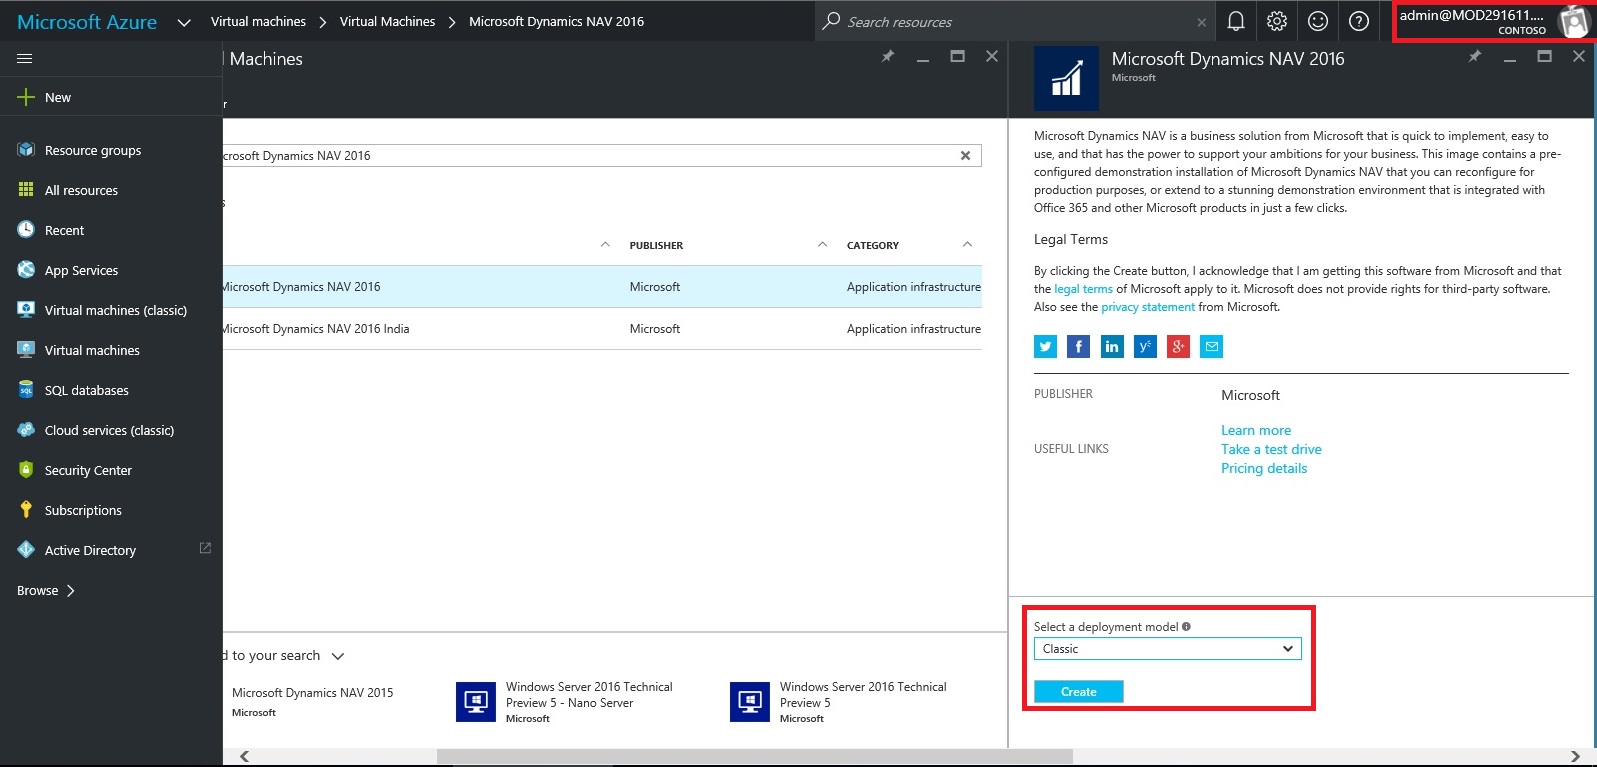
Enter your details and Create. For more details see the link provided on top of the post.
SingleSignOn-9

Let us return to our AD, Click on Applications. This will List all you Apps currently available with your AD or office 365.

SingleSignOn-10

Click on Add to configure your Application.

Give a Name and Select Web Application/or Web API, as we are configuring for Web Client today. Click on Next.

SingleSignOn-11

Enter your Web Client URL and Office portal AD URL.  Click on OK.

SingleSignOn-12

Your New application gets registered with your AD.

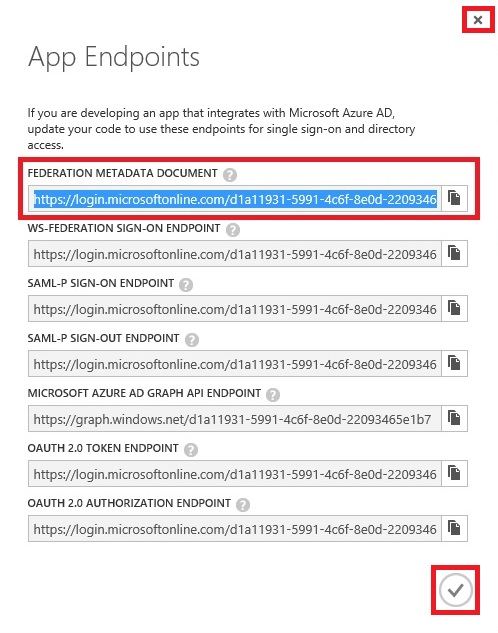
Select the created Application and Click on View Endpoints.

SingleSignOn-13

Copy the Federation MetaData URL and keep it handy at safe place we will require this in our next step. Close the window we are not performing any changes here.
SingleSignOn-14

Open your Navision User Card.In Office 365 Authentication enter your Office portal user email id which you will be using for Single Sign-On.

SingleSignOn-15

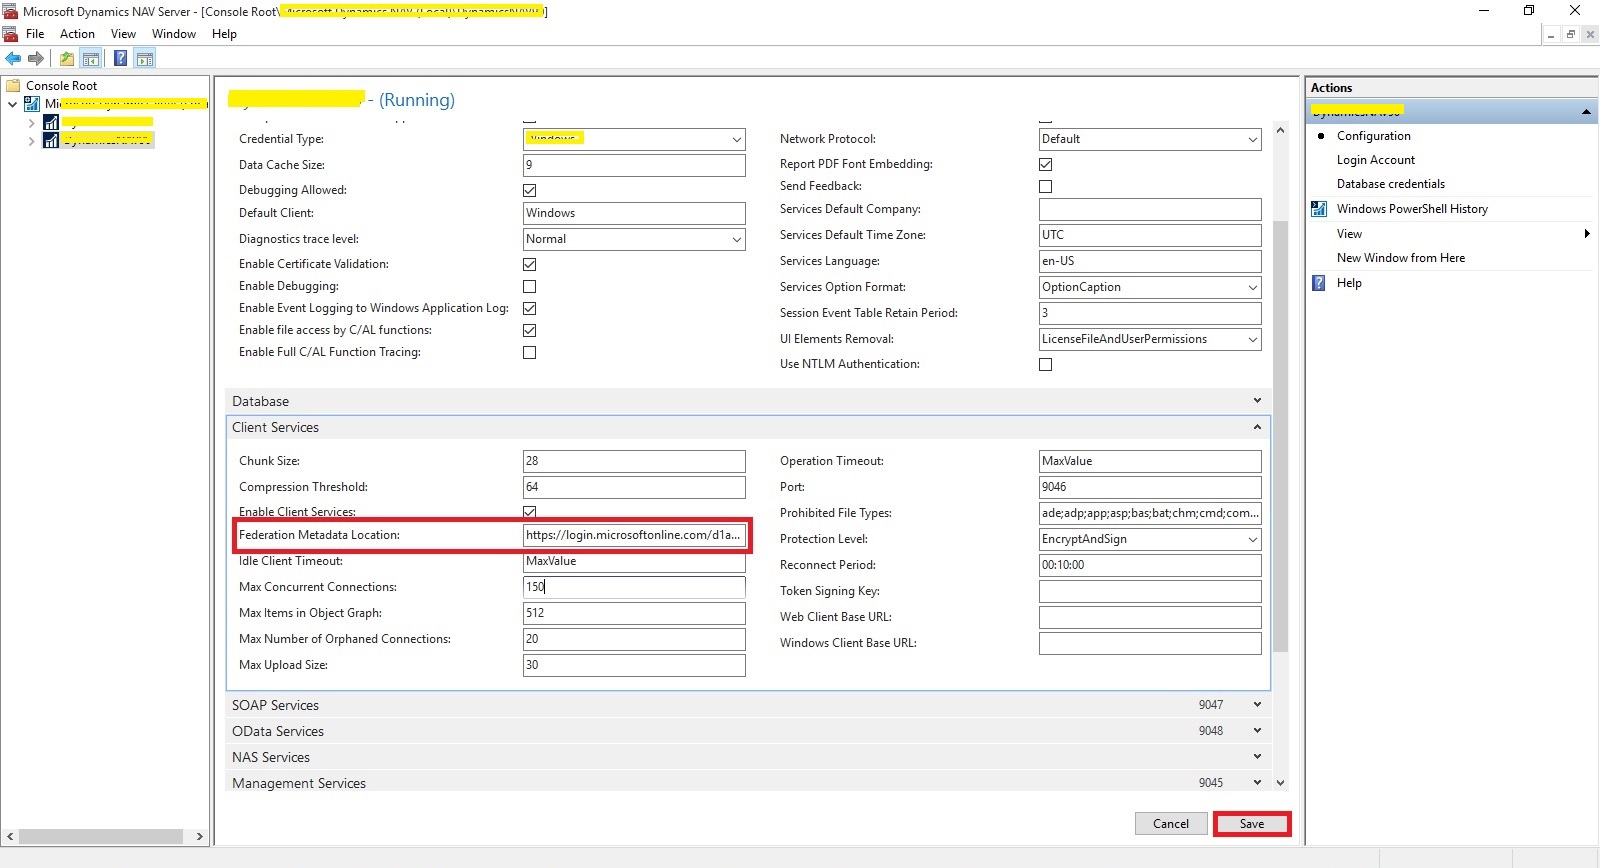
Open your Navision Service Instance configuration and enter Federal MetaData URL which we copied in our previous step.
SingleSignOn-16

Restart you NAV Service.

SingleSignOn-17

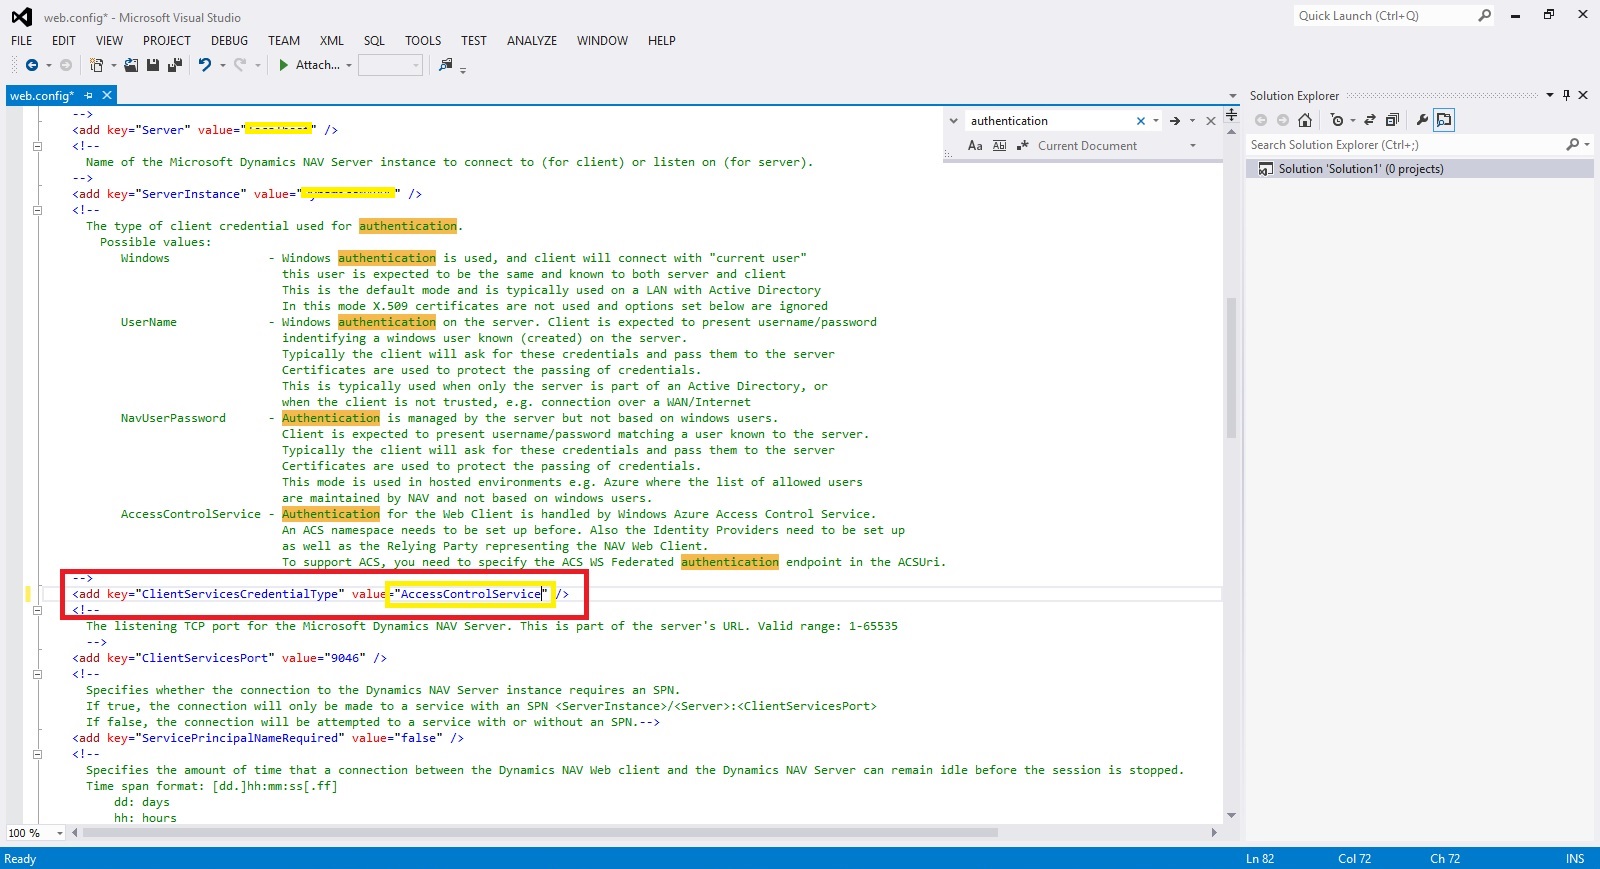
Open the Web Client Folder under your IIS. Edit your Web.config file using prefered Editor.

SingleSignOn-18

Enter you Client Service Credentials as AccessControlService.
SingleSignOn-19

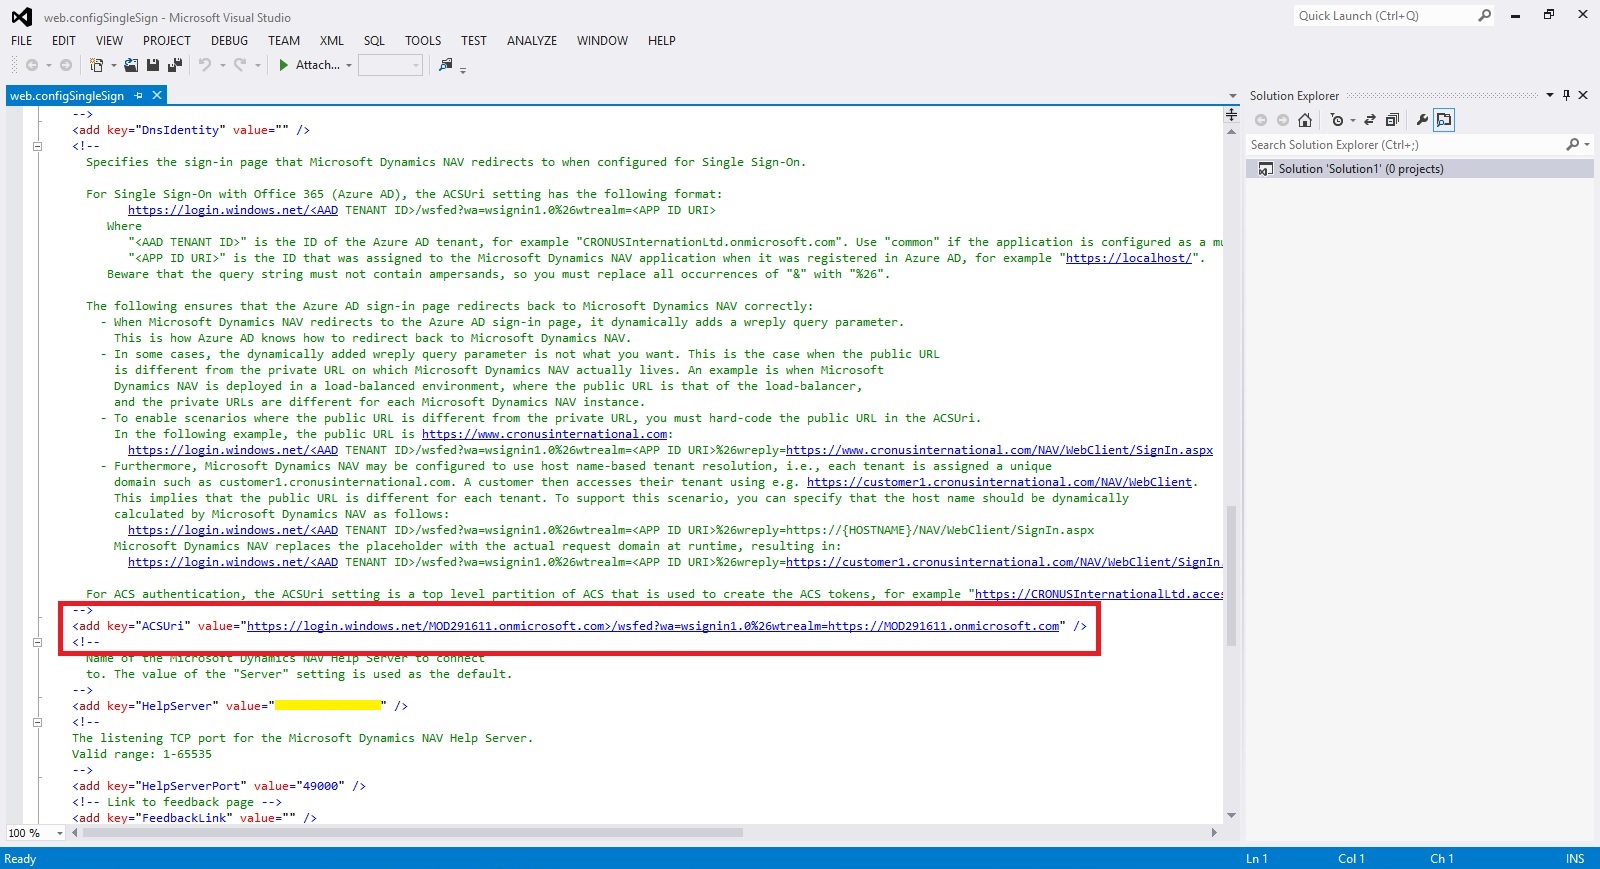
Change value of ACS URI as below. You have full explaination of same in the file itself.
SingleSignOn-20

Thats all, Now you open your web client and you will be redirected to Office 365 Login Page, enter your valid office 365 e-mail user id and password you will be authenticated and Web Client is opened.

Thats all for today, I will come up with moredetails in my upcoming posts.

Till then keep exploring and learning.


Tuesday, 26 July 2016

Jet Professional 2017 - Introduction and Installation

Why to switch to and What's New in Jet Professional 2017?

Its valid question same came to my mind also when i heard about new Release.

Then i tried to explore a bit about it and got an information about some exciting features introduced with it. I will discuss as i progress with my evaluation and exploration with these features.

Here i am giving bit overview about some features and limit to Installation topic in this post. If you wish to know more you will have to wait for my next few upcomming posts.

As per Jet Report Sources:
Jet Professional 2017 makes sharing your reports easier than ever before!  

Reporting with (and without) the Jet add-in for Excel

The Jet Web Portal is an online interface that provides an easy-to-manage repository for your organization’s reports.

Using the web interface and Office 365 Online, you can allow any of your network users – whether they have Excel and the Jet add-in installed or not – to view reports directly from their web browser.

Jet Mobile for Jet Enterprise

Jet Professional integrates with the Jet Mobile web client – allowing you to log into one site to see and run all your reports - and to see all of your business intelligence dashboards.

And... Jet Mobile for Jet Enterprise includes many new features - making your dashboards more powerful and even easier to use.

What's New?

Publishing to the Jet Web Portal


The Jet ribbon within Excel includes the ability to publish your reports to the Jet Web Portal.  The Jet Web Portal provides a manageable repository for your organization’s reports. All your users – whether they have Excel and Jet Professional installed or not – can run and view reports directly from their web browser.


What is Jet Web Portal


Jet Professional 2017 represents a new way to manage, run and view your business reports. Designed for today’s always-connected, always-moving workforce, Jet Professional 2016 introduces a new Information Management System that allows business users access to their business reports using virtually any device through a simple web interface.


As a user, you don’t need to install anything to run and view reports. Within the Jet Web Portal, you can quickly find the report that you’re after, specify report parameters, run the report to get up-to-the-minute data and view it in Excel Online.


With features like sharing, search, version control and report permissions, Jet Professional 2017 is a complete report management system.


Will comeup with more detailed about new features in my upcomming posts.

Let us move to Installation part.

To get the installation file go to this link : https://www.jetreports.com/support/product-downloads/

After downloading you will get the Jet Professional Installation Files.Zip, extract it.

Install-1

Befor you start installation make sure no Excel instance is running on your system.

I am doing simple one system Instalation, will come up with more details and other options later.

Double click to Setup file to begin with installation.

Install-2

If you have Activation code enter it or you can continue and activate later.

Install-3

Select instalation type as desired, i am installing All Components.

Install-4

Select the features you want to install, since i am performing complete install, so i am accepting all as suggested by default.

Install-5

Select the Account to run the service, and don't forget to select Add rules to Windows Firewall. Rest all as default suggested.

Install-6

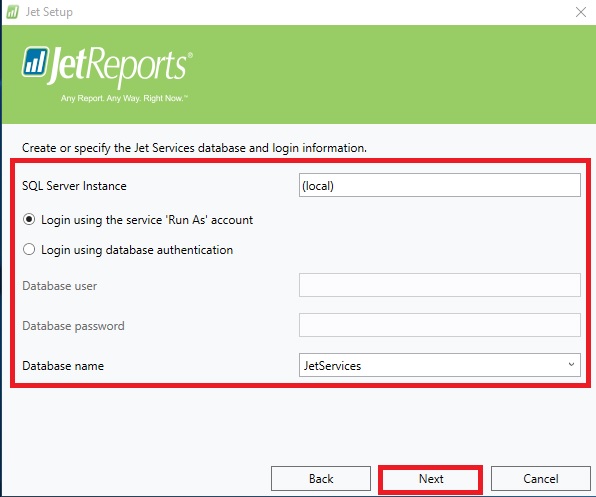
Select the SQL Instance for Jet Service Database and login method.

Install-7

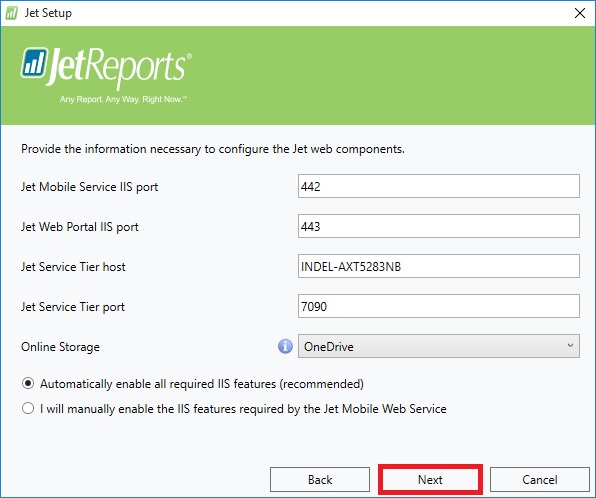
Select desired ports and host detail or accept as suggested as default.

Install-8

Enter Jet Service Tier details or accept suggested as default.

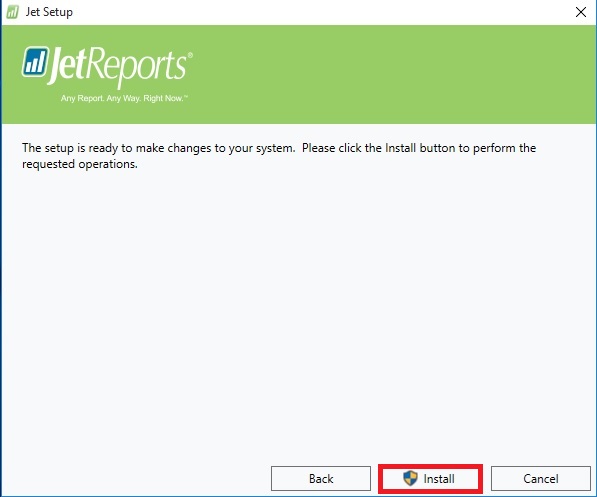
Now your pre-configuration part is completed. Click on Install to proceed with Jet Components Instalation.

Install-10

Click on Install to proceed.

Install-11

Click on Finish to exit Instalation wizard, your Jet is now installed with above provided configuration.

Install-12

Next Step is to Activate your Jet Professional.

From Jet Tab on Ribbon select Activate Jet Professional.

choose the desired option.

Install-13

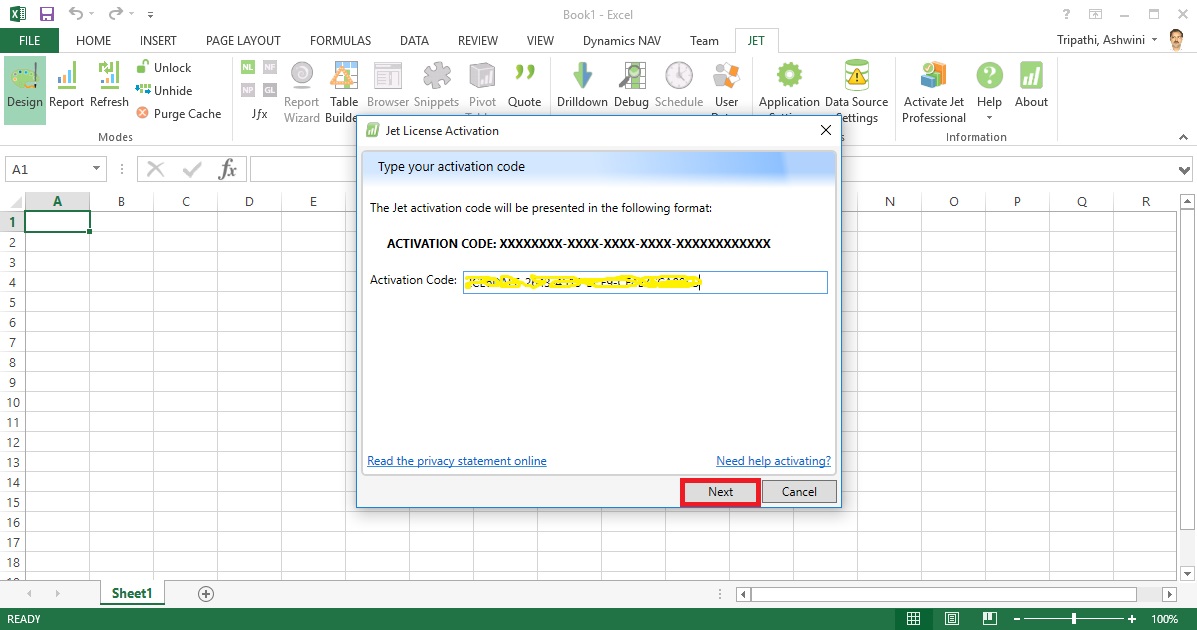
Enter your activation code and click on Next.

Install-14

Copy the message and send to the mentioned e-mail id and click Next.

Install-15

Close to exit.

Wait for the Activation Token, it may take upto 24 hours to receive mail with this code.

Install-16

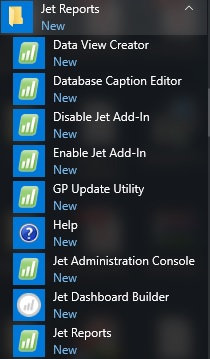
If you check your Start Menu you will find these components got installed.

Install-17

Once you receive your Tocken.

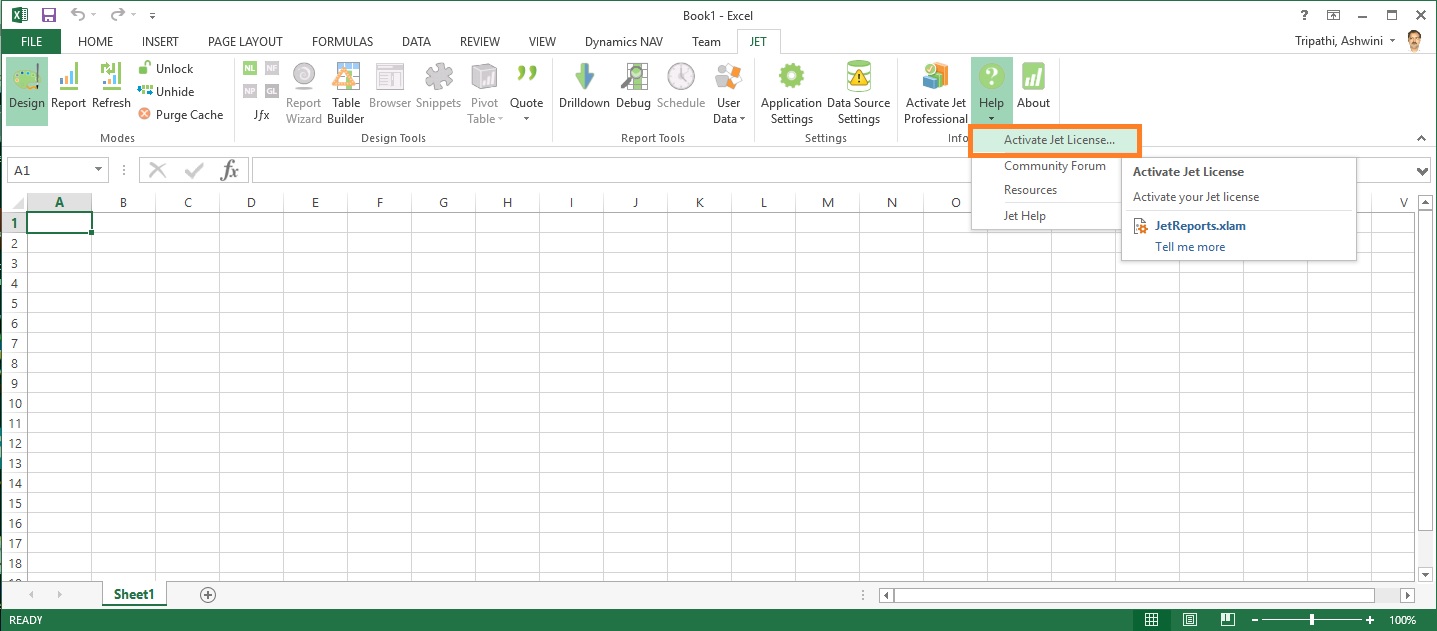
Launch Excel, From Jet Tab, Click on Help from ribbon and select Activate License.

Install-18

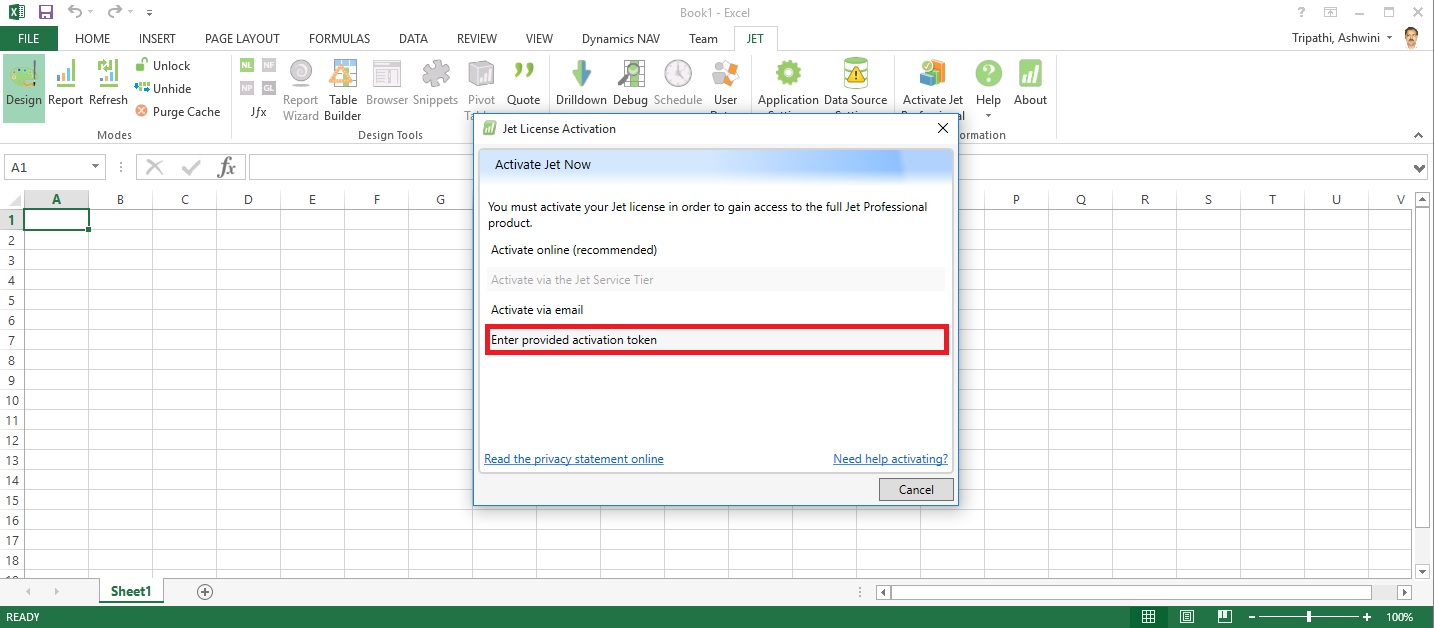
Select Enter provided Activation token.

Install-19

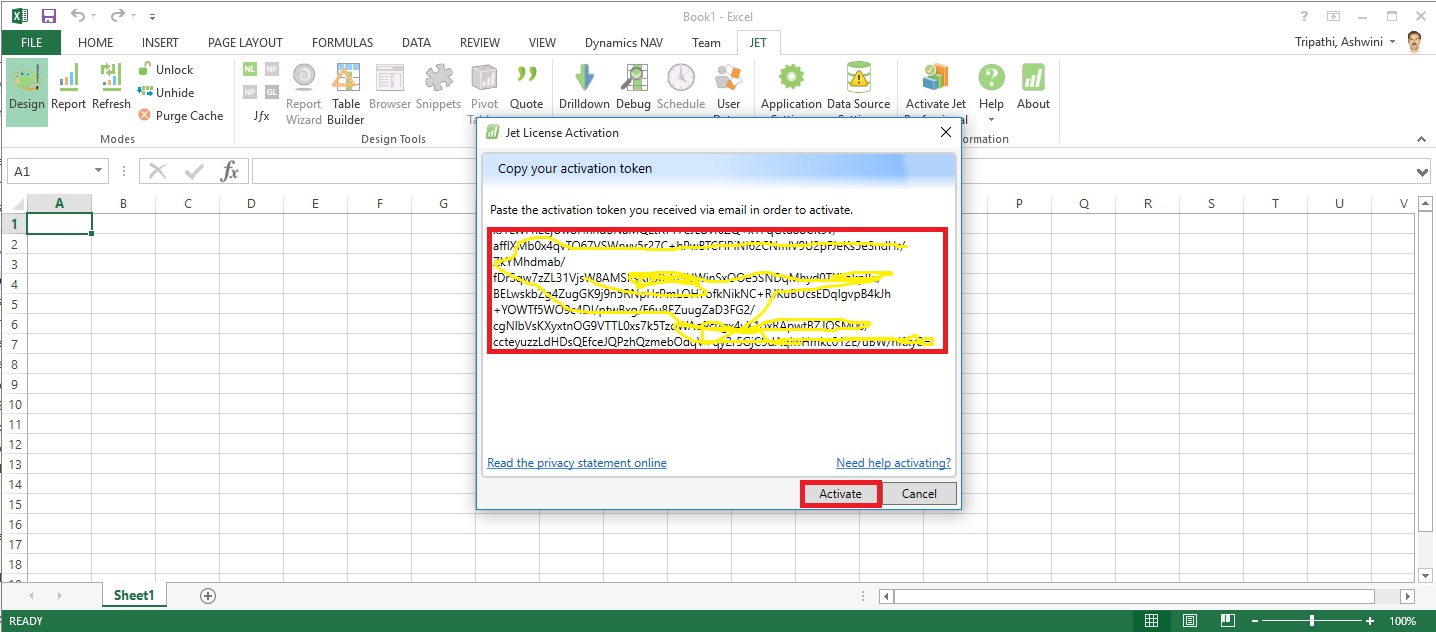
Copy the Token you received via mail here and click on Activate.

Install-20

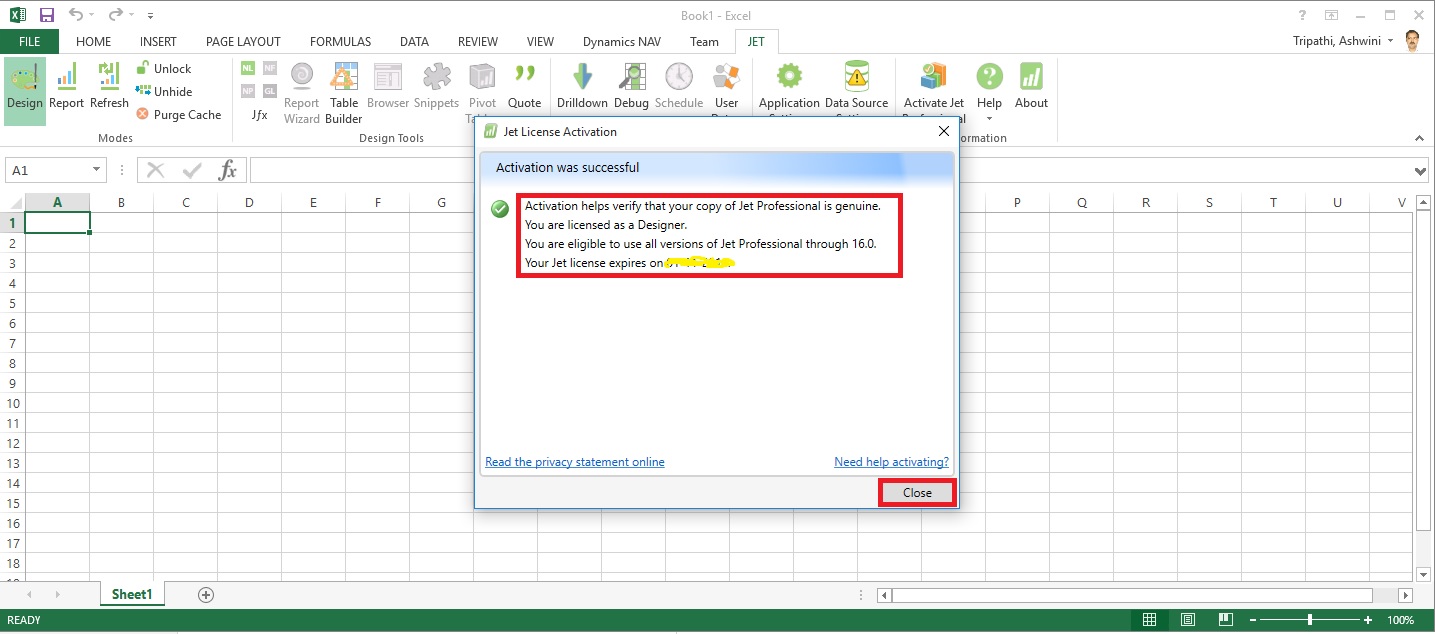
If every thing is fine you will receive the Activation Successful message.

Now you are ready to start with using Jet Professional.

I will come up with more details on this in my upcomming posts till then keep exploring and learning.


Working with Project "Madeira" Content Pack for Power BI

In today's post we will see how to use Power BI Content Pack for Madeira.

The content pack is preconfigured to work with sales data and financial data from the demonstration company that you get when you sign up for the Project "Madeira" preview.

To see your Project "Madeira" data in Power BI, you must have the following:

  • Access to Project "Madeira".

  • Access to Power BI.


Before we start with connecting we will collect few information that we will require while connecting the Power BI to fetch data from Madeira.
User Name

Web Service Acess Key

Note down both value, if you don't have Web Service Access Key Generate one and set appropriate Expiration date or Set Never Expire as shown below.

PowerBi_Madeira-1

Next open the Web Service Page.

Make sure all selected Web Service is running as in below screen.

The data is extracted from your Project "Madeira" company using web services to read live data. In Project "Madeira", the Web Services window lists the web services that have been set up for you, including the following that are consumed by the content pack in Power BI:

  • ItemSalesAndProfit

  • ItemSalesByCustomer

  • powerbifinance

  • SalesDashboard

  • SalesOpportunities

  • SalesOrdersBySalesPerson

  • TopCustomerOverview


Note: If you change the name of any of these web services, the data will not show up in Power BI.

Note your URL of OData. Edit it to follow the format one shown in below screen.

PowerBi_Madeira-2

Now we have all our required information.

Open Power BI site and Get Data from Services as shown in below screen.

PowerBi_Madeira-3

Select Project "Madeira" Content Pack and click on Get.

PowerBi_Madeira-4

Enter the URL of Web Service we get in above step.

PowerBi_Madeira-5

Select Next.

Select Authentication method as Basic.

In User Name enter your user name as obtained in above step.

For Password ented the Web Service Access Key as obtained in above step.

PowerBi_Madeira-6

Choose Sign In.

After few minutes/seconds churning you will be ready with your first Dashboard from Madeira.

PowerBi_Madeira-7

Troubleshooting


"Parameter validation failed, please make sure all parameters are valid"
If you see this error after you enter your Project “Madeira” URL, make sure the following requirements are satisfied:

  • The URL follows exactly this pattern:

    https://mod291611.projectmadeira.com:7048/MS/OData/Company('CRONUS%20US')

  • Delete any text after the company name in parenthesis

  • Make sure there are no trailing forward slash at the end of the URL.

  • Make sure that it is a secure connection as indicated by the URL starting with https.


"Login failed"
If you get a "login failed" error when you log in to the dashboard, using your Project “Madeira” credentials, then this can be caused by one of the following issues:

  • The account you are using does not have permissions to read the Project “Madeira” data from your account.

    Verify your user account in Project "Madeira", and make sure that you have used the right web service access key as the password, and then try again.

  • The Project "Madeira" instance that you are trying to connect to does not have a valid SSL certificate. In this case you'll see a more detailed error message ("unable to establish trusted SSL relationship").

    Note: Self-signed certificates are not supported.


"Oops"
If you see an "Oops" error dialog after you pass the authentication dialog, this is most frequently caused by a problem connecting to the data for the content pack.

  • Verify that the URL follows the pattern that was specified earlier:

    https://mod291611.projectmadeira.com:7048/MS/OData/Company('CRONUS%20US')

  • A common mistake is to specify the full URL for a specific web service:

    https://mod291611.projectmadeira.com:7048/MS/OData/Company('CRONUS%20US')/powerbifinance

  • Or you might have forgotten to specify the company name:

    https://mod291611.projectmadeira.com:7048/MS/OData/


Thats all for today's post.

I will comeup with more details in my upcomming posts.

Til then keep exploring and learning.


Monday, 11 July 2016

Project "Madeira" preview in Canada Released

Project “Madeira” is a completely reinvented business management solution for small and midsize businesses. Project “Madeira” connects business processes with the productivity tools in Office 365 to help SMBs grow sales, manage finances and streamline operations. Project “Madeira” is public cloud service (Software as a Service) running on Microsoft Azure. Customers can access the service on the Web, or using apps for Windows, iOS or Android devices. 

The service is scheduled to become generallyavailable in the US and Canada in the second half of 2016, with other countries to follow. Project “Madeira” will be released as part ofMicrosoft Dynamics 365. The service is in public preview over the next several months as we collect feedback and fine-tune the user experience.


For full details see below post :-

https://madeira.microsoft.com/en-us/blog/madeira-preview-canada/

Saturday, 30 April 2016

Assisted Setup (Office Add-Ins) in Madeira

In this post we will discuss about how to setup Office Add-Ins.

Select Assisted Setup & Tasks from the ribbon of Action Tab.

SetupOfficeAddIn-1

Select Setup Office Add-Ins from the list.

SetupOfficeAddIn-2

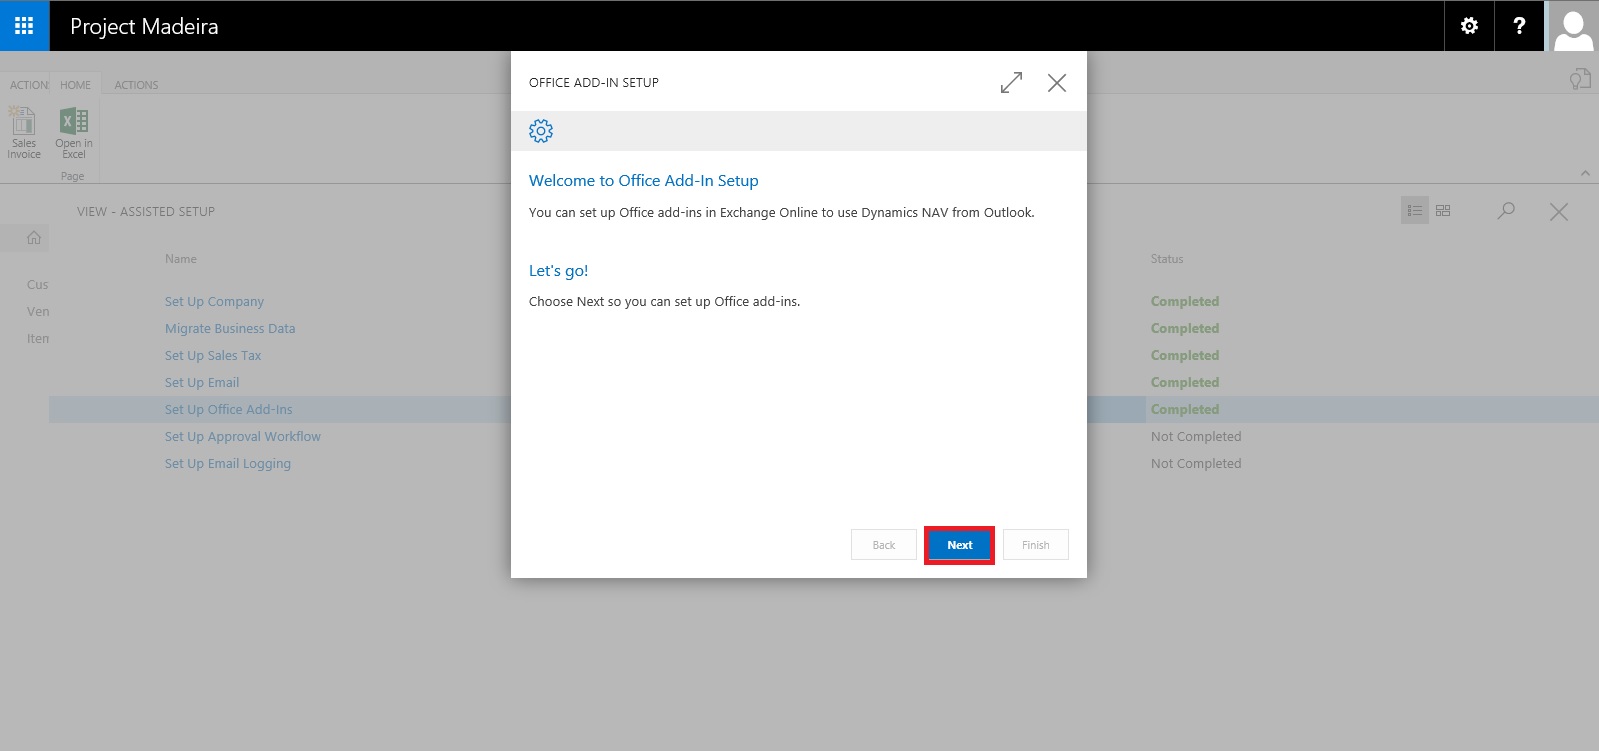
Click on Next Button on Welcome Screen.

SetupOfficeAddIn-3

Select Setup for (Organization or you only) and click on Next Button.

SetupOfficeAddIn-4

Enter your E-mail id and Password, click on Next to continue with next step.

SetupOfficeAddIn-5

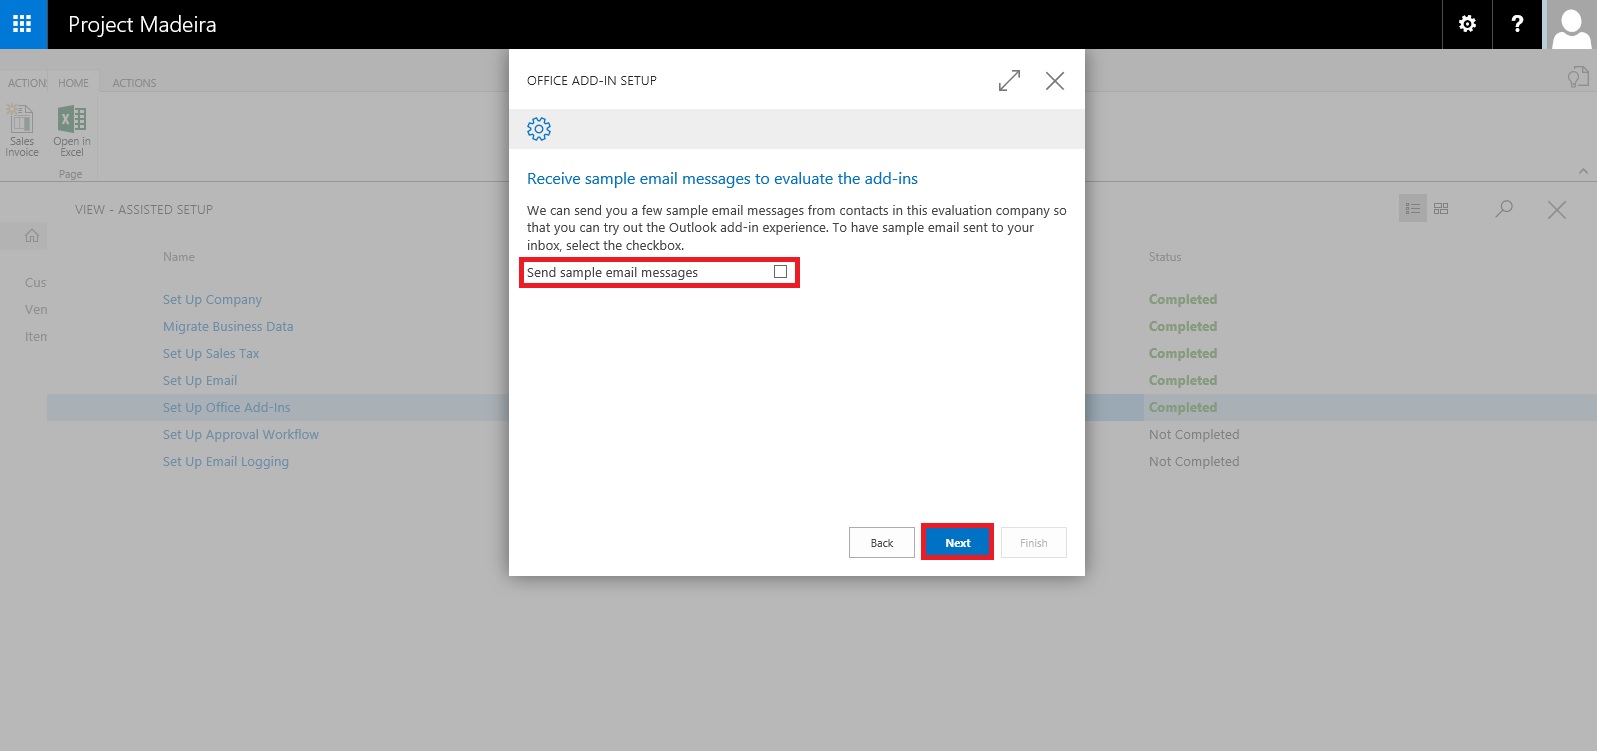
If you wish to receive few sample mails in your Mail box click on the check box or leave it blank, click on Next Button.

SetupOfficeAddIn-6

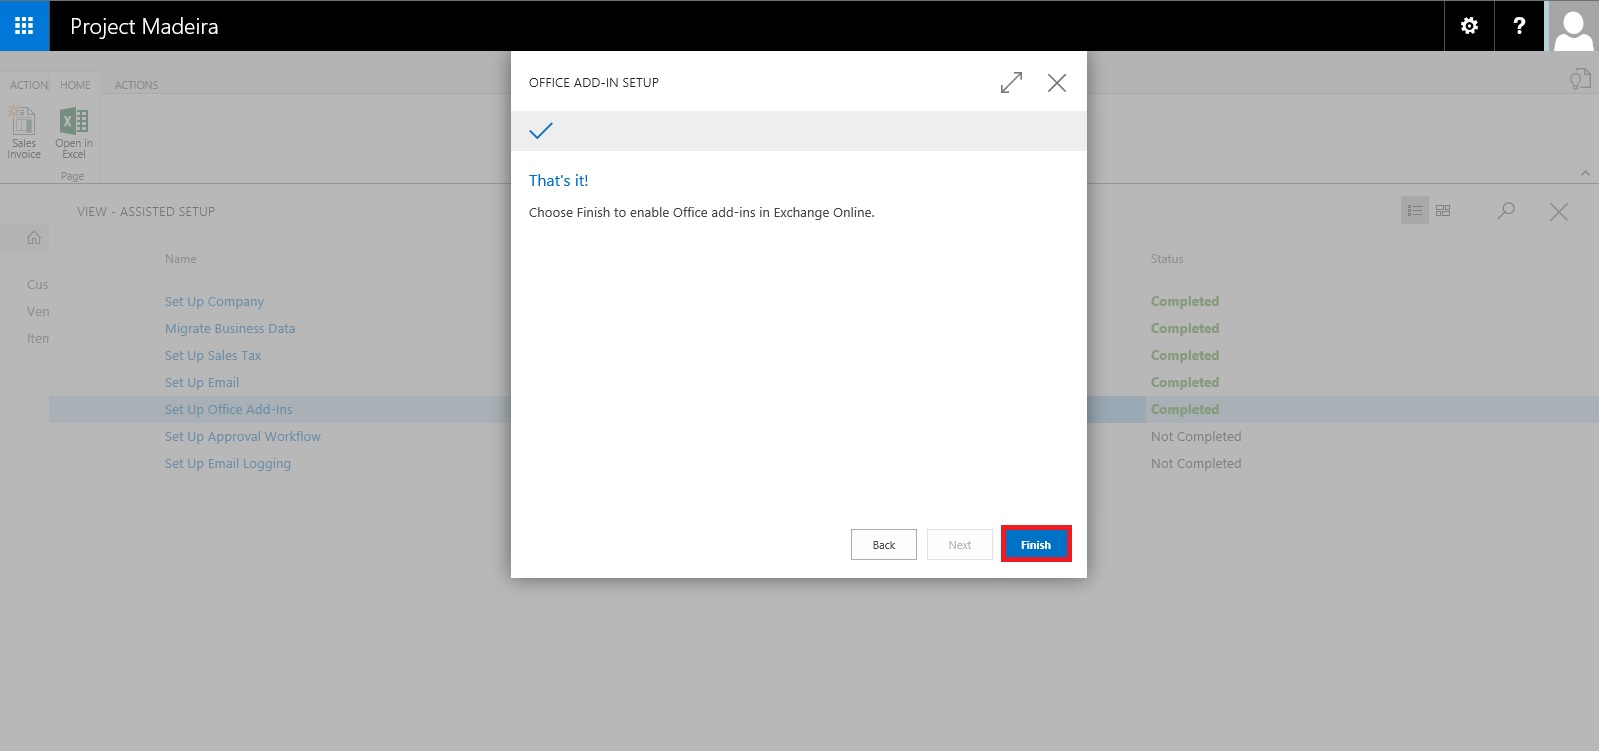
That's it. click on Finish to complete the setup.

SetupOfficeAddIn-7

SetupOfficeAddIn-8

That's all for this post.

Will come with more details in my upcoming posts.

Till then keep exploring & learning.