Showing posts with label Part-2. Show all posts

Friday, 30 October 2015

Configuring SQL Server Authentication in Microsoft Dynamics NAV 2016 – Part-2

Recall from my previous post Configuring SQL Server Authentication in Microsoft Dynamics NAV 2016 – Part-1, action is almost similar with few small differences when dealing with Multitenant Deployment.
Configure SQL Server Authentication on Microsoft NAV Server Instance in a Multitenant Deployment
How to configure a Microsoft Dynamics NAV database to use SQL Server Authentication with a Microsoft Dynamics NAV Server instance.

To configure a SQL Server Authentication on a Microsoft Dynamics NAV Server instance, you set up the server instance with the login credentials (user name and password) for the user accounts for the application and tenant databases in SQL Server.

To configure SQL Authentication on Microsoft NAV Server Instance using Microsoft Dynamics NAV Server Administration tool


  • Open the Microsoft Dynamics NAV Server Administration tool.

  • In the console tree, which is the left pane, expand the node for the computer that contains the Microsoft Dynamics NAV Server instance, and then select the Microsoft Dynamics NAV Server instance.

  • Configure SQL Server Authentication with the application database as follows:

    • In the Actions pane, choose Database Credentials.

    • On the Database Credentials page, choose the Edit button.

    • Set the Database Authentication Mode to SQL Server Authentication.

    • In the Database User Name field, type the login name for the database user that you want to use to access the Microsoft Dynamics NAV application database in SQL Server.

    • In the Password field, type the login password for the database user that you want to use to access the Microsoft Dynamics NAV database in SQL Server.

    • Choose the Save button, and then on the Enable Encryption on SQL Server Connections dialog box, choose the OK button.


Encryption keys are used to help secure the login credentials over the connection between the Microsoft Dynamics NAV Server instance and the Microsoft Dynamics NAV database in SQL Server.

  • On the Information dialog box about encryption, choose the OK button.


This dialog box is to inform you to enable encryption on SQL Server connections, which is disabled by default.

  • If you want to enable encryption on SQL Server connections, in the Action pane, choose Configuration, and then choose the Edit button. In the Database tab, select Enable Encryption on SQL Connections, choose the Save button, and then the OK button.

  • To configure SQL Server Authentication with the tenant database, mount the tenant to the Microsoft Dynamics NAV Server instance and specify the login credentials (user name and password) for the database user that you want to use to access the Microsoft Dynamics NAV tenant database in SQL Server.


If the tenant is already mounted to the Microsoft Dynamics NAV Server instance, you must dismount the tenant, and mount it again.

Restart the server instance.

Friday, 25 September 2015

Using NL( Lookup ) in Jet Reports Part-2

We have discussed regarding Lookup in my previous post. If you missed can find link here.

Using NL( Lookup ) in Jet Reports Part-1.

I am continuing with more advanced usage here below.

In some instances it is also desirable to base the values that are displayed in one NL(“Lookup”) function on the results that were selected in another NL(“Lookup”) function.

An example of this could exist in a Sales Report. The viewer will have the ability to select a Salesperson Code to run the report for, and will also be able to specify Customer Numbers in order to filter the report further.

If only one Salesperson Code is selected, however, it may be undesirable to display Customer Numbers that are associated with other Salesperson Codes.

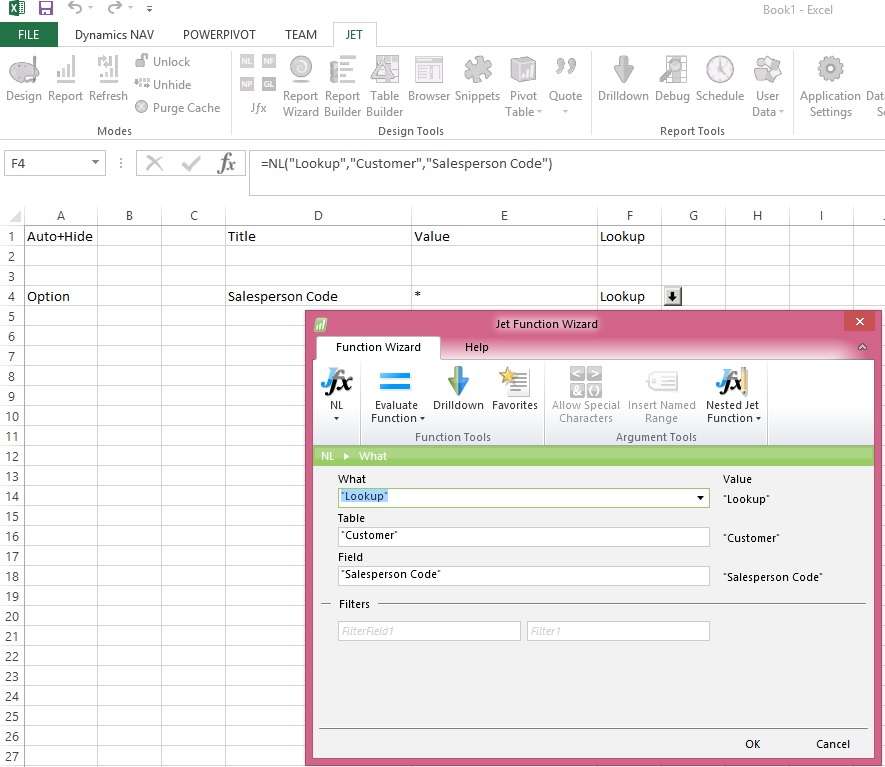
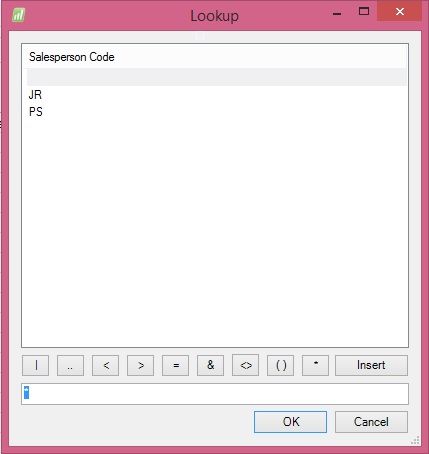
In this instance, two NL(“Lookup”) functions will be used, with the Customer Number filtered by the Salesperson Code so that the values are related. The first NL(“Lookup”) function, which will allow the selection of the Salesperson Code, will look like this:
Lookup-6

Lookup-7

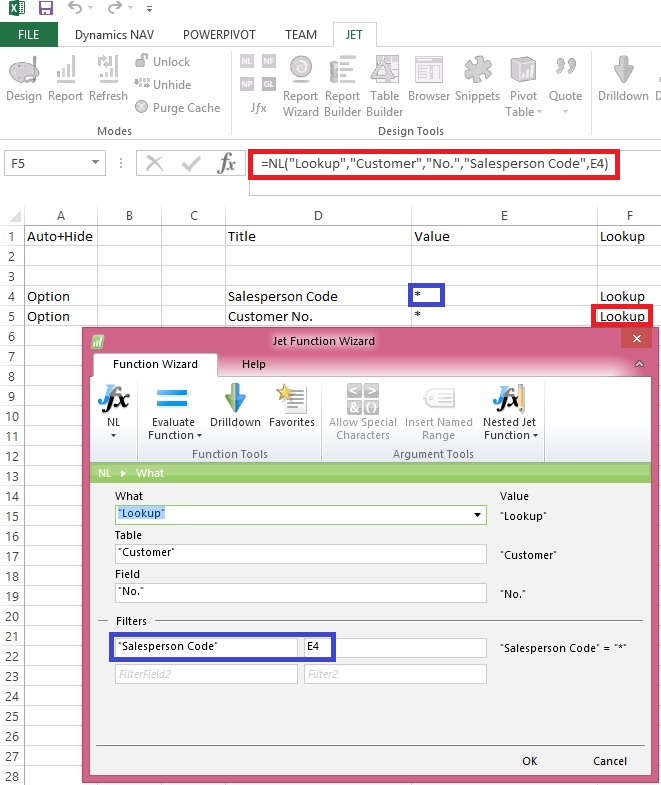
The next NL(“Lookup”) function will give the viewer the ability to select from a list of Customer Numbers, but it will be filtered based on the Salesperson Code that was previously selected. This is done but inserting a normal filter into the function and referencing the cell containing the Salesperson Code that was previously selected by the viewer.

This addition would make the report look like this:
Lookup-8
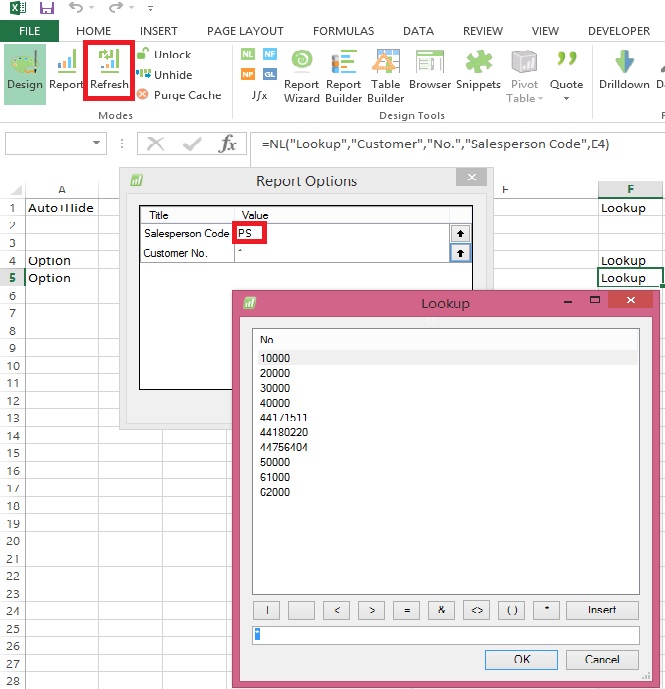
After selecting Salesperson Code Filter when we open Customer List it will show lookup as below:
Lookup-9

Customer List is filtered out with Salesperson Code we selected using Salesperson List Lookup.

Will come up with more details in my upcoming post, stay tuned for more details.

Creating Simple List Report in Excel Using Jet Reports Part-2

In my previous post we saw how to create simple report in excel using Jet Report.

If not seen please refer it before you continue with this post, here is the link for same:

Creating Simple List Report in Excel Using Jet Reports Part-1

Using NL Lookup Part-1

Here we will start from where we left in previous post.

We will add one more sheet in Report we created in our previous post, and name it is as Option, where we will define all of our Filters.

Our Option sheet will look as below:
JetSimpleReport-7
Here we have created 3 Filters Customer No., Credit Limit LCY & Balance LCY.

Next Step will be to apply this Filter provided by user at runtime to the Report.

Return to your Report Sheet and edit the NL Function used to retrieve Rows from Customer as below:
JetSimpleReport-8
(*) in filter denotes all, in other words no Filter.

Now let see the Filter Sheet how it behaves when we run the report.

When we run the report first Report option is shown, where we will give our Filters:
JetSimpleReport-9

Here I am giving below filters:
Customer No. Filter                         *              Include All Customers

Credit Limit (LCY) Filter                  0              All rows with Credit Limit as Zero

Balance (LCY) Filter                      >0             All rows with Balance value greater than Zero

The output of the report should be as below:

JetSimpleReport-10

Stay tuned for more details in my future posts.

I will explain more about commands, filters, functions, lookup etc.…