Continuing from my previous post. Find the link to access the same in case you missed it.
Exposing & Consuming the Web service from & inside Navision – Part-1
Exposing & Consuming the Web service from & inside Navision – Part-2
Step 4: Create a DLL to use as Add-in to consume the Web Service itself in Navision.
We will start with Class Library Project in Visual Studio.
It’s very simple with few steps to follow, and we will be done with our requirement.
Enter Name and select the path for your project solution folder. In my case I am saving my project to the default location of Visual Studio. And I am naming my project as XMLData.

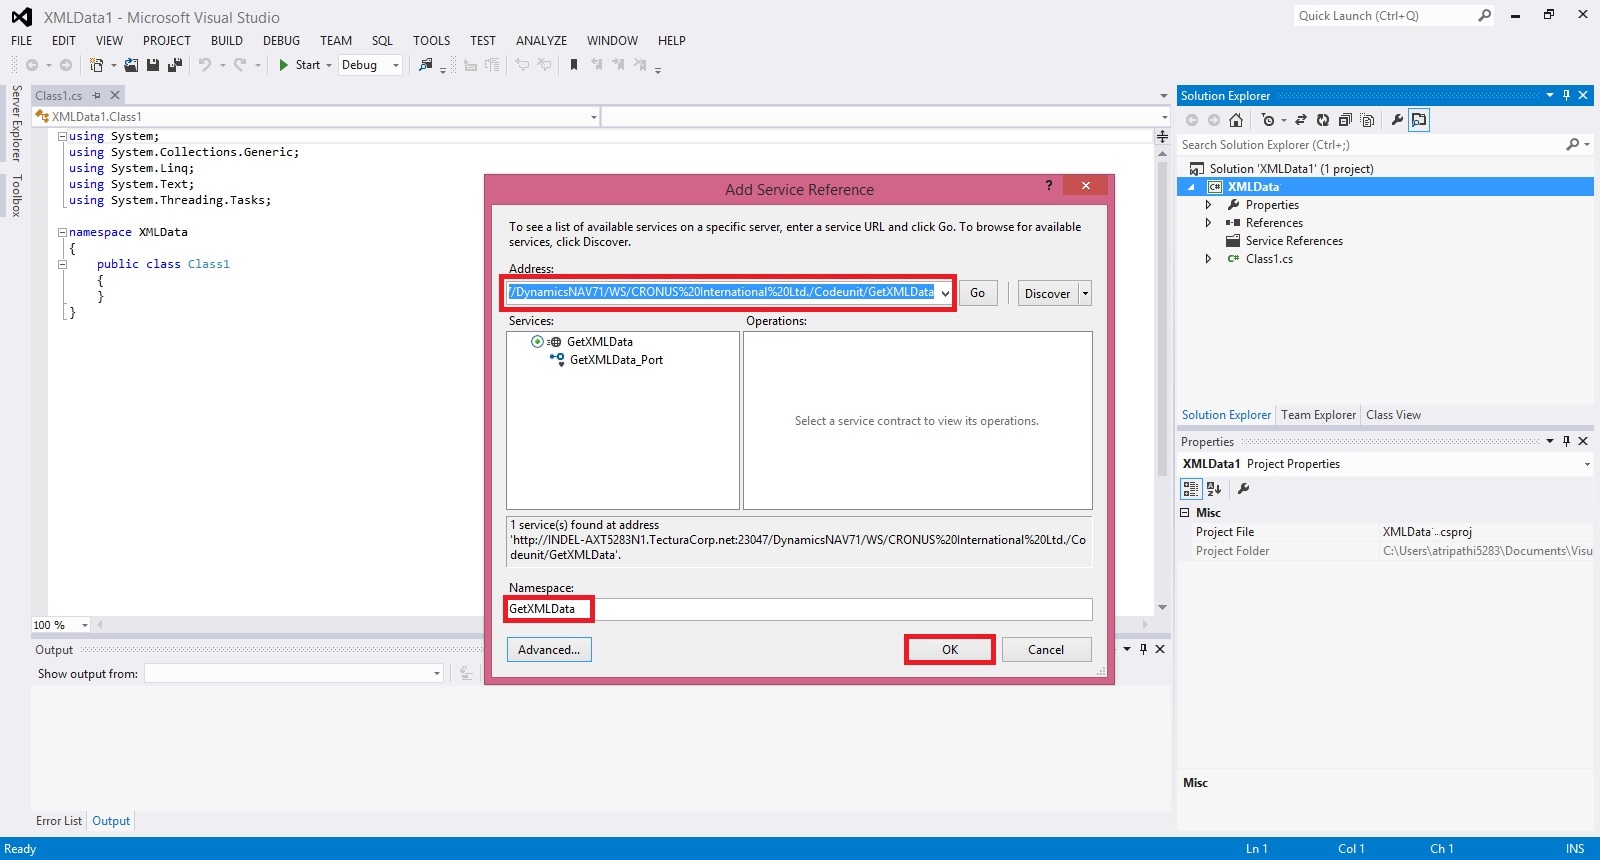
Right click on the project folder and Add Service reference to the project.

Enter your Web Service URL and click on GO.
Once your Service is listed, enter the Reference Namespace. And click on OK to add the Service Reference to the project.
Click on app.config in Solution browser to open.
Verify your code similar to below.

Build your Project to obtain the .dll file.
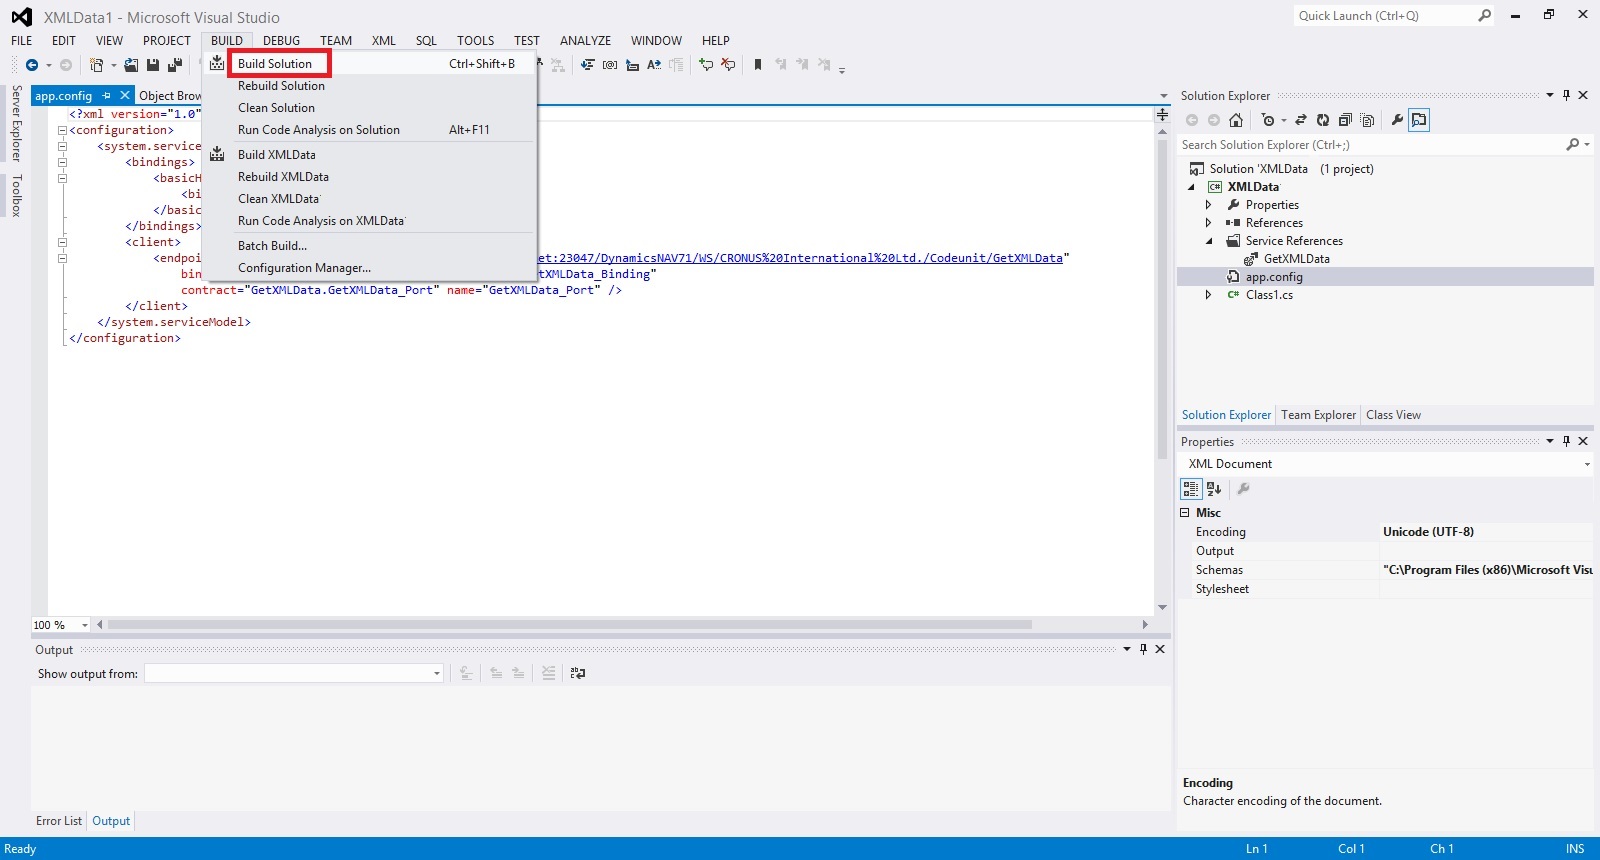
Below screen shows we have no errors and the .dll file is created successfully.

Locate the .dll file in your Project folder similar to path shown below. Copy your dll file.
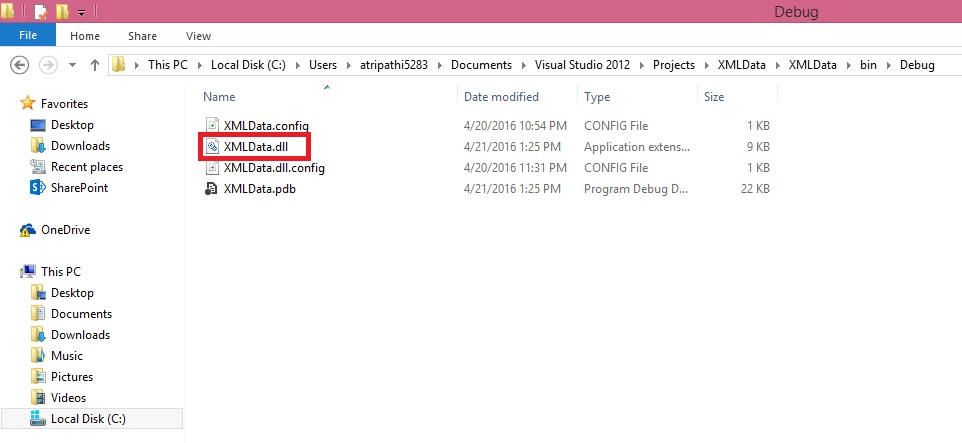
Create a folder and paste your .dll file to Service & RTC folder, as shown in below screen.

We are ready with the Add-in, which we will use in our next post to consume our service with the help of this dll, and call the method to obtain our file for further processing.
That’s all for this post, I will be back with next post in series soon.
Till then keep practicing.
To be Continued....
[…] Exposing & Consuming the Web service from & inside Navision – Part-3 […]
ReplyDelete