Select Assisted Setup & Tasks from the ribbon of Action Tab.

Select Setup Office Add-Ins from the list.

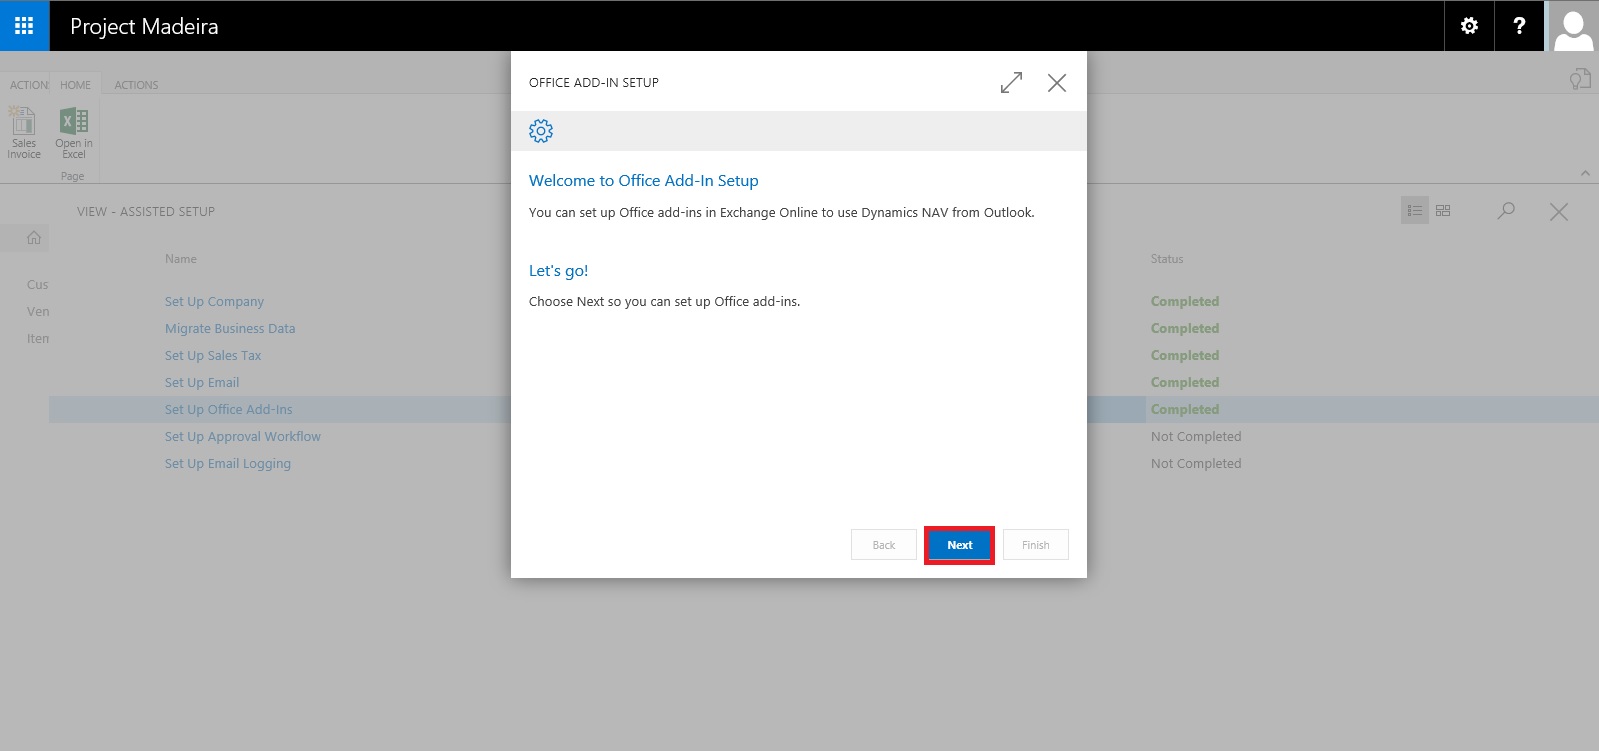
Click on Next Button on Welcome Screen.
Select Setup for (Organization or you only) and click on Next Button.

Enter your E-mail id and Password, click on Next to continue with next step.

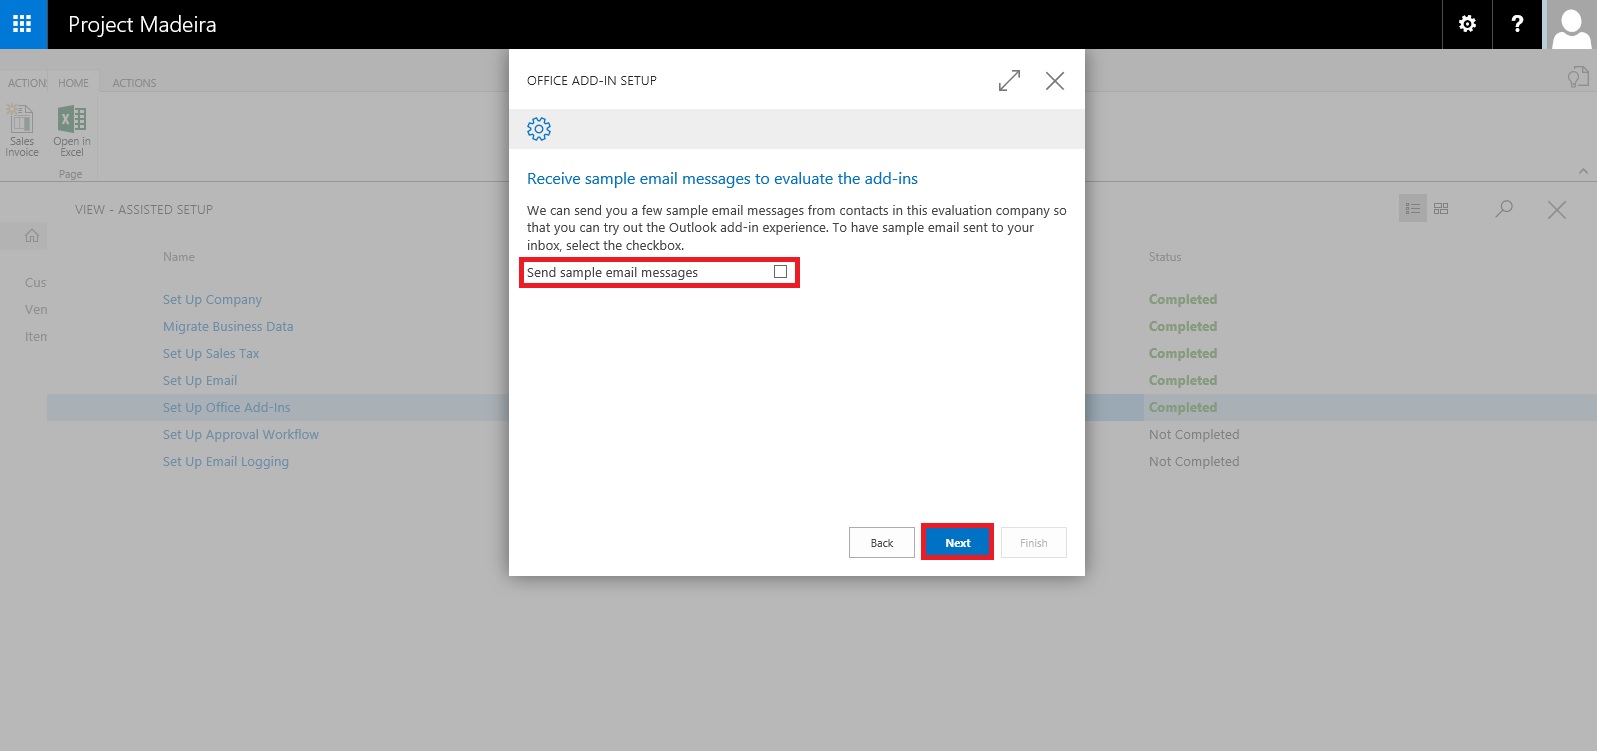
If you wish to receive few sample mails in your Mail box click on the check box or leave it blank, click on Next Button.
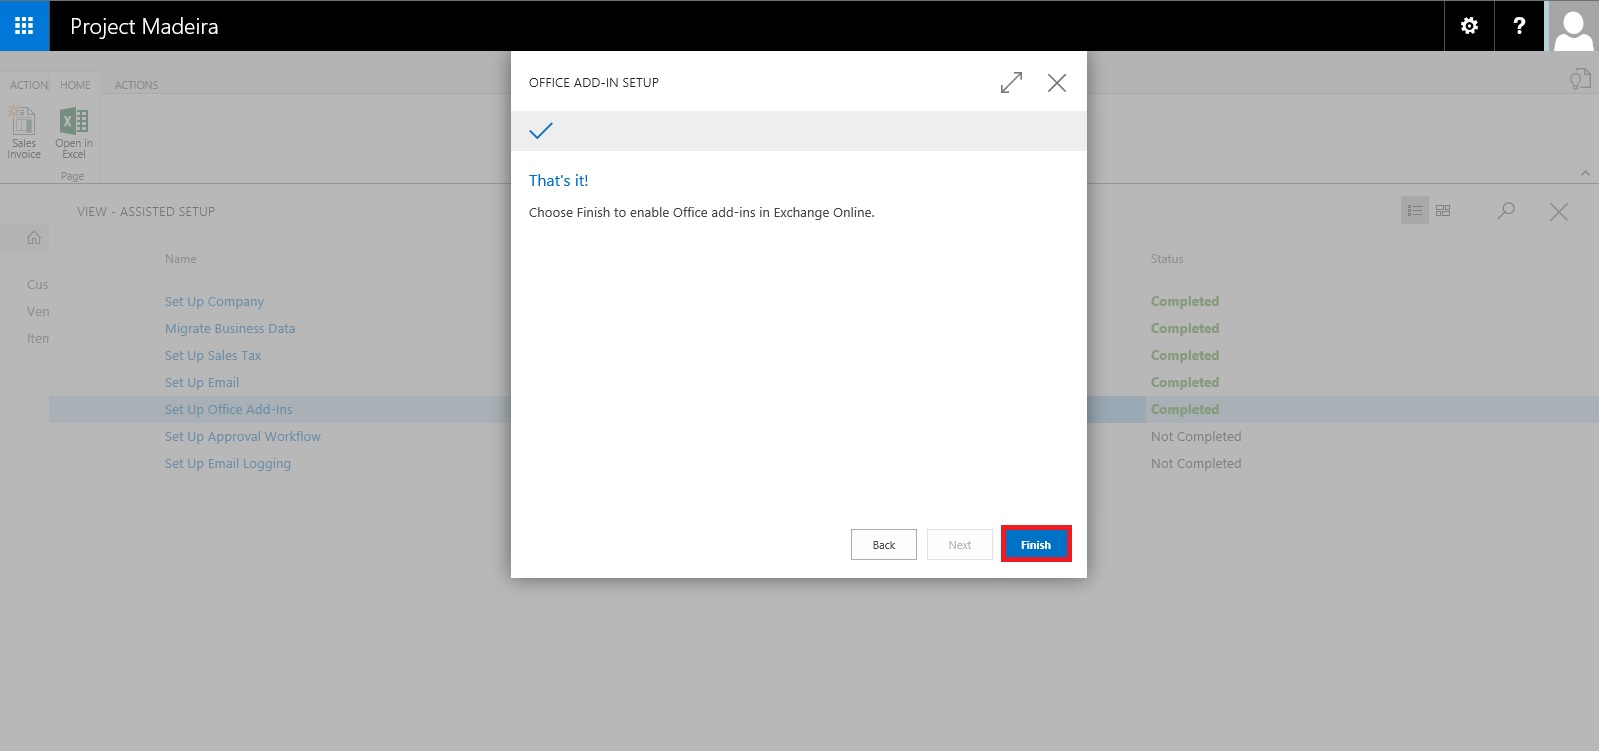
That's it. click on Finish to complete the setup.

That's all for this post.
Will come with more details in my upcoming posts.
Till then keep exploring & learning.
No comments:
Post a Comment