Showing posts with label Azure. Show all posts

Sunday, 31 July 2016

Configuring Single Sign-On using Office 365 on Navision 2016

Today we will see how we can enable Single Sign-On using Office 365 for Navision 2016.

Before we start we should have Virtual Machine ready on Azure with Navision 2016 installed, Certificates and Nav User is configured. Endpoints are open so that web client can be used from outside Virtual Machine on internet.

It should be hosted on Public IP, then only we will be able to configure it.

For details regarding Azure Subscription you can see my earlier post here.

For details regarding Creating Virtual Machines you can see my earlier post here.

You also need Office 365 Subscription ready for use and you can use the AD of same to configure your Single Sign-On.

Let us start with Admin console of office 365. Click on Azure AD this will create Management Console to work with AD.

SingleSignOn-1

Enter your details and click on Next.

SingleSignOn-2

Enter your details and click on Next, Finally Sign Up.

SingleSignOn-3

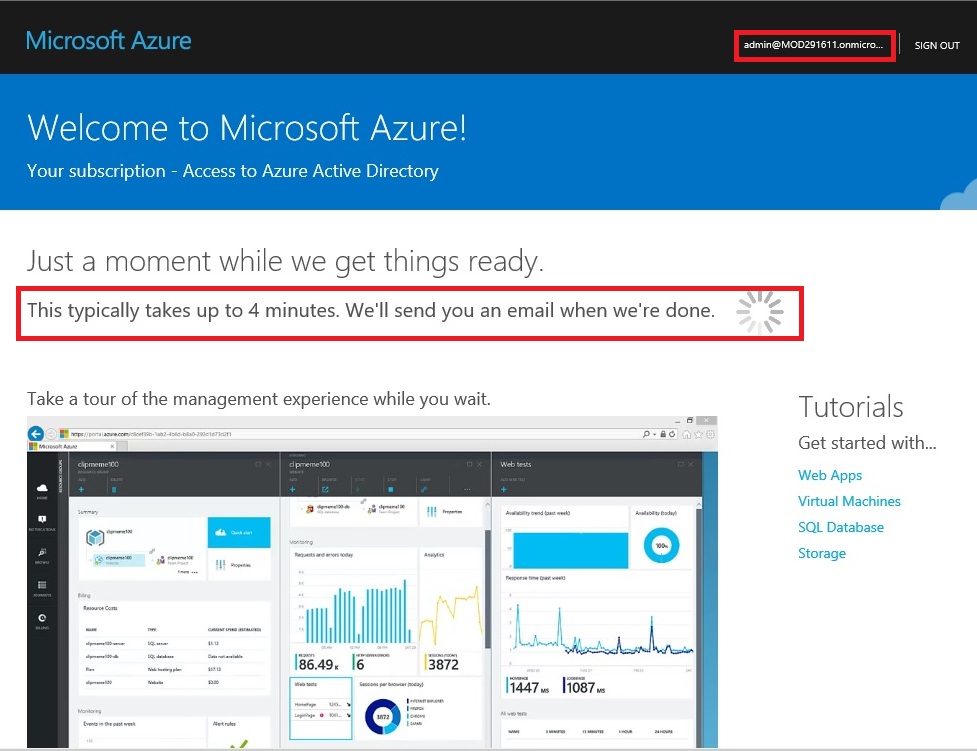
It will take few minutes to configure and make it available for you.
SingleSignOn-4

Once your Subscription is ready click on Start Managing my Service.

SingleSignOn-5

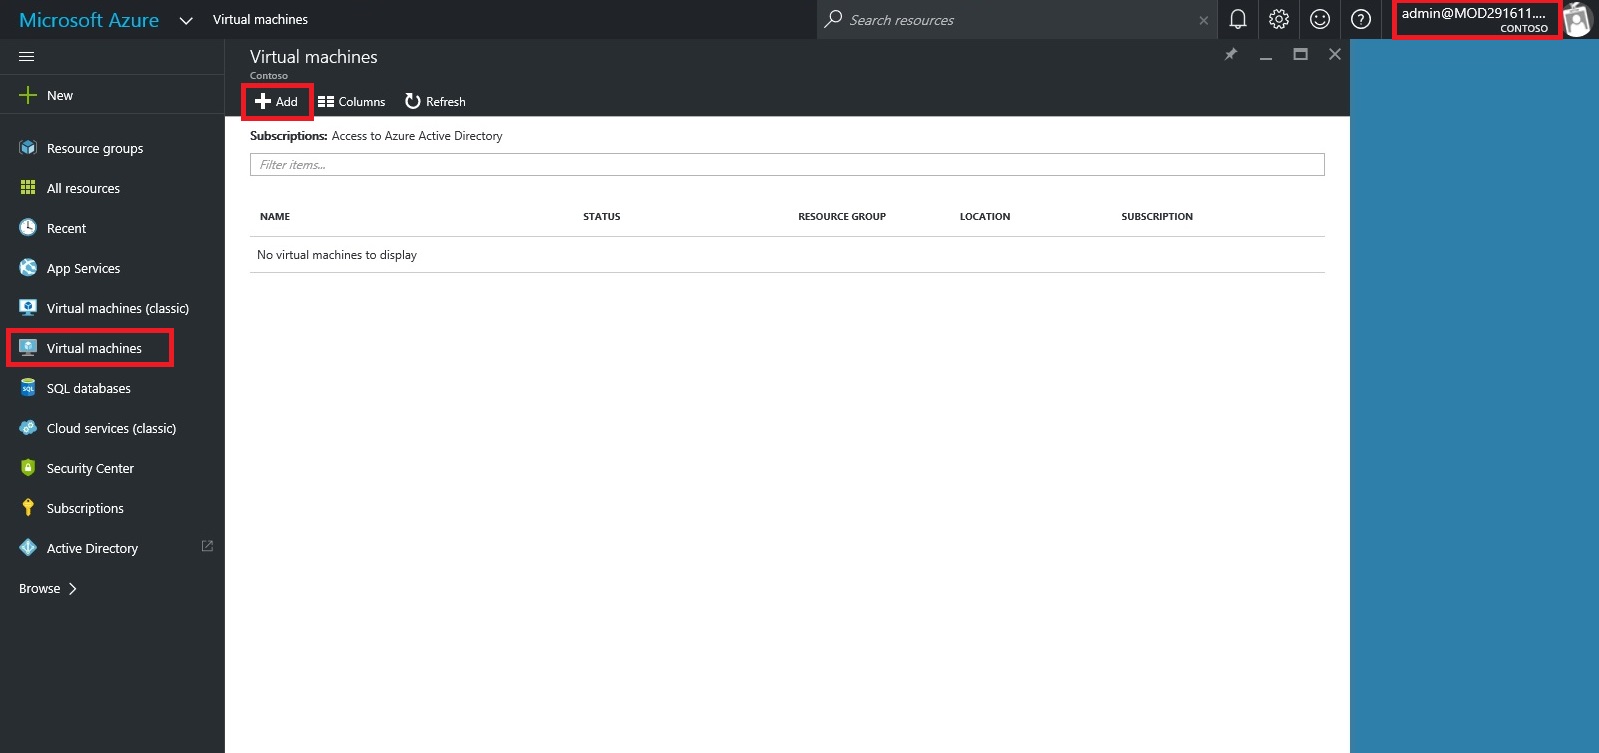
From Management Console click on Virtual Machine, if you dont have already to create one for you.
SingleSignOn-6

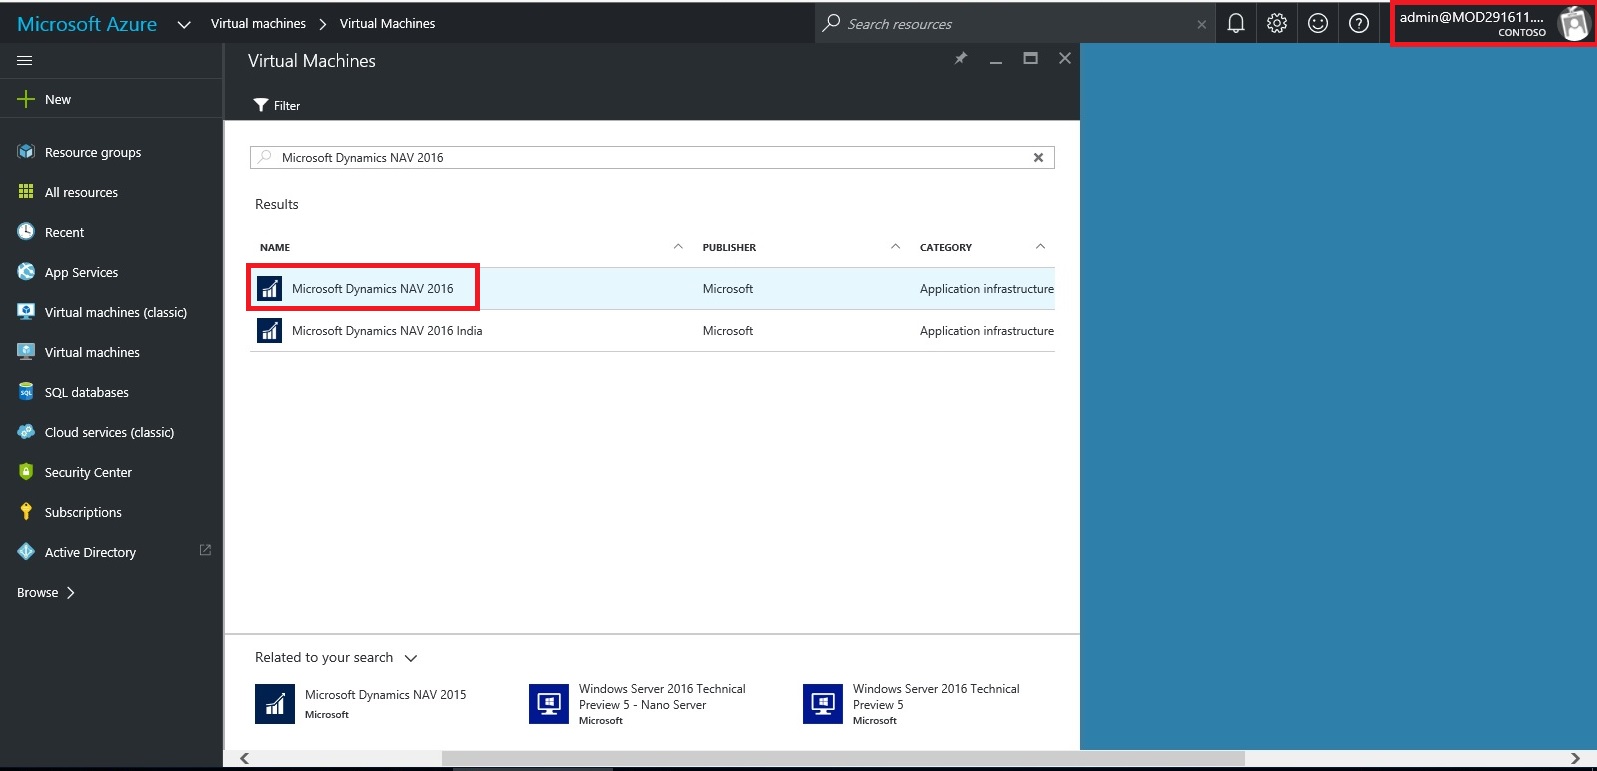
Select the Virtual Machine in Search for Microsoft Dynamics Nav 2016.

SingleSignOn-7

Select the approprite Virtual Machine from the List.
SingleSignOn-8

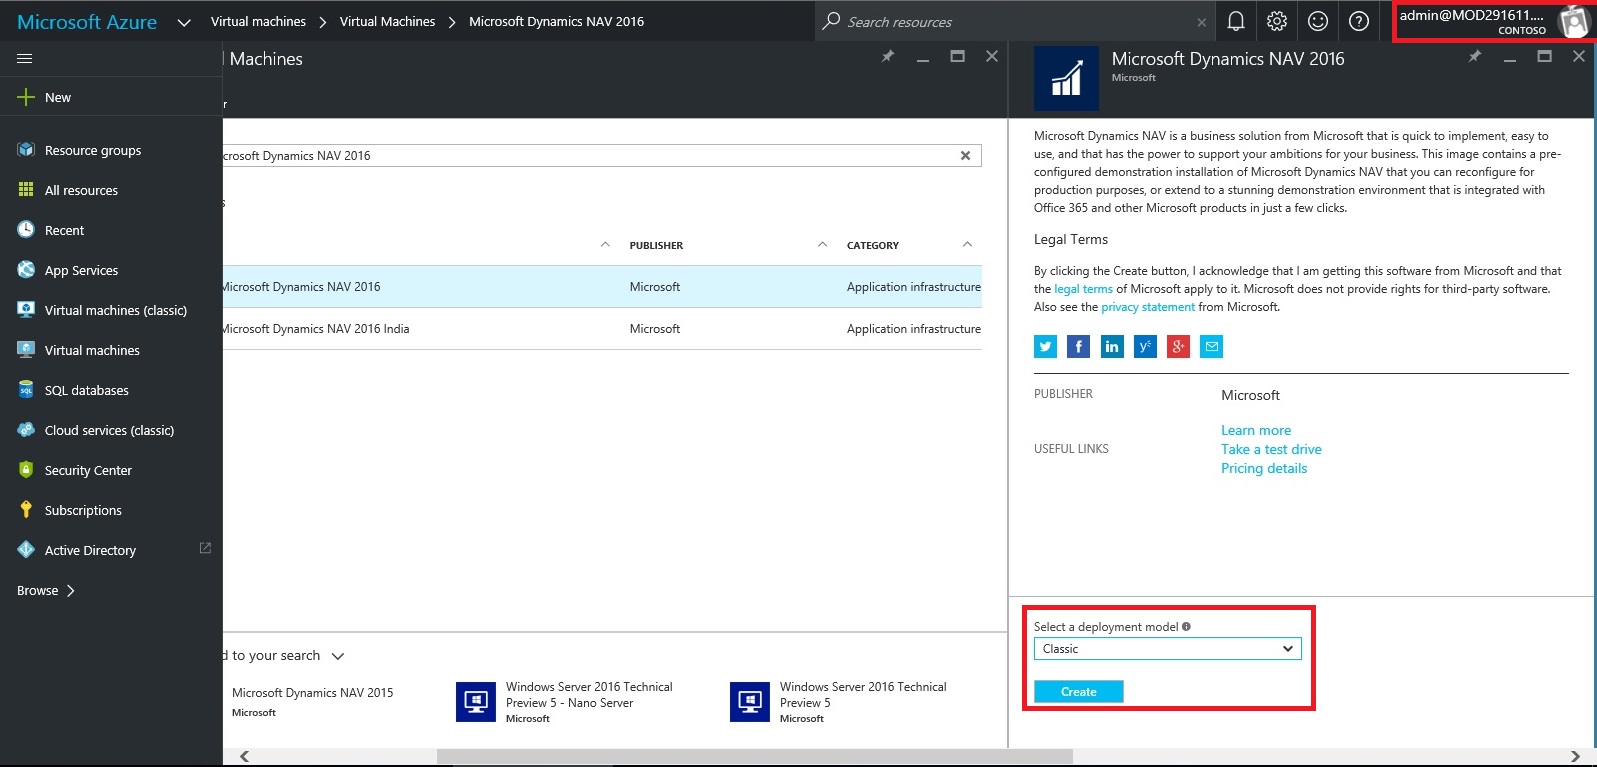
Enter your details and Create. For more details see the link provided on top of the post.
SingleSignOn-9

Let us return to our AD, Click on Applications. This will List all you Apps currently available with your AD or office 365.

SingleSignOn-10

Click on Add to configure your Application.

Give a Name and Select Web Application/or Web API, as we are configuring for Web Client today. Click on Next.

SingleSignOn-11

Enter your Web Client URL and Office portal AD URL.  Click on OK.

SingleSignOn-12

Your New application gets registered with your AD.

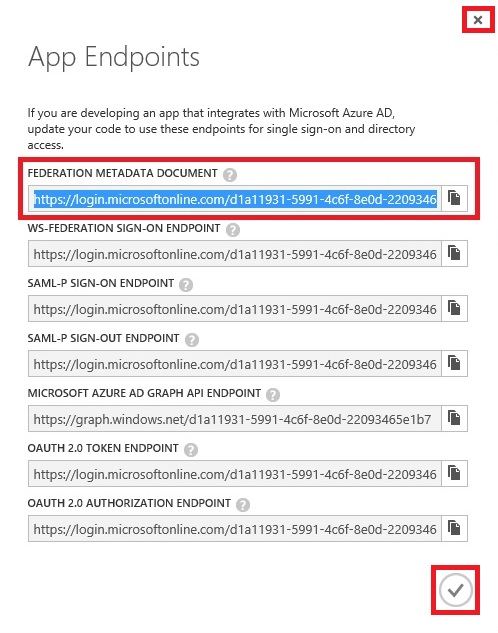
Select the created Application and Click on View Endpoints.

SingleSignOn-13

Copy the Federation MetaData URL and keep it handy at safe place we will require this in our next step. Close the window we are not performing any changes here.
SingleSignOn-14

Open your Navision User Card.In Office 365 Authentication enter your Office portal user email id which you will be using for Single Sign-On.

SingleSignOn-15

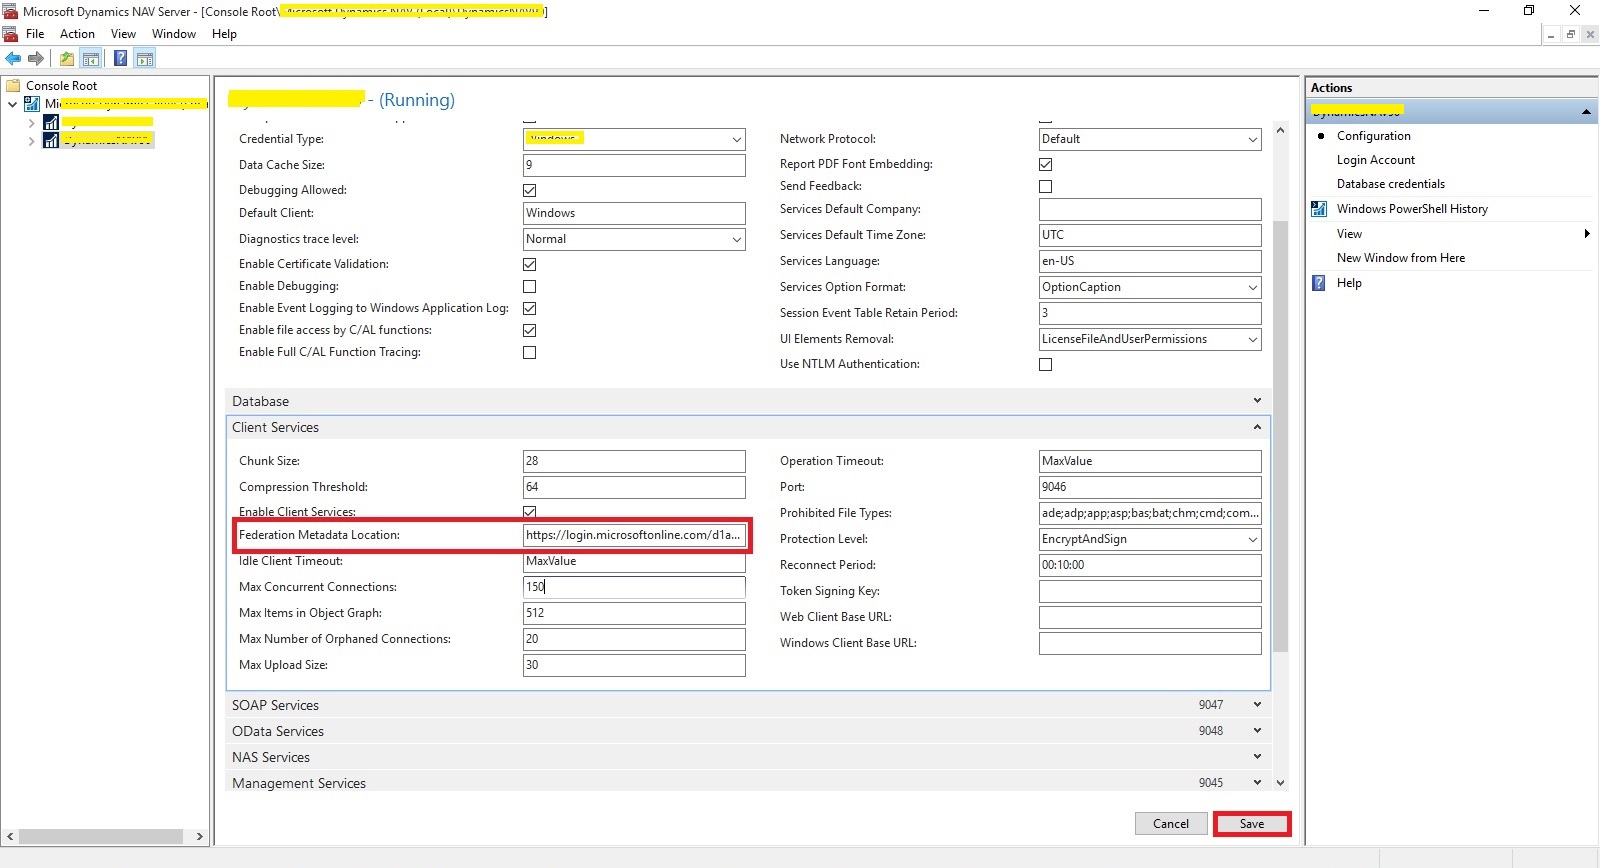
Open your Navision Service Instance configuration and enter Federal MetaData URL which we copied in our previous step.
SingleSignOn-16

Restart you NAV Service.

SingleSignOn-17

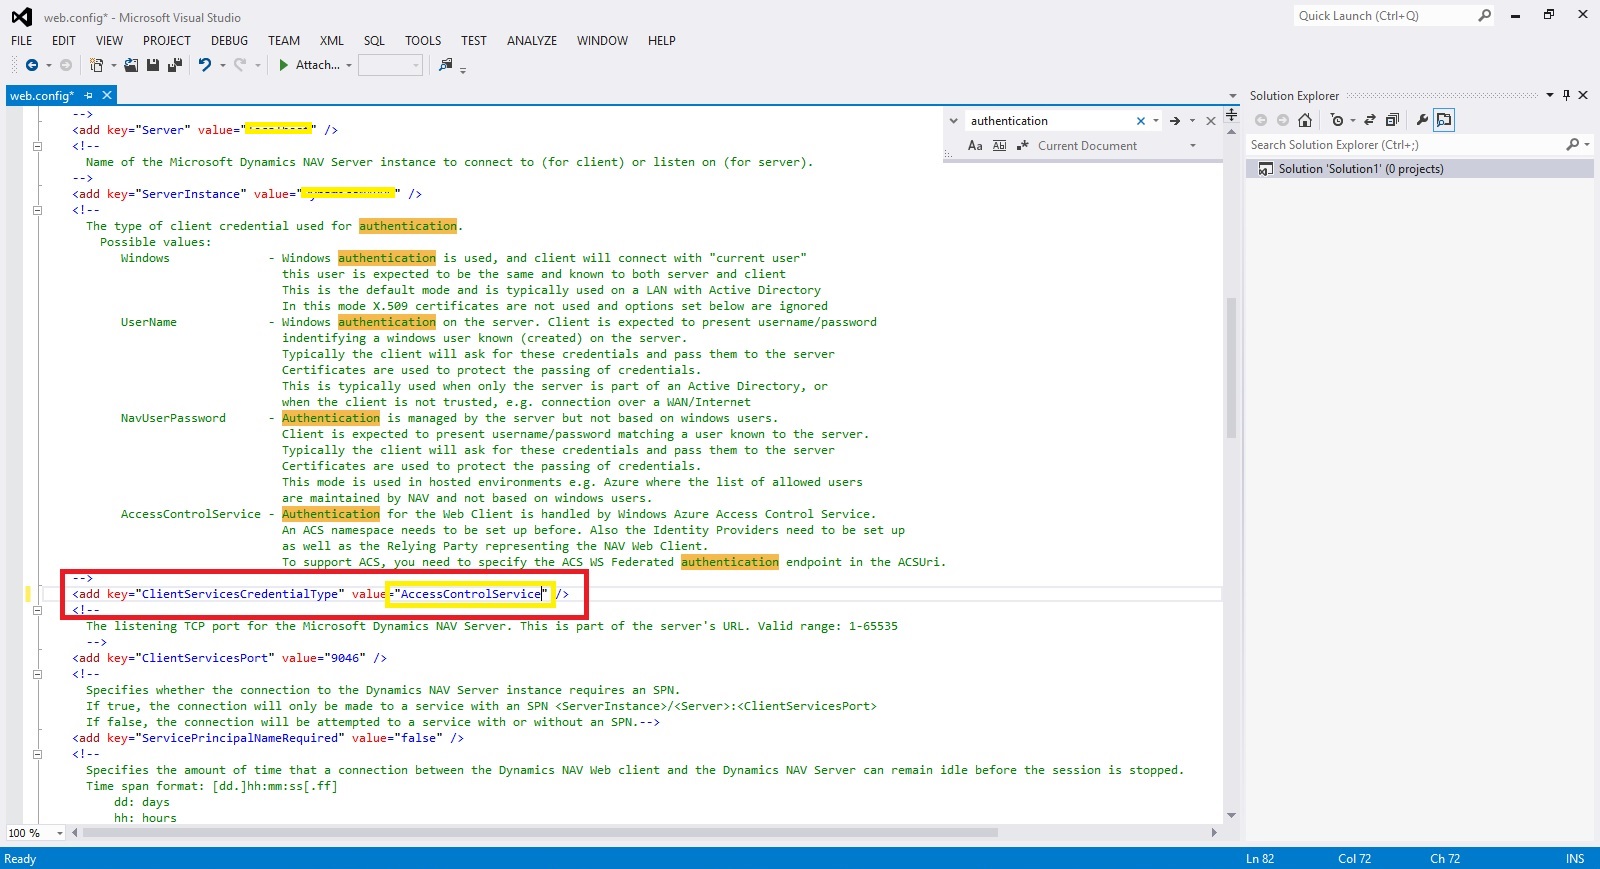
Open the Web Client Folder under your IIS. Edit your Web.config file using prefered Editor.

SingleSignOn-18

Enter you Client Service Credentials as AccessControlService.
SingleSignOn-19

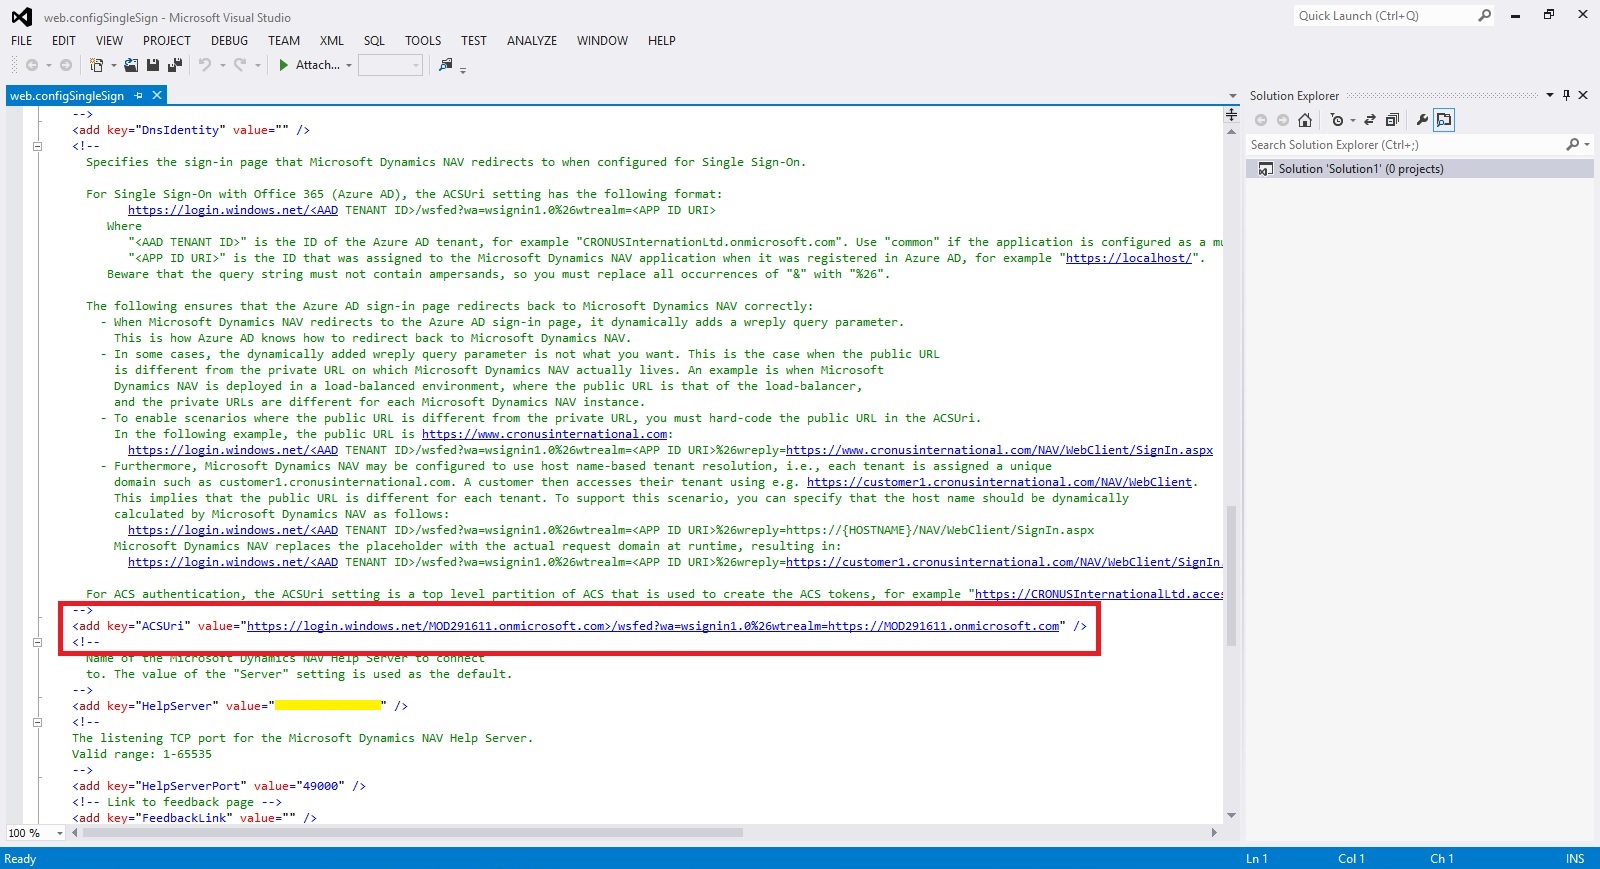
Change value of ACS URI as below. You have full explaination of same in the file itself.
SingleSignOn-20

Thats all, Now you open your web client and you will be redirected to Office 365 Login Page, enter your valid office 365 e-mail user id and password you will be authenticated and Web Client is opened.

Thats all for today, I will come up with moredetails in my upcoming posts.

Till then keep exploring and learning.


Saturday, 28 May 2016

Customers with Enterprise Agreement who already have SQL Server Licenses, can use them on Azure Virtual Machines

Now  Microsoft Enterprise Agreement customers can bring existing licenses to run SQL Server on Azure Virtual Machines. Since the launch of Azure Virtual Machines, customers can already run SQL Server on Azure Virtual Machines through several existing SQL Server images available in the Azure Gallery, or bring their own images to Azure.

These images and capabilities will continue to be supported so customers can continue to take advantage of pay per use licensing for SQL Server on Azure Virtual Machines.


Starting this week, customers with Enterprise Agreement who already have SQL Server Licenses, can use them on Azure Virtual Machines with Microsoft-certified (BYOL) gallery images. These images will not charge for SQL Server licensing, just for compute cost.

For more details see the Link.


Monday, 9 May 2016

Creating Virtual Machine on Azure

Continuing from my previous post.

In previous post we saw how to register for Free Azure Portal Account, if you missed you can find the link here.

Today we will see how to create Virtual Machine for Dynamics Navision 2016 pre Loaded.

Lets start creating one for our future posts practice.

Open the page : https://azure.microsoft.com/en-us/free/ and follow onscreen Instruction to login to your account.

Login using the account credentials you used for registering on Azure Portal.

Azure-5

Upon signing you will be landed to your dashboard on Portal.

You can see we don't have any resource on Portal yet.

Azure-6

Lets start creating one.

Click on New from Top right corner.

Choose Virtual Machine.

Enter "Microsoft Dynamics NAV 2016" in the search box, it will list available Virtual Machine images.

Select the one available Virtual Machine for commissioning.

I have choose this because we will get preinstalled NAV 2016 which will save our time.

Azure-7

Select Deployment Model, I have choose Classic and click on Create.

Azure-8

Next we will enter  Host Name, User Name, Password, other things you adjust as per your need. Click on Create.

Note your User Name & Password you will require this to login to the Server.

Azure-9

Give some time to get created and up your Server.

In the mean time you can explore other things till your Server is up and running for you.

Once it is made available, you can start login and explore your newly created Server.

Where to find my Server?

From the Navigation Bar choose Virtual Machine (classic).

It will list you all Virtual Machines created by you.

Select your Virtual Machine in my case it is NavDemo.

You can find the Server Name and IP of your Virtual Machine.

Azure-10

I am using my IP to login to my Server.

Open your Remote Desktop Connection and enter your IP.

The User Name & Password as we created in previous step.

Azure-11

Here I am Login to my Server.

Azure-12

You can see that Dynamics NAV 2016 is already available with my Server.

Azure-13

That's all for today, we will see more in my upcoming posts.

Till then keep exploring & Learning.


Saturday, 7 May 2016

AZURE free Subscription

Azure-0

I will be going with few posts demonstrating the Navision in Azure environment.

To start with we will be required to subscribe to Azure first.

Open page:

https://azure.microsoft.com/en-us/free/

Click on Start now.

Azure-1

Enter your Mobile No to verify you phone no.

Azure-2

Next you will be required to verify your credit card.

Once both things are verified you can start with Sign up with the Azure Subscription.

Azure-3

Before you start with managing your services on Azure here presented few FAQ.


Few FAQ on Azure Subscription.


Why is my credit card being charged $1 for signing up for the Free Trial offer?

To ensure a valid credit card, Microsoft will charge your credit card $1 when signing up for the Free Trial Offer. This is only an authorization hold, the charge will be reversed within 3-5 business days.

What happens with the services I created after the 30-day trial period ends?

Once the trial period is over, if you have not upgraded to a Pay-As-You-Go Azure subscription, we will decommission your services, and you will not be able to use them anymore.

What do I get when I sign up for a Free Trial?

You receive a $200 credit to spend on Azure services during the trial. You can use this $200 however you want to create and try out any combination of Azure resources. It enables you to explore our cloud entirely for free.

Do I pay anything during the trial?

No – the trial is absolutely free.

Do I have to pay something at the end of the trial?

No – there is absolutely no obligation to buy anything at the end of the trial.

How do I know how much of the $200 I’ve used and how much I have left?

During the trial we display your remaining trial credits at the top of the management portal. You cannot miss it.

What happens if I exceed the $200 free trial credit?

If you exceed your $200 free credit, we will suspend your free trial account. You can optionally upgrade your trial to be a Pay-As-You-Go Azure subscription at this point if you want to continue using and paying for services. If not, don’t worry – you won’t be billed anything.

Please refer to updated FAQ on site at time of using, all information is true as on date of this post, anything can change. https://azure.microsoft.com/en-us/pricing/free-trial-faq/

Azure-4

Click Start managing my subscription, you will land to your Dashboard.

Will come with next step in my upcoming post.