Showing posts with label 365. Show all posts

Sunday, 31 July 2016

Configuring Single Sign-On using Office 365 on Navision 2016

Today we will see how we can enable Single Sign-On using Office 365 for Navision 2016.

Before we start we should have Virtual Machine ready on Azure with Navision 2016 installed, Certificates and Nav User is configured. Endpoints are open so that web client can be used from outside Virtual Machine on internet.

It should be hosted on Public IP, then only we will be able to configure it.

For details regarding Azure Subscription you can see my earlier post here.

For details regarding Creating Virtual Machines you can see my earlier post here.

You also need Office 365 Subscription ready for use and you can use the AD of same to configure your Single Sign-On.

Let us start with Admin console of office 365. Click on Azure AD this will create Management Console to work with AD.

SingleSignOn-1

Enter your details and click on Next.

SingleSignOn-2

Enter your details and click on Next, Finally Sign Up.

SingleSignOn-3

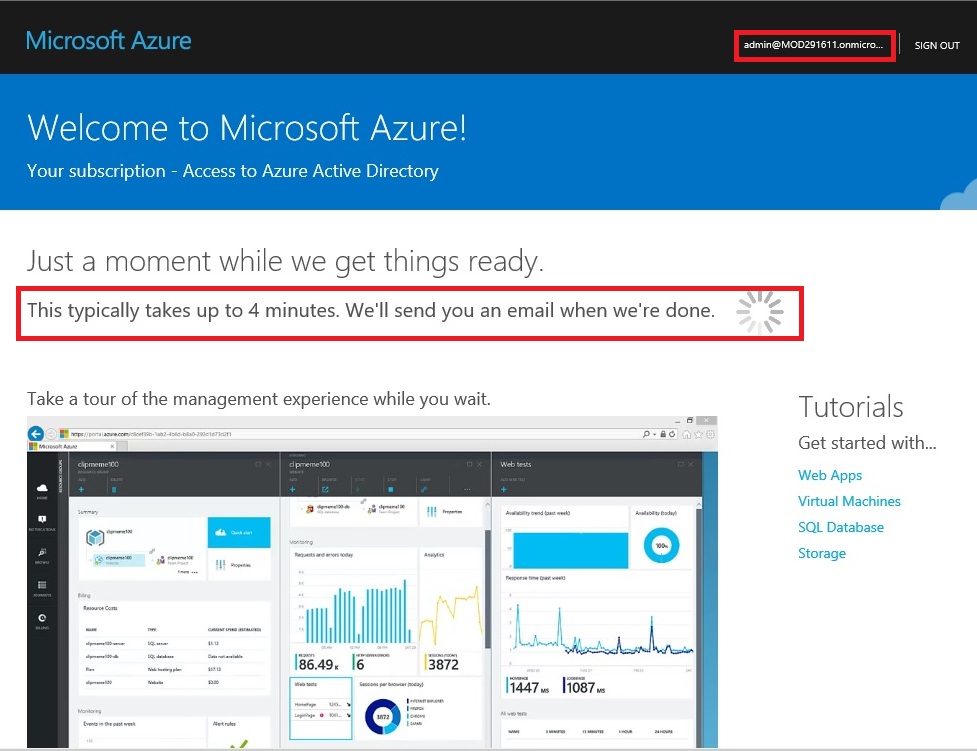
It will take few minutes to configure and make it available for you.
SingleSignOn-4

Once your Subscription is ready click on Start Managing my Service.

SingleSignOn-5

From Management Console click on Virtual Machine, if you dont have already to create one for you.
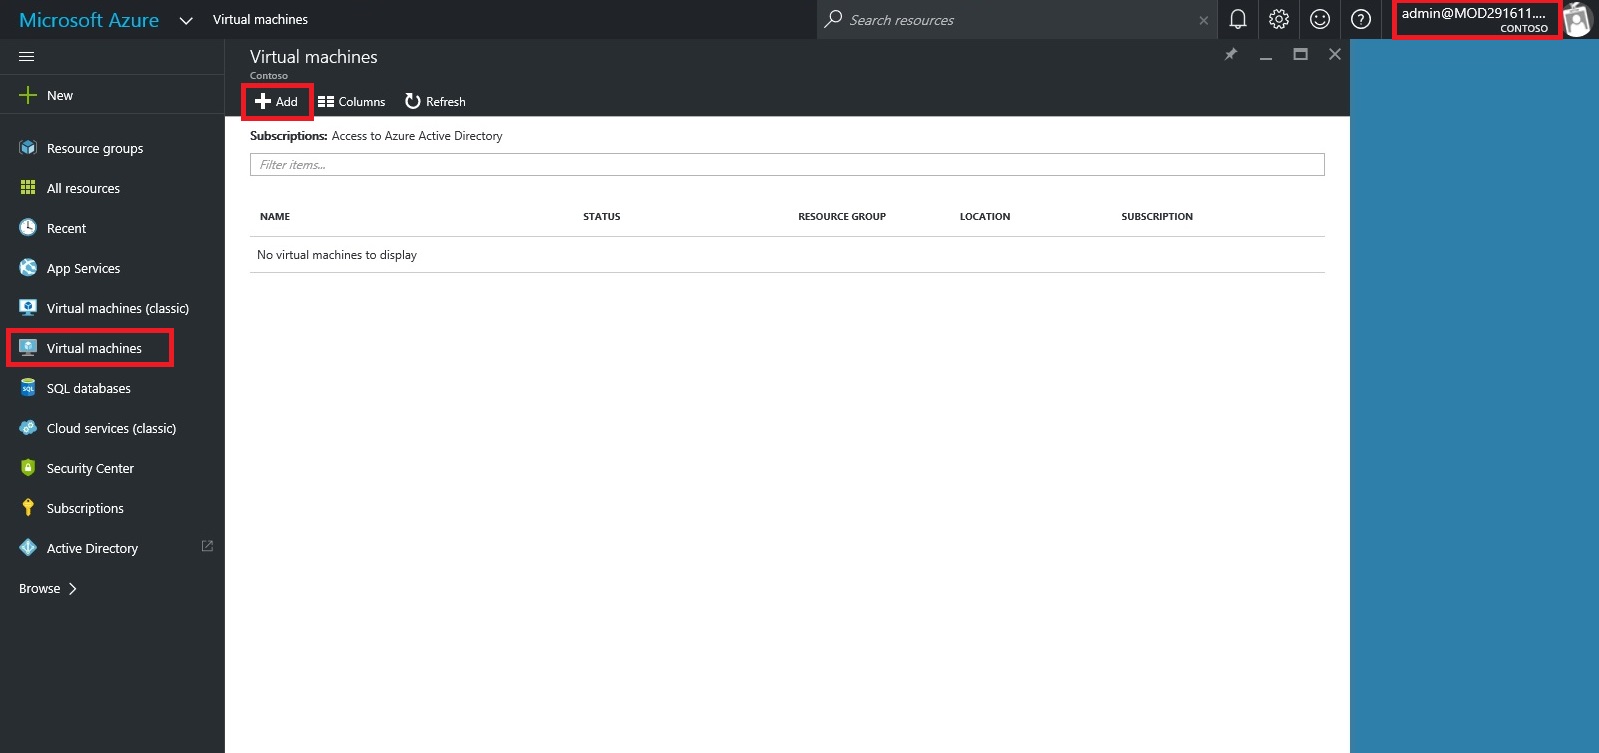
SingleSignOn-6

Select the Virtual Machine in Search for Microsoft Dynamics Nav 2016.

SingleSignOn-7

Select the approprite Virtual Machine from the List.
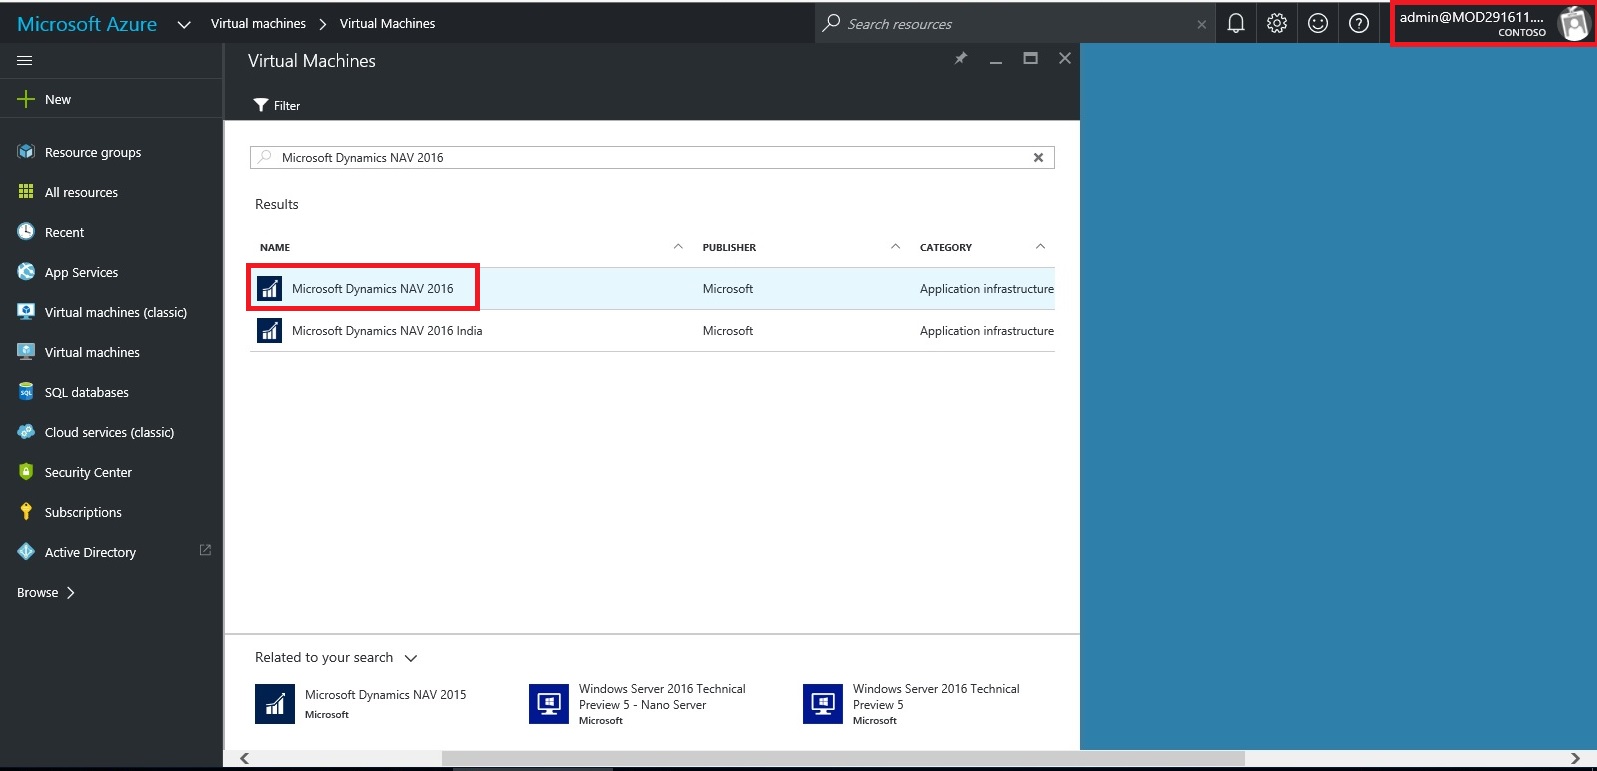
SingleSignOn-8

Enter your details and Create. For more details see the link provided on top of the post.
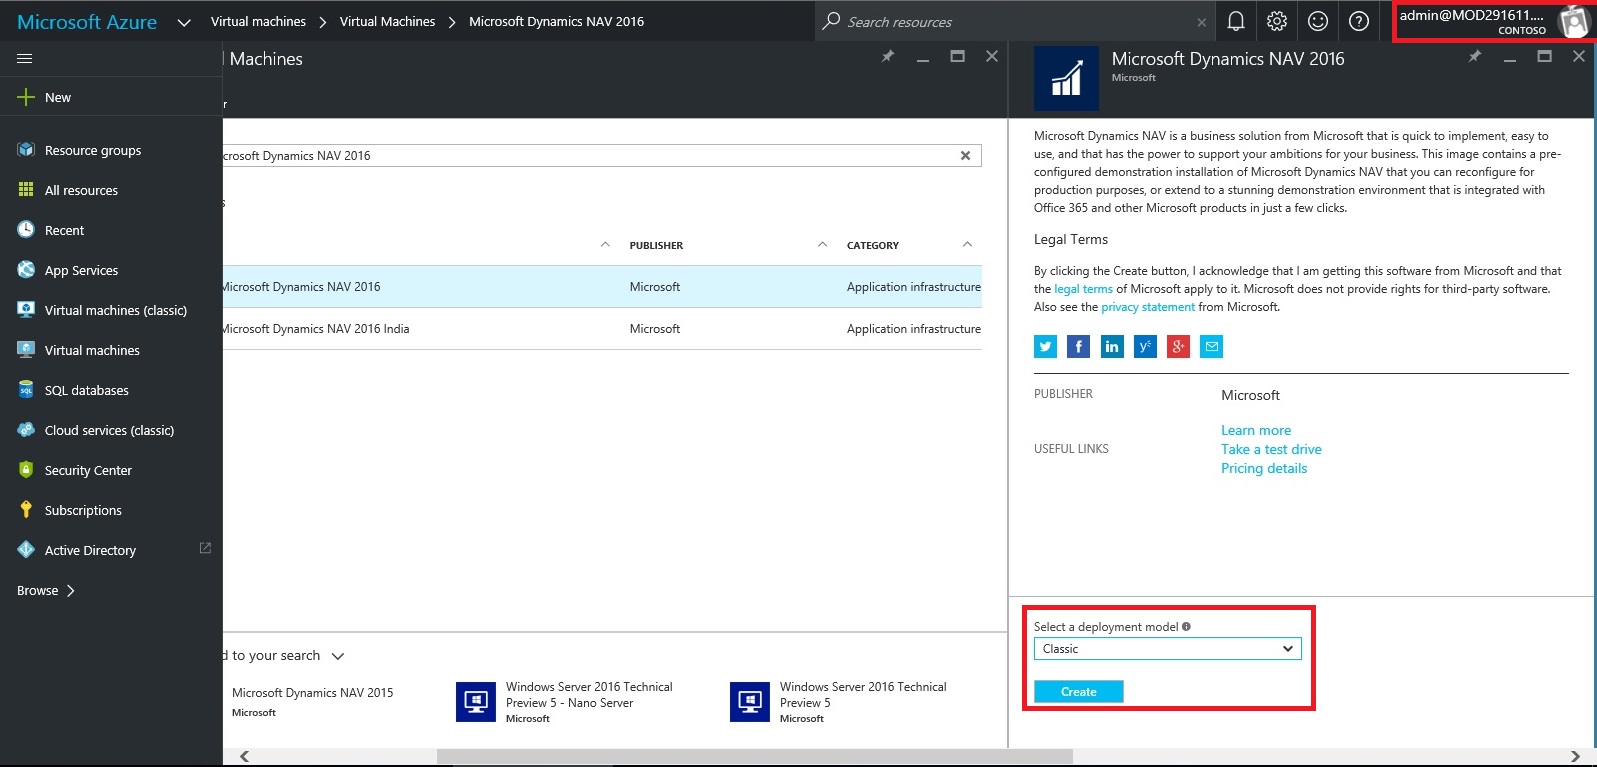
SingleSignOn-9

Let us return to our AD, Click on Applications. This will List all you Apps currently available with your AD or office 365.

SingleSignOn-10

Click on Add to configure your Application.

Give a Name and Select Web Application/or Web API, as we are configuring for Web Client today. Click on Next.

SingleSignOn-11

Enter your Web Client URL and Office portal AD URL.  Click on OK.

SingleSignOn-12

Your New application gets registered with your AD.

Select the created Application and Click on View Endpoints.

SingleSignOn-13

Copy the Federation MetaData URL and keep it handy at safe place we will require this in our next step. Close the window we are not performing any changes here.
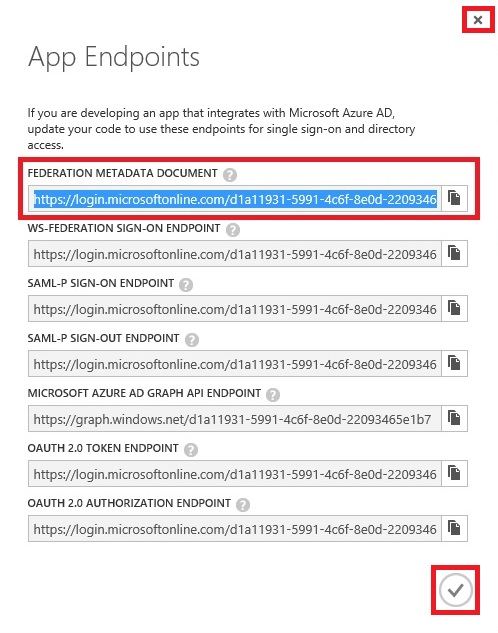
SingleSignOn-14

Open your Navision User Card.In Office 365 Authentication enter your Office portal user email id which you will be using for Single Sign-On.

SingleSignOn-15

Open your Navision Service Instance configuration and enter Federal MetaData URL which we copied in our previous step.
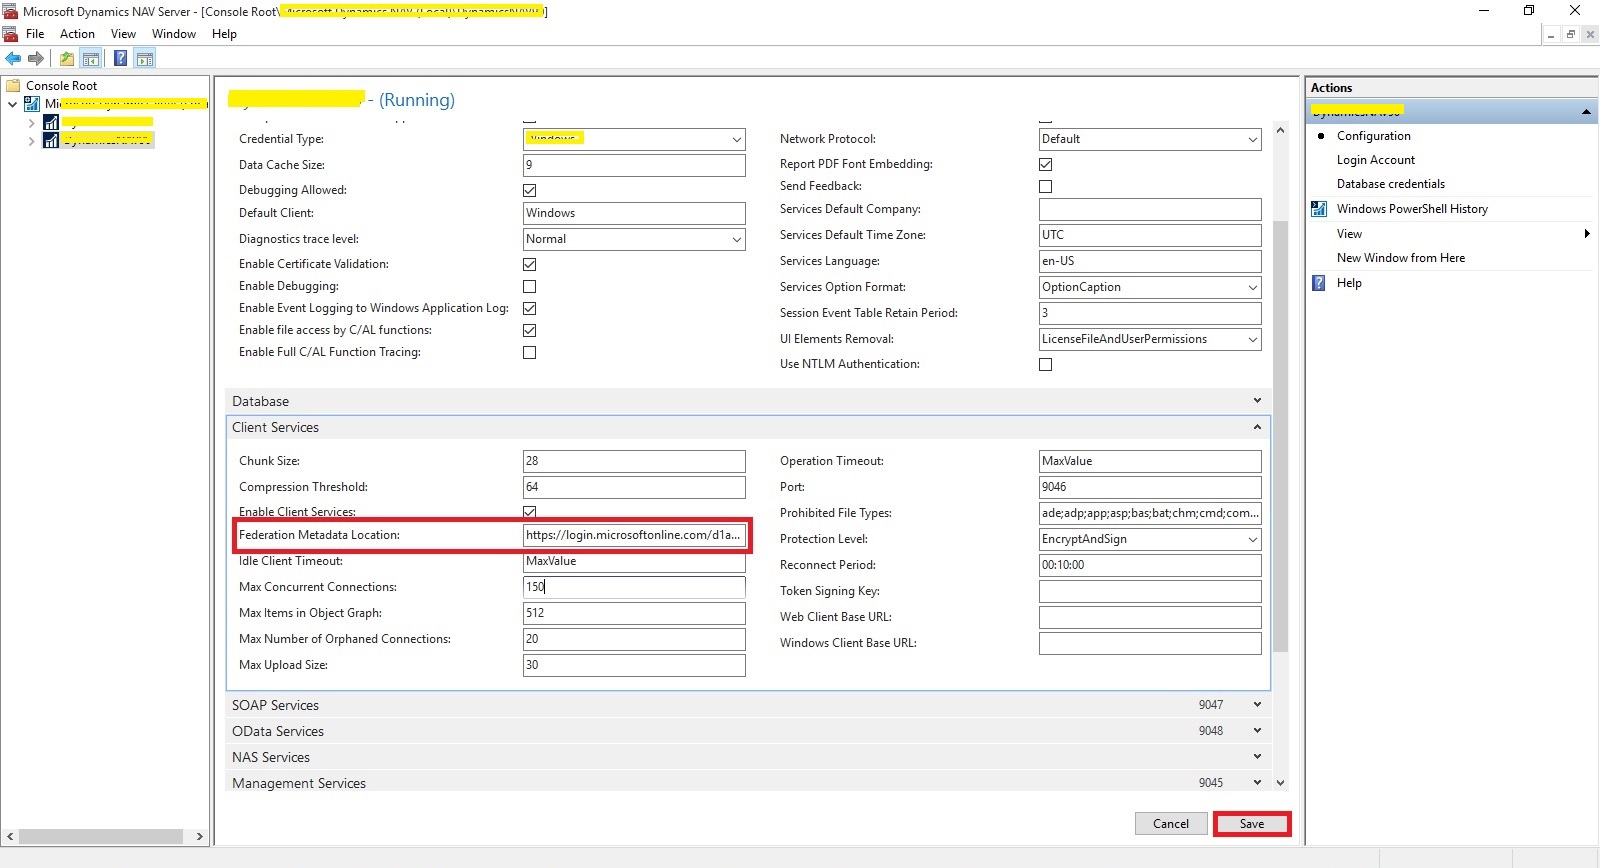
SingleSignOn-16

Restart you NAV Service.

SingleSignOn-17

Open the Web Client Folder under your IIS. Edit your Web.config file using prefered Editor.

SingleSignOn-18

Enter you Client Service Credentials as AccessControlService.
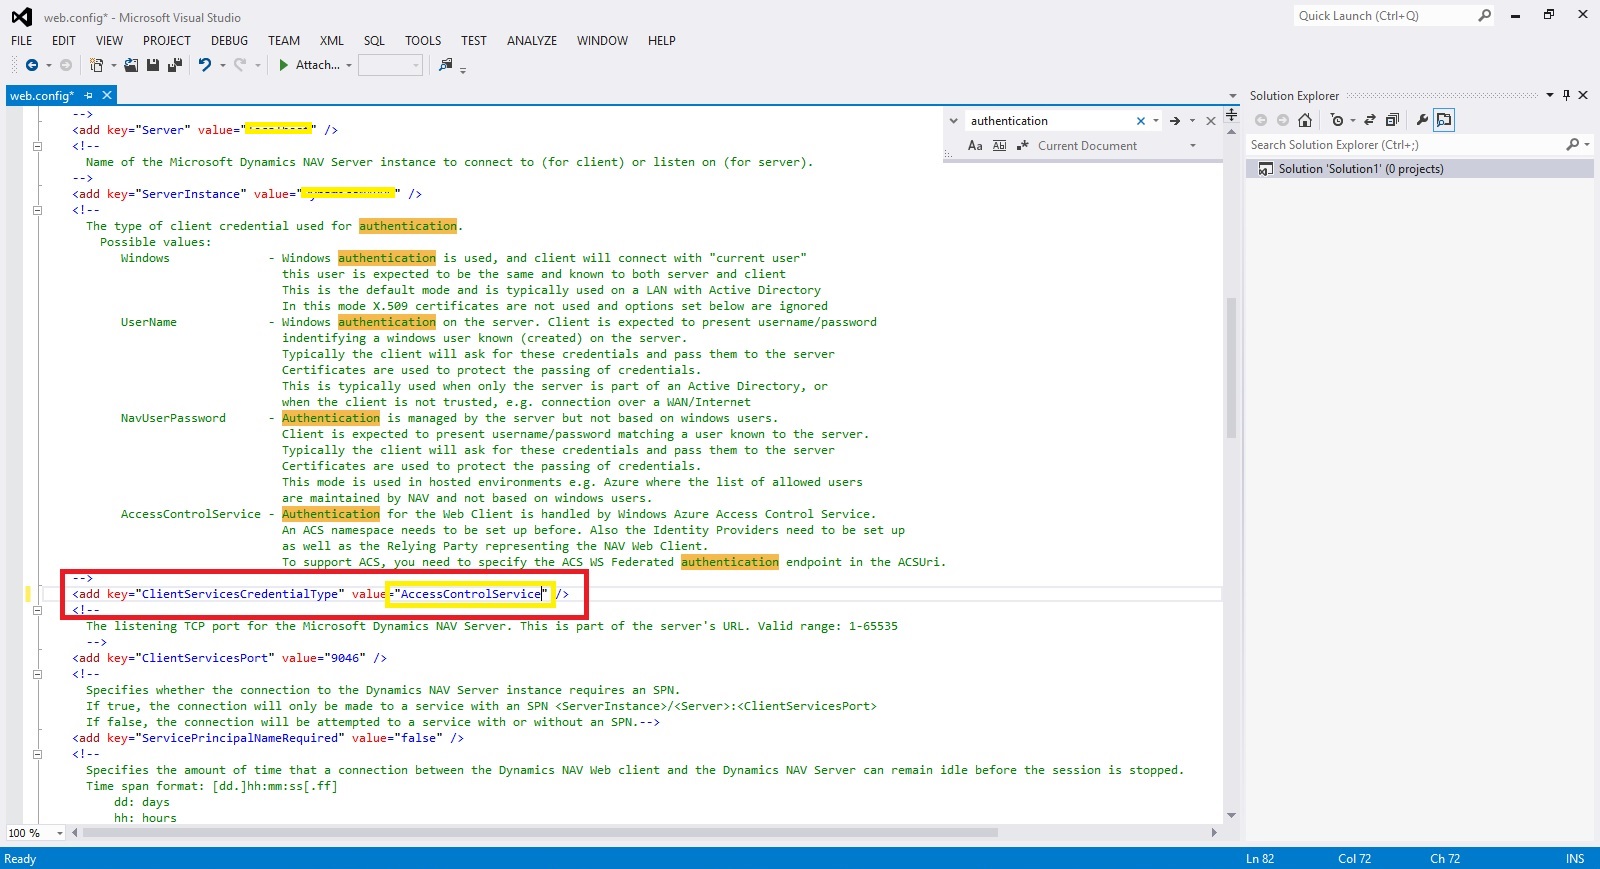
SingleSignOn-19

Change value of ACS URI as below. You have full explaination of same in the file itself.
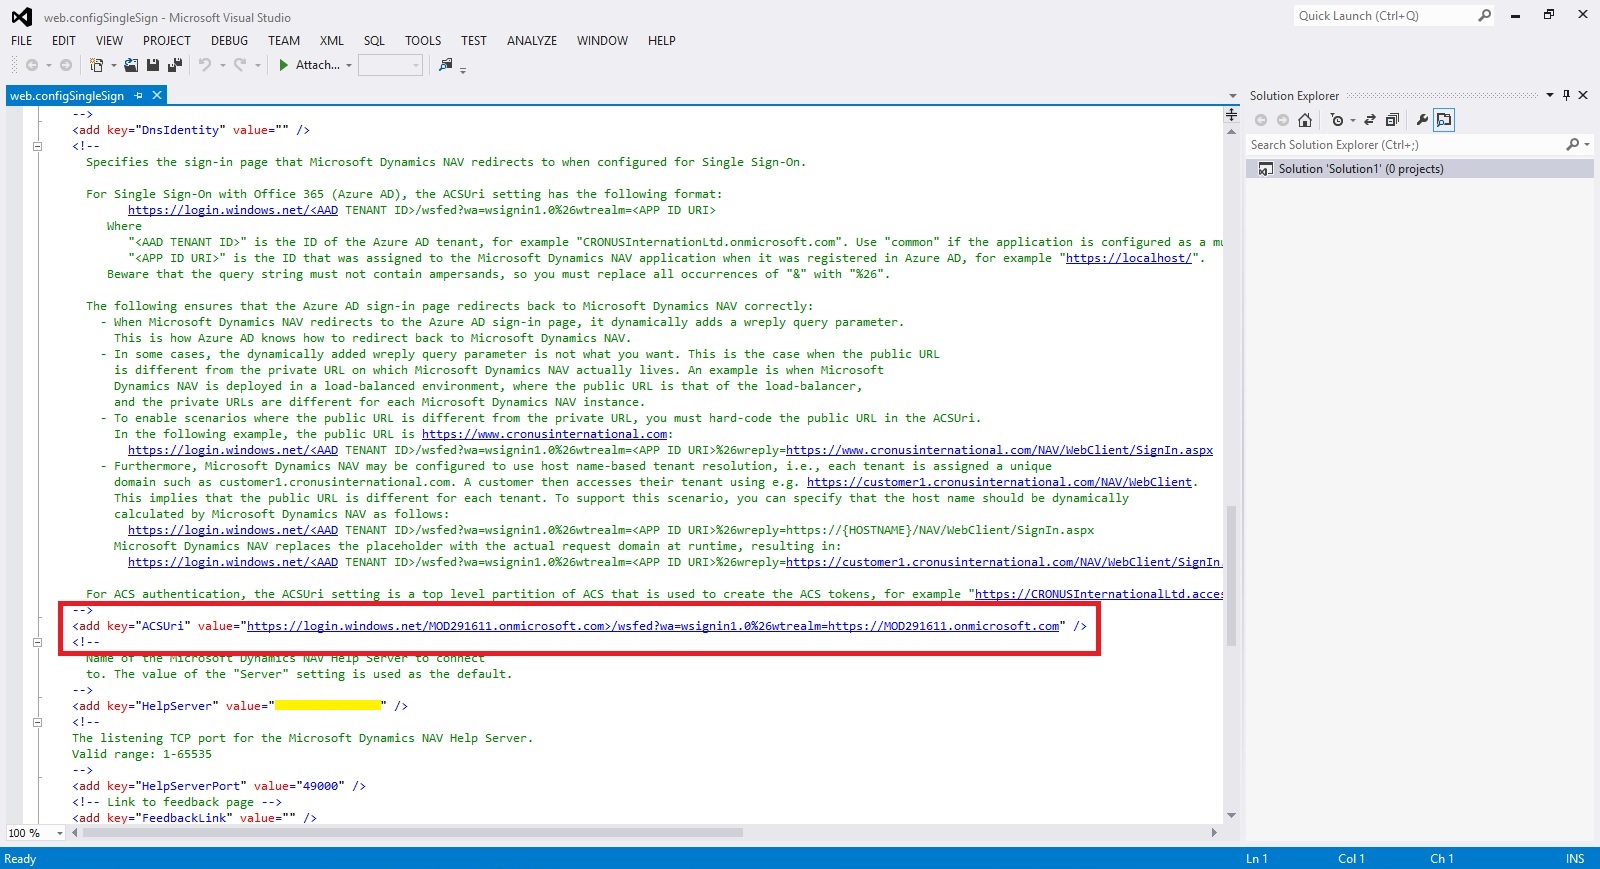
SingleSignOn-20

Thats all, Now you open your web client and you will be redirected to Office 365 Login Page, enter your valid office 365 e-mail user id and password you will be authenticated and Web Client is opened.

Thats all for today, I will come up with moredetails in my upcoming posts.

Till then keep exploring and learning.


Saturday, 30 April 2016

Assisted Setup (Office Add-Ins) in Madeira

In this post we will discuss about how to setup Office Add-Ins.

Select Assisted Setup & Tasks from the ribbon of Action Tab.

SetupOfficeAddIn-1

Select Setup Office Add-Ins from the list.

SetupOfficeAddIn-2

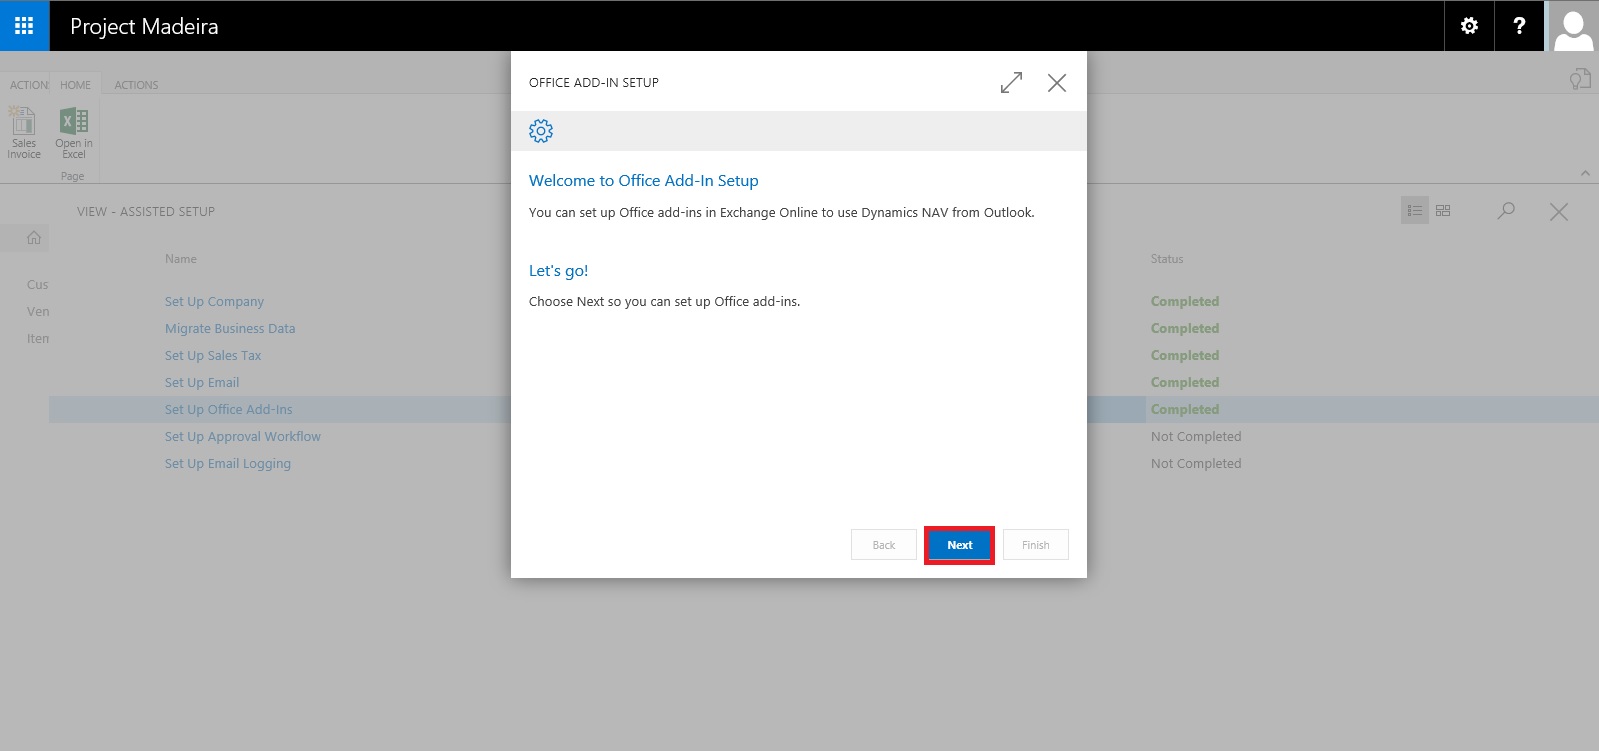
Click on Next Button on Welcome Screen.

SetupOfficeAddIn-3

Select Setup for (Organization or you only) and click on Next Button.

SetupOfficeAddIn-4

Enter your E-mail id and Password, click on Next to continue with next step.

SetupOfficeAddIn-5

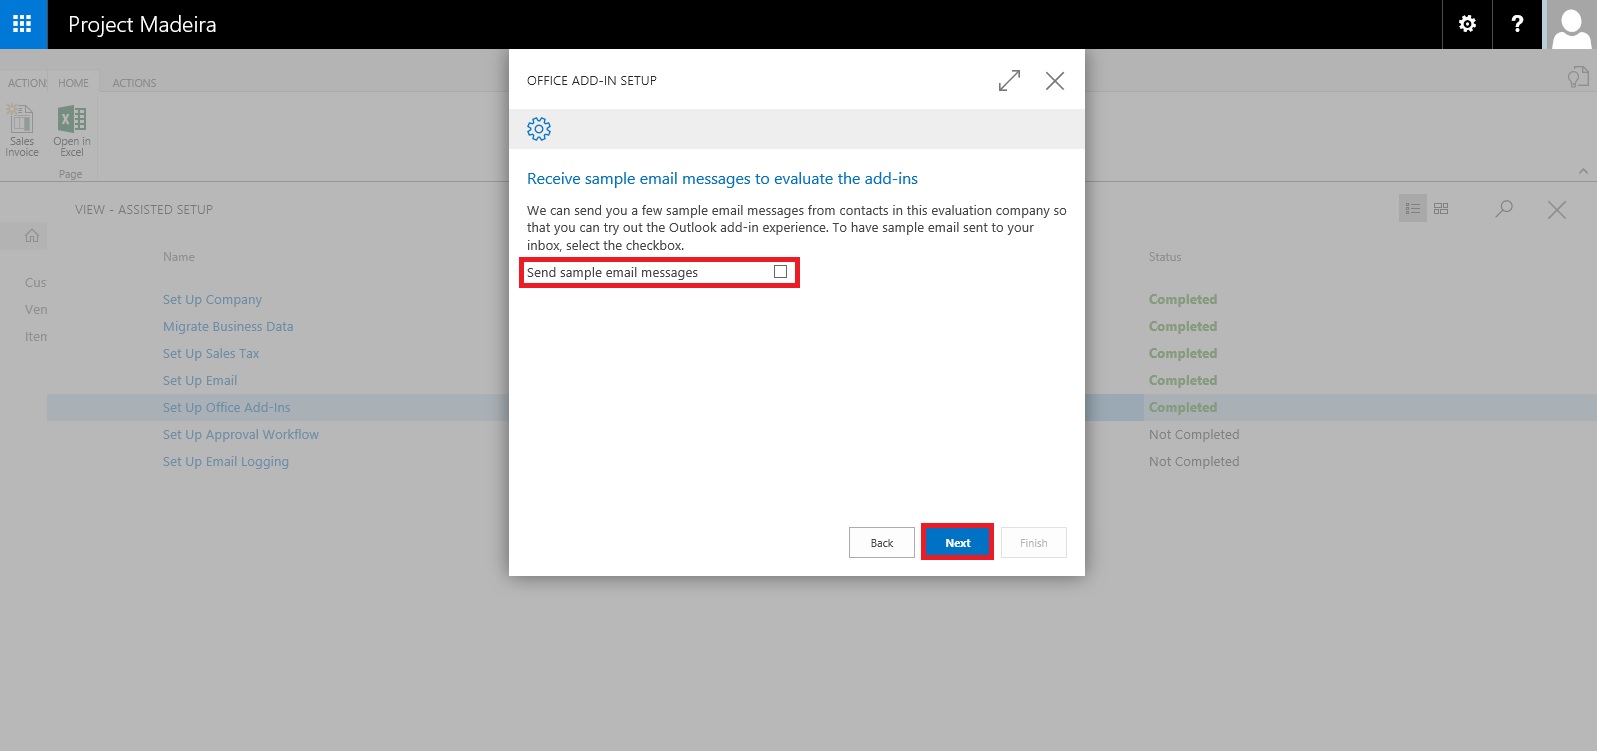
If you wish to receive few sample mails in your Mail box click on the check box or leave it blank, click on Next Button.

SetupOfficeAddIn-6

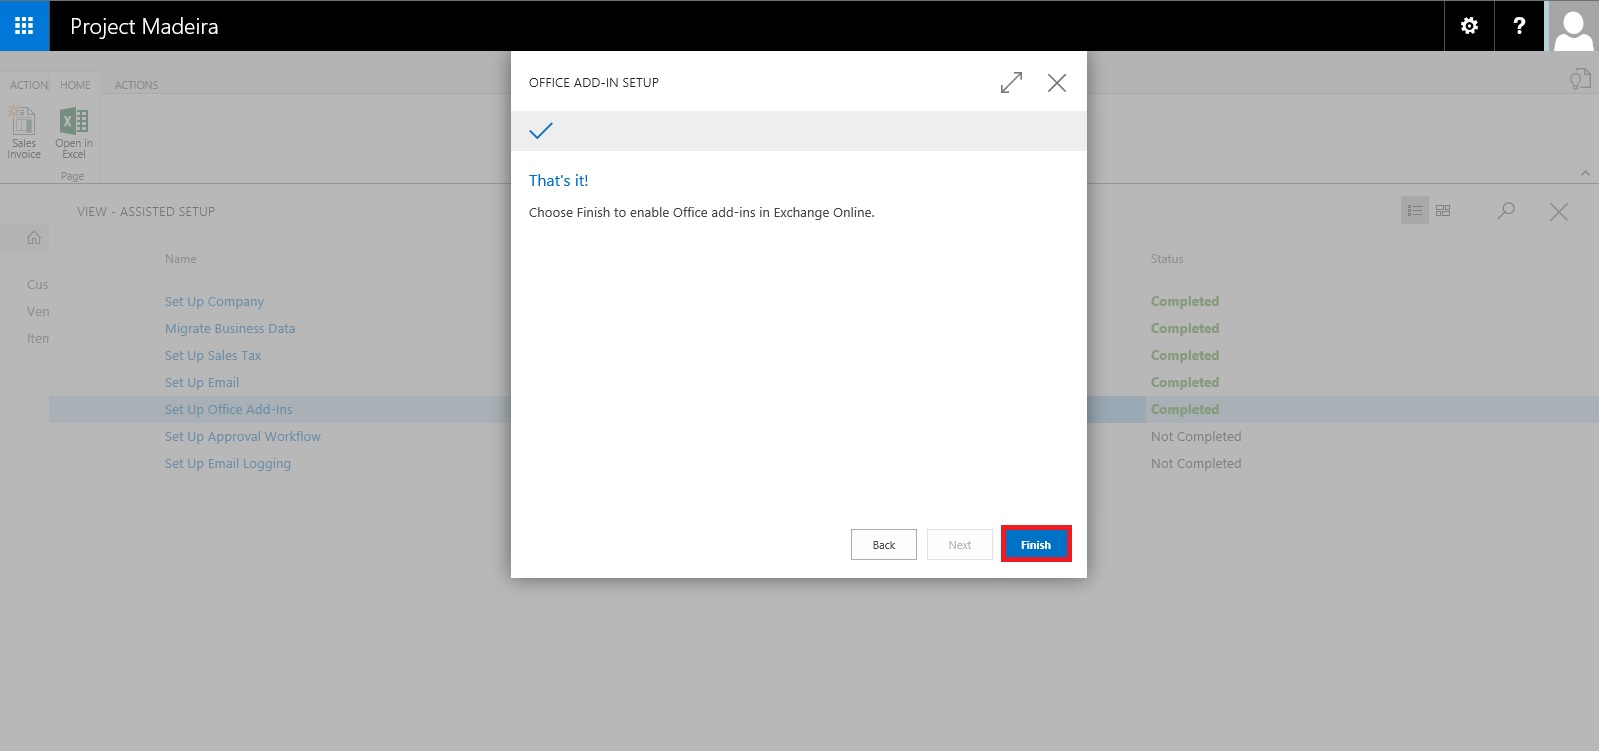
That's it. click on Finish to complete the setup.

SetupOfficeAddIn-7

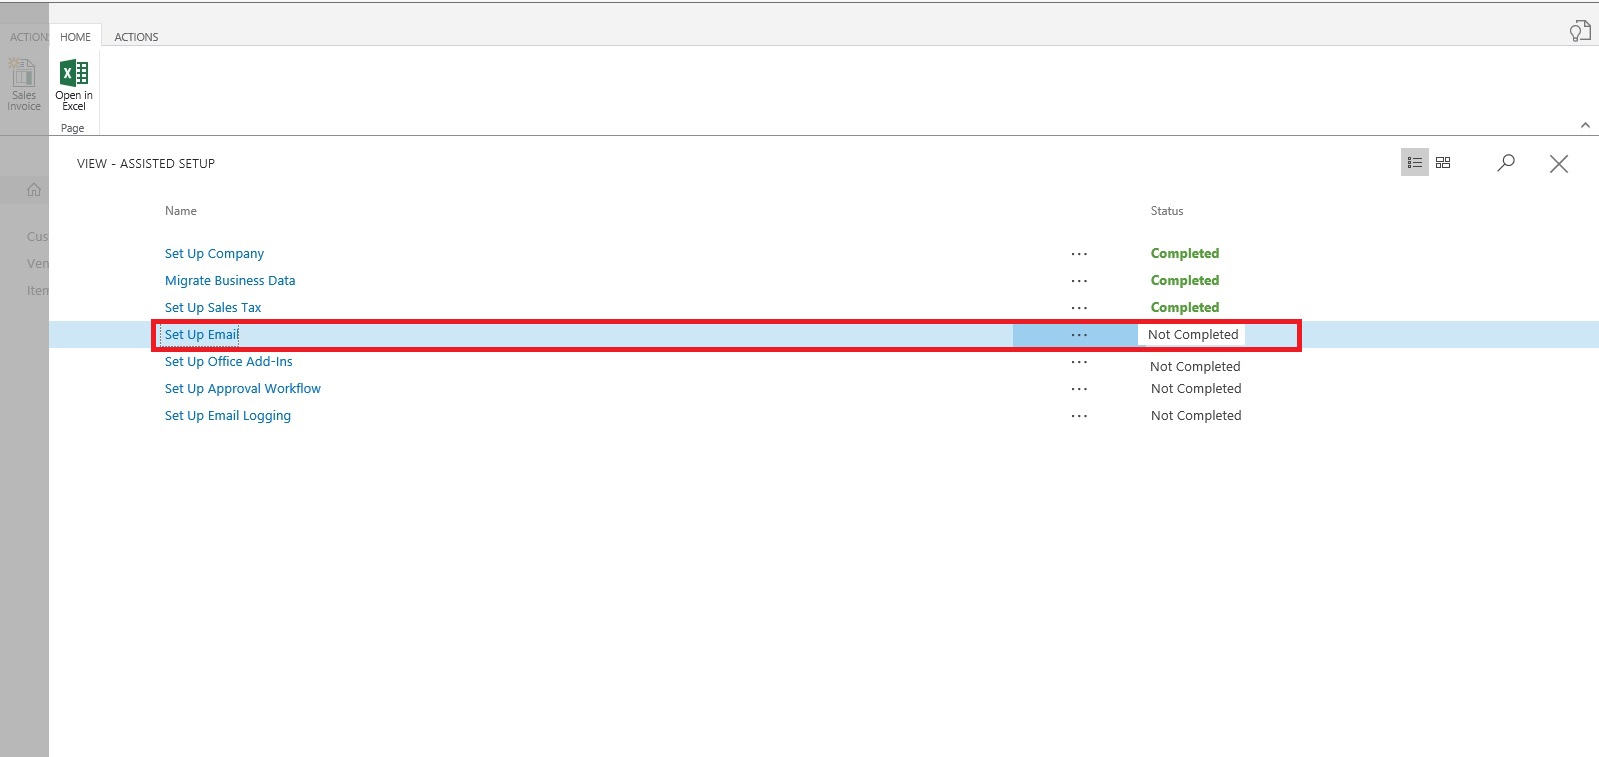
SetupOfficeAddIn-8

That's all for this post.

Will come with more details in my upcoming posts.

Till then keep exploring & learning.


Assisted Setup (Email) in Madeira

In this post we will discuss how to setup Email.

Its very easy and single user intervention required.

SetupEmail-1

From Action Tab click on Assisted Setup & Task from the ribbon.

SetupEmail-2

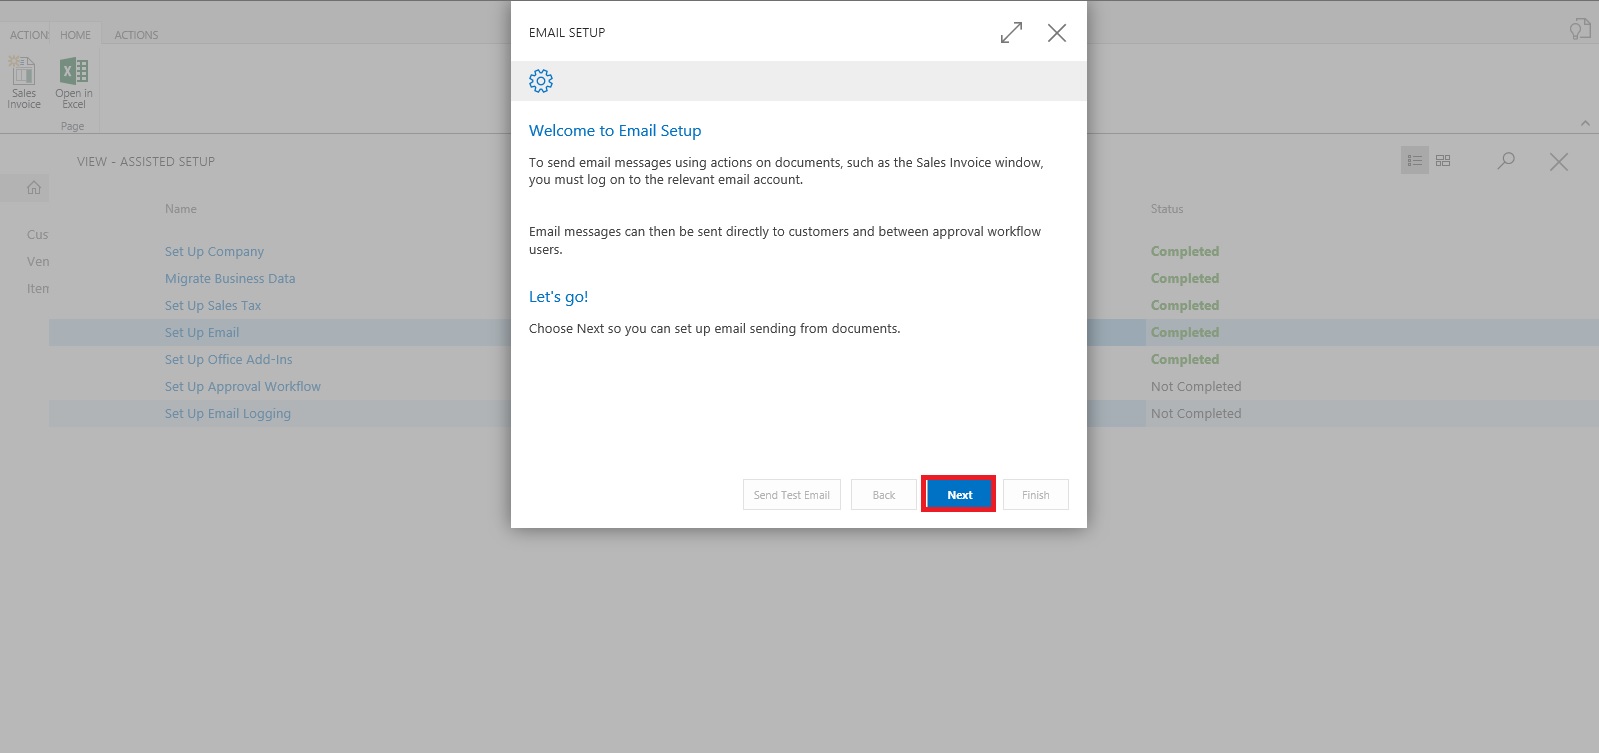
On Welcome screen click on Next Button.

SetupEmail-3

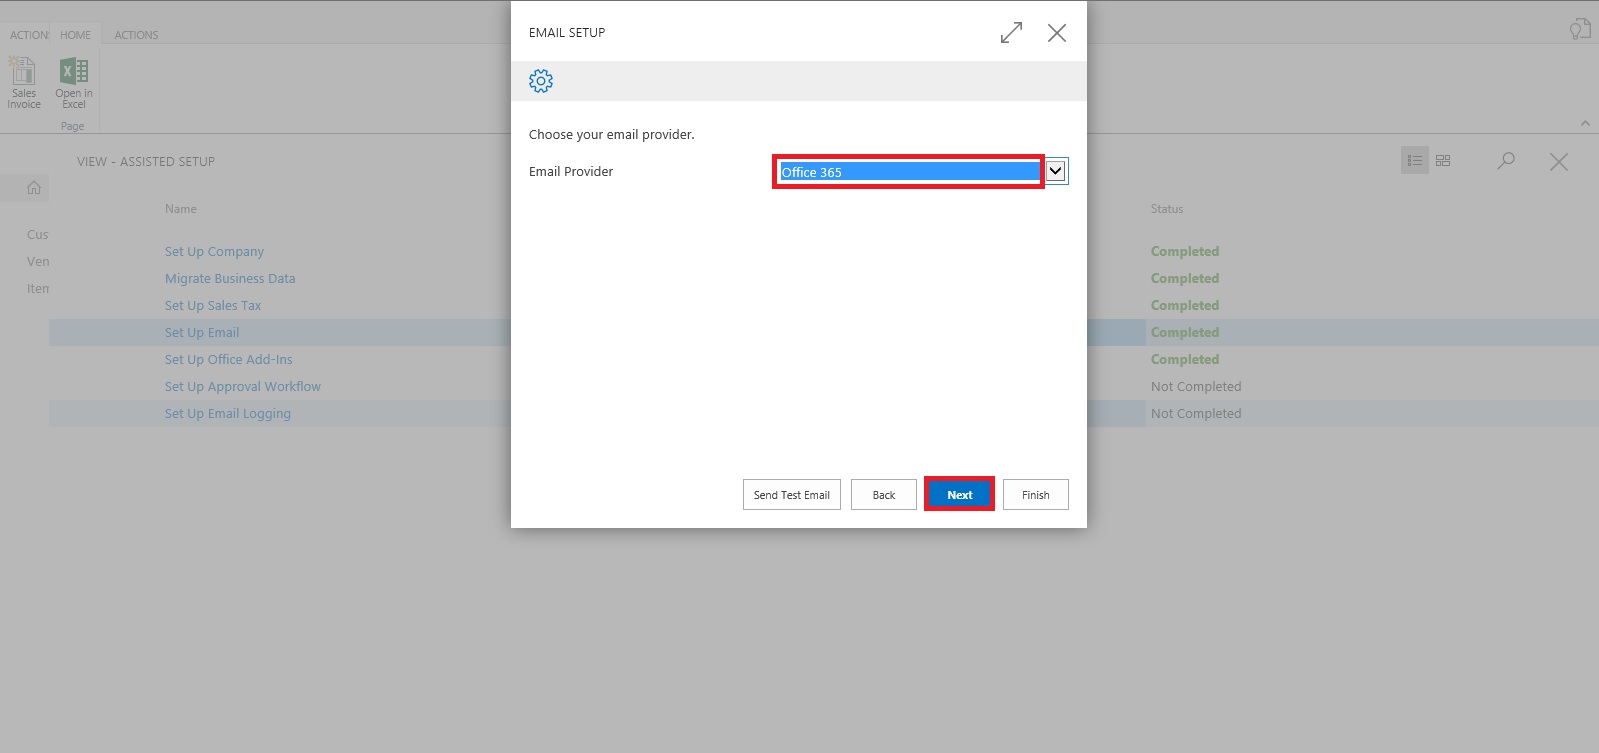
Select the Email Provider and click on Next to continue.

SetupEmail-4

Enter your Email id and password, click on Next Button.

SetupEmail-5

That's it, click on Finish.

SetupEmail-6


SetupEmail-7


Just required to enter Email id and password, setup is done.

Will come with other option in my next post.

Till then keep exploring and learning.


Tuesday, 7 July 2015

OFFICE 365 INTEGRATION IN NAV 2015 – Word/Excel/SharePoint

If you have signed up for Office 365, Microsoft Dynamics NAV can use this service to open and save documents. For example, when you export a report to Excel and save it on Office 365, Microsoft Dynamics NAV can use Excel Online that your Office 365 account uses to open the document.

Before you can use Office 365 and SharePoint Online with Microsoft Dynamics NAV, you must configure the service in Microsoft Dynamics NAV.

If you want to use the same folder to store temporary files for all users, you must specify a shared user account. Otherwise, each user's temporary files are stored in their personal document repository on the SharePoint site.

Let us first understand the details before we start with Setup for SharePoint Shared Folder.

Your IT can help you configuring and assigning suitable rights to access. Although you can explore and help yourself. Since we are concentrating on Navision so we will not go in details for Share point.

Just to make understand I will be only covering top level information.

In this example I assume you already have up and running site for Document Sharing in SharePoint 2013 – 365 Online.

Here I am logging in to Office 365 – Online registered by me for demo purpose. You can register for free trial to explore the same in more details.

SharePoint-1

My Opening screen looks as one below.

SharePoint-2

I select SharePoint Site to continue. Below is my SharePoint Opening screen. I will select my site which I have created for this demo and file sharing with other users in my organization.

SharePoint-3

Let us understand different parts which will help configuring our Online Document Storage Configuration in Navision 2015.

SharePoint-4

Here I am in my Folder at Lower level where all my files will be stored and shared with my other colleges.

SharePoint-5

Open “Online Document Storage Configuration” from path shown in below screen.

SharePoint-6


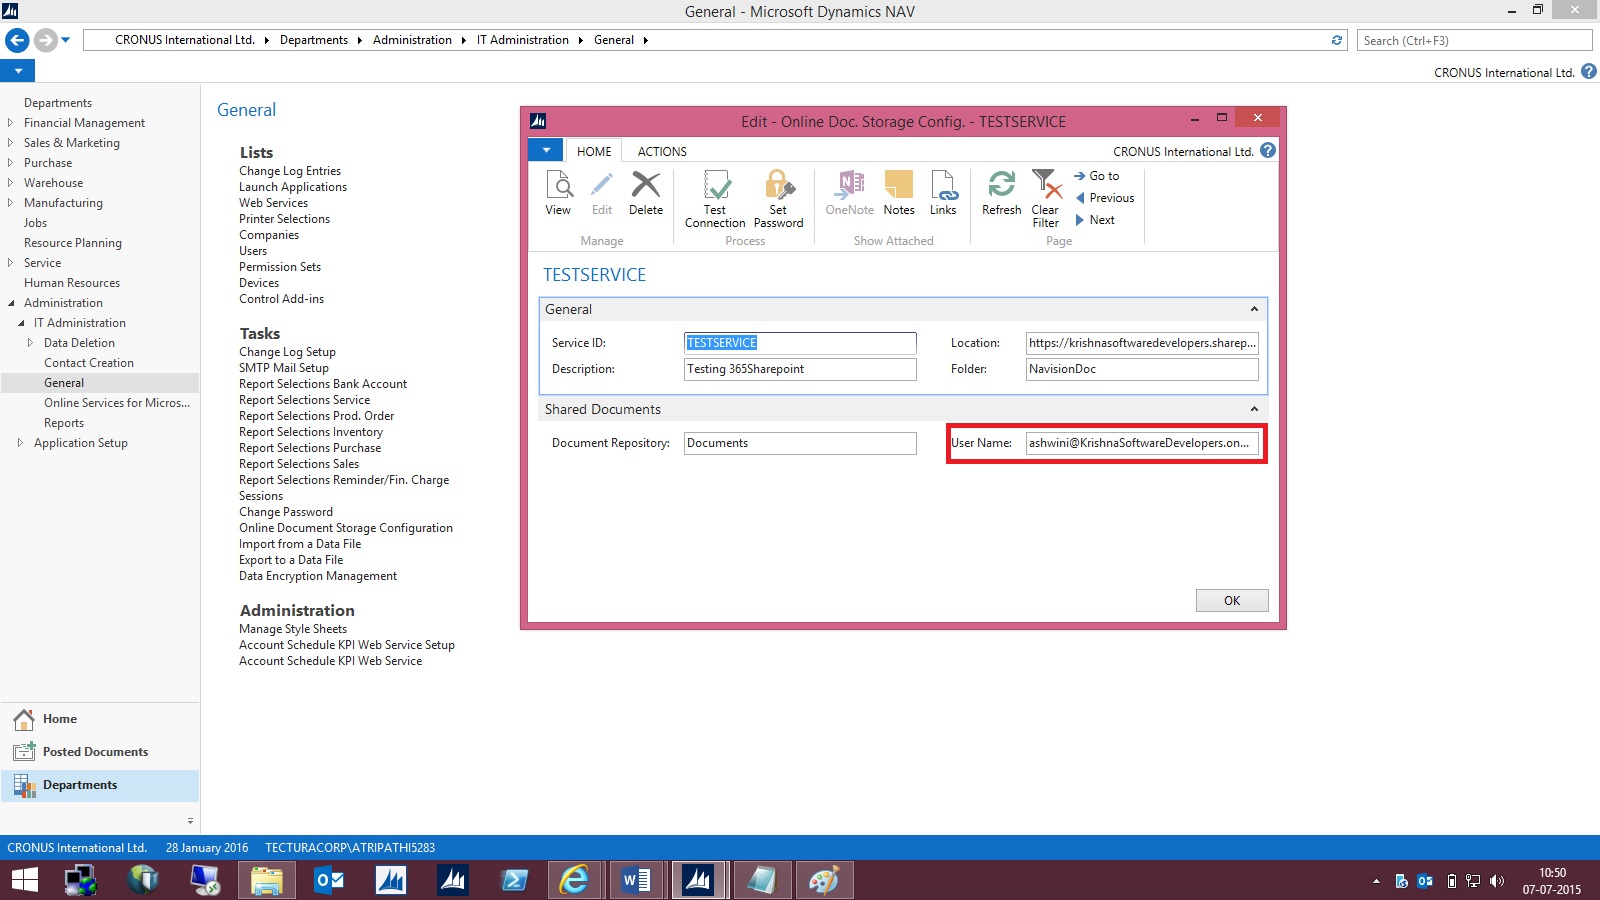
Specify the Service Name of your choice or use Default provided by the System.


Fill the Location to your SharePoint site: Specifies the unified resource indicator (URI) for your site on SharePoint Online, such as [https://krishnasoftwaredevelopers.sharepoint.com/MS_Nav_Documents] in my case I will use this.


Fill the Folder field which specifies the folder in the document repository for this document service that you want documents to be stored in.


This field is required. If you have not already created a subfolder in your document repository, you must create one now, and then specify it in the Folder field.


The Document Repository field includes the top-level folder in the document repository that your document service provides. The Folder field specifies a subfolder so that you can keep business documents and drafts separate from pictures and other shared documents.


For example, if the Document Repository field is set to [Documents], the Folder field can be set to [NavisionDoc] as per my example discussed above.


When a user exports data to Excel, for example, Microsoft Dynamics NAV saves the temporary file at the location that is specified in the Document Repository and Folder fields, such as


[https://krishnasoftwaredevelopers.sharepoint.com/MS_Nav_Documents/Documents/NavisionDoc]


Fill Document Repository field: Specifies the name of the document library, such as [Document]


Fill User Name field: Specifies the account that Microsoft Dynamics NAV Server must use to log on to the document service.


I would recommend that you specify a different user name than the administrative account. This helps reduce the risk of users accessing administrative settings, for example. For example, if your user name as an administrator is Administrator@KrishnaSoftwareDevelopers.onmicrosoft.com,


then the user name for Microsoft Dynamics NAV Server can be Nav@KrishnaSoftwareDevelopers.onmicrosoft.com or any of the regular user names that you have created.

SharePoint-7


On the Actions tab, in the General group, choose Set Password.


In the window that appears, specify and confirm the password for the account    that you specified in the User Name field. Choose the OK button.


When you have set up the service, you can test whether that configuration is valid.


SharePoint-8


On the Actions tab, in the General group, choose Test Connection.


A message displays the result of the test.


SharePoint-9


The above message confirms we can now save documents on our SharePoint.


Let us check a sample as below:
Open the Document and Execute the report available.
While Running the Report I specify I want to Print with Microsoft Word.


SharePoint-10


Document will be generated and opened in Word - Office - 365. Temp file name is given to the file. Close the File as it is auto Saved by Office 365 Word Application.


SharePoint-11


Browse to your SharePoint Folder configured above, you will see the Word file is now available in this Folder.


SharePoint-12


Right Click on Name of the File and Rename with some meaning full Name as shown below.


SharePoint-13


Give the Name to the File and press Save Button.


SharePoint-14


Here is the File after Rename.


SharePoint-15


This way when ever you Print your document from Navision in Word or Excel it will get saved in this Folder.


By setting appropriate access rights you can share the files between you colleges in your Organization.

 Please check SharePoint stuffs with you admin or appropriate authority in your organization.