Showing posts with label Assisted. Show all posts

Saturday, 30 April 2016

Assisted Setup (Office Add-Ins) in Madeira

In this post we will discuss about how to setup Office Add-Ins.

Select Assisted Setup & Tasks from the ribbon of Action Tab.

SetupOfficeAddIn-1

Select Setup Office Add-Ins from the list.

SetupOfficeAddIn-2

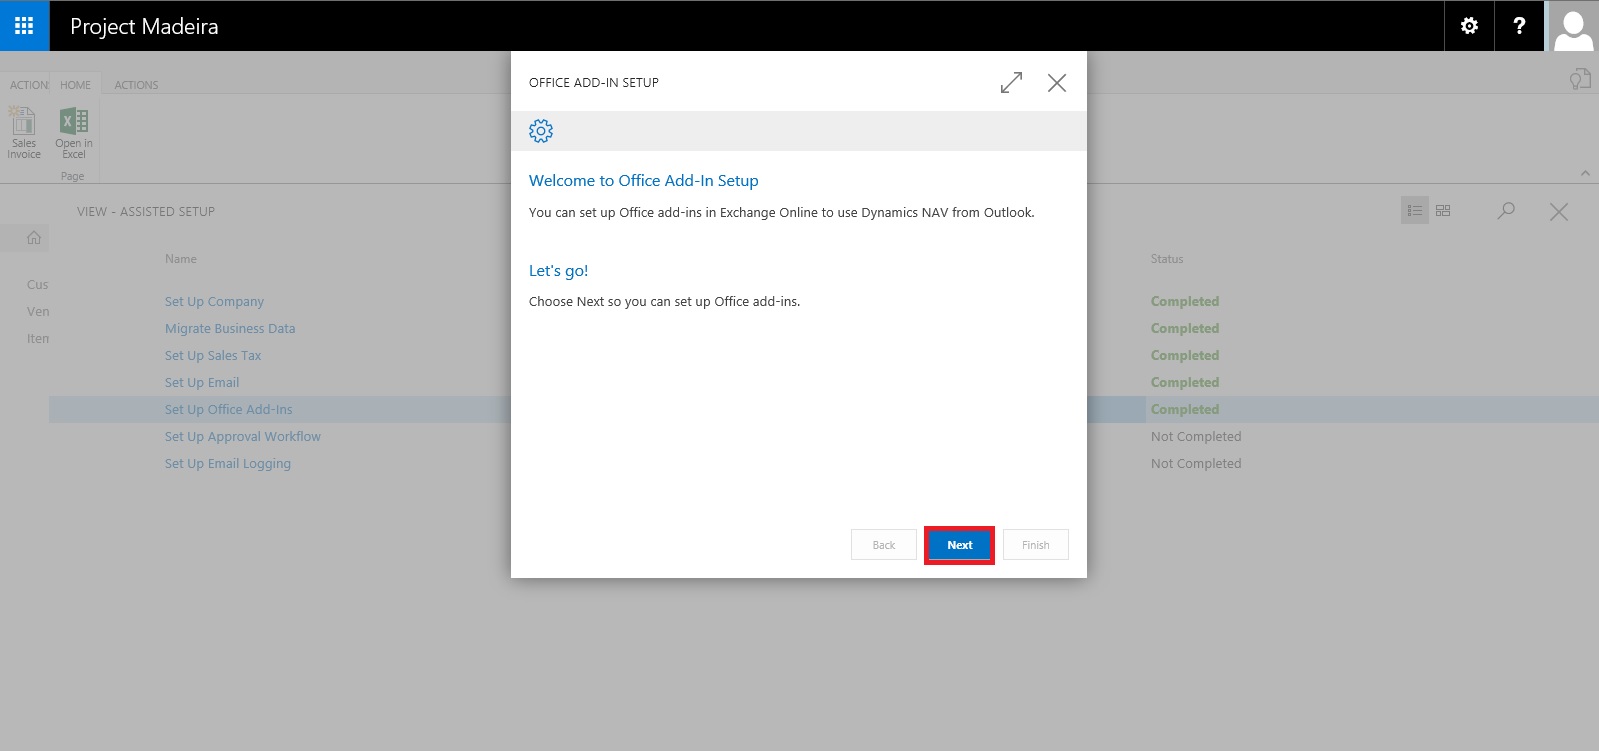
Click on Next Button on Welcome Screen.

SetupOfficeAddIn-3

Select Setup for (Organization or you only) and click on Next Button.

SetupOfficeAddIn-4

Enter your E-mail id and Password, click on Next to continue with next step.

SetupOfficeAddIn-5

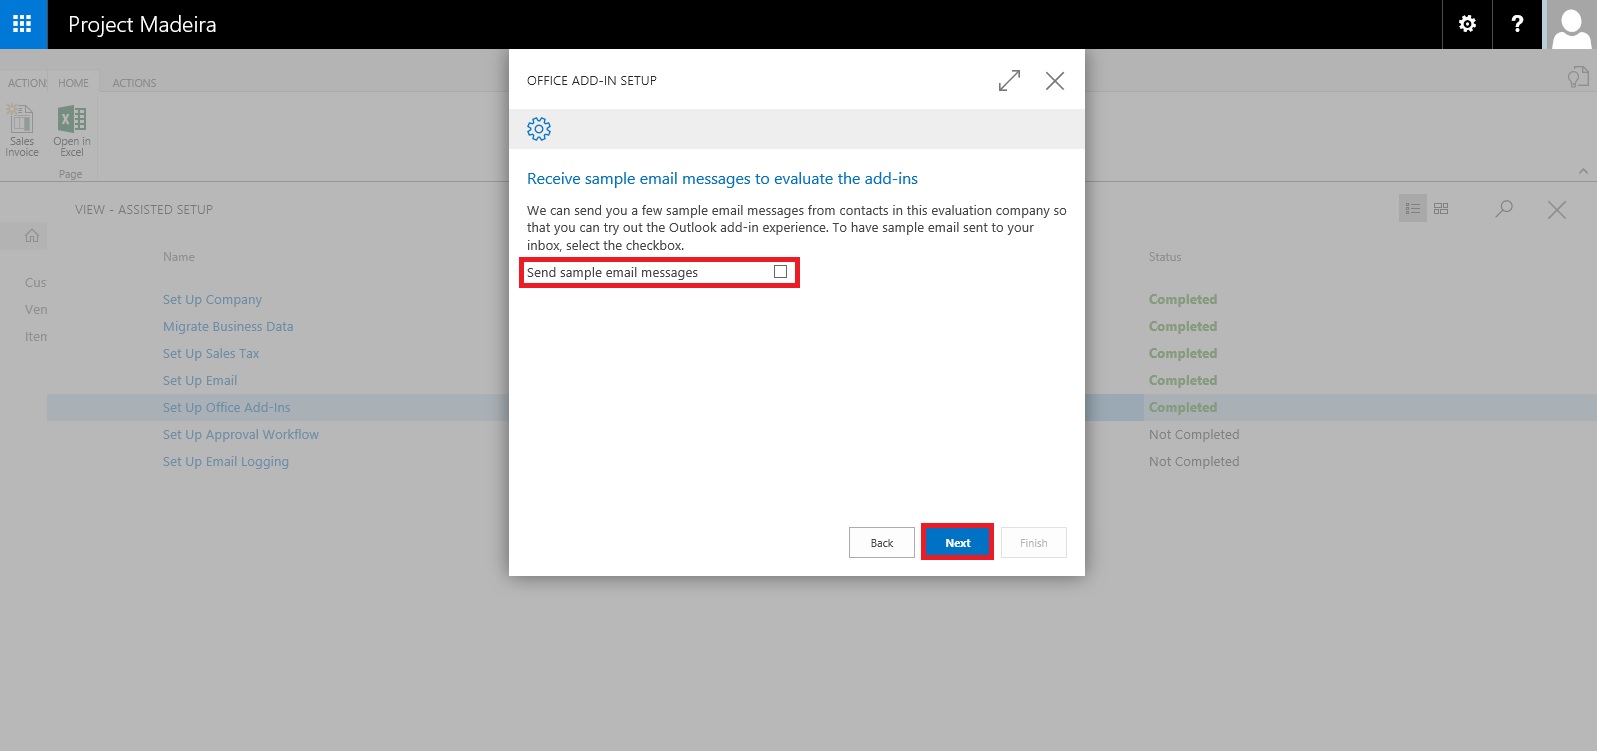
If you wish to receive few sample mails in your Mail box click on the check box or leave it blank, click on Next Button.

SetupOfficeAddIn-6

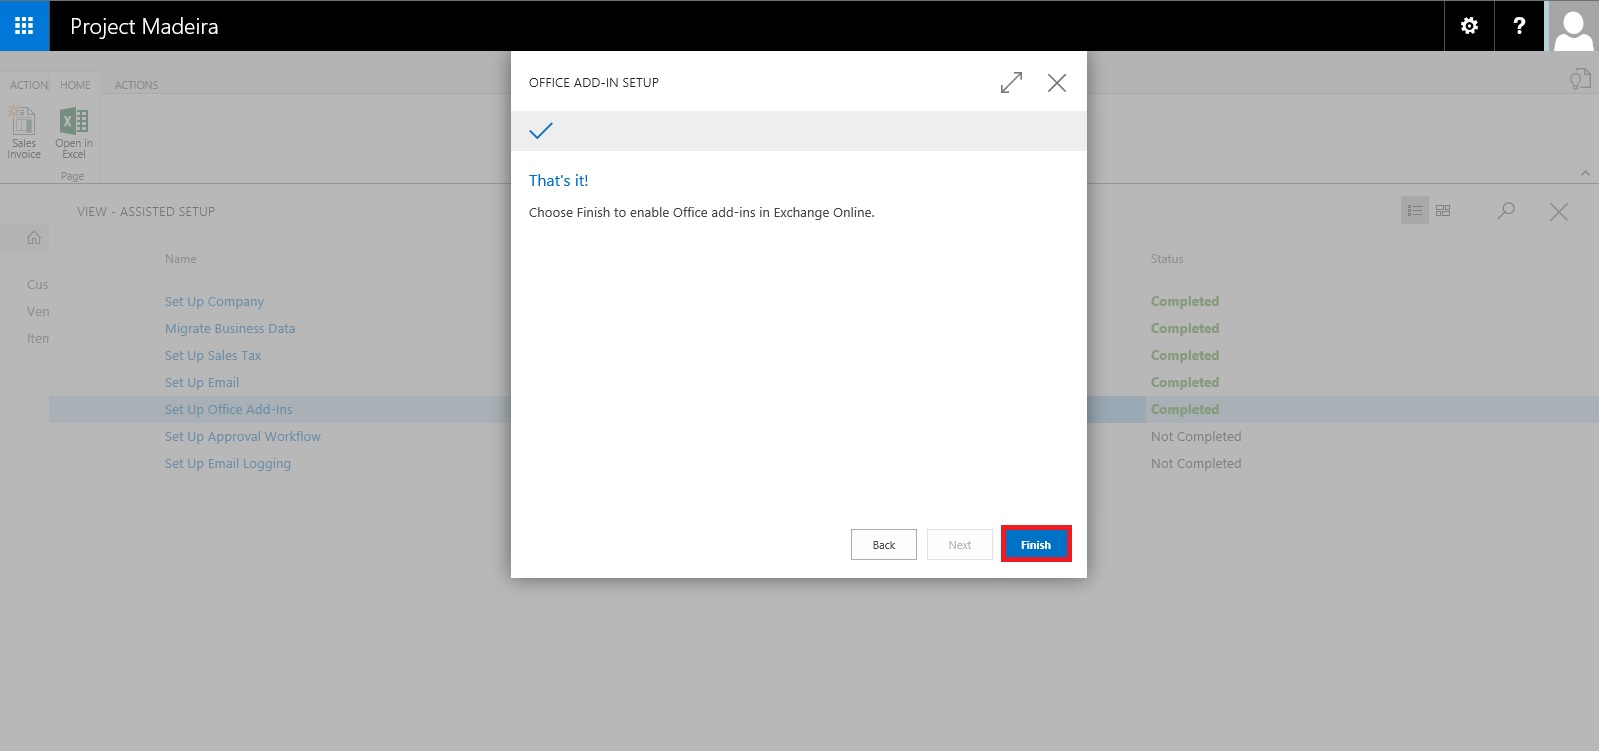
That's it. click on Finish to complete the setup.

SetupOfficeAddIn-7

SetupOfficeAddIn-8

That's all for this post.

Will come with more details in my upcoming posts.

Till then keep exploring & learning.


Assisted Setup (Email) in Madeira

In this post we will discuss how to setup Email.

Its very easy and single user intervention required.

SetupEmail-1

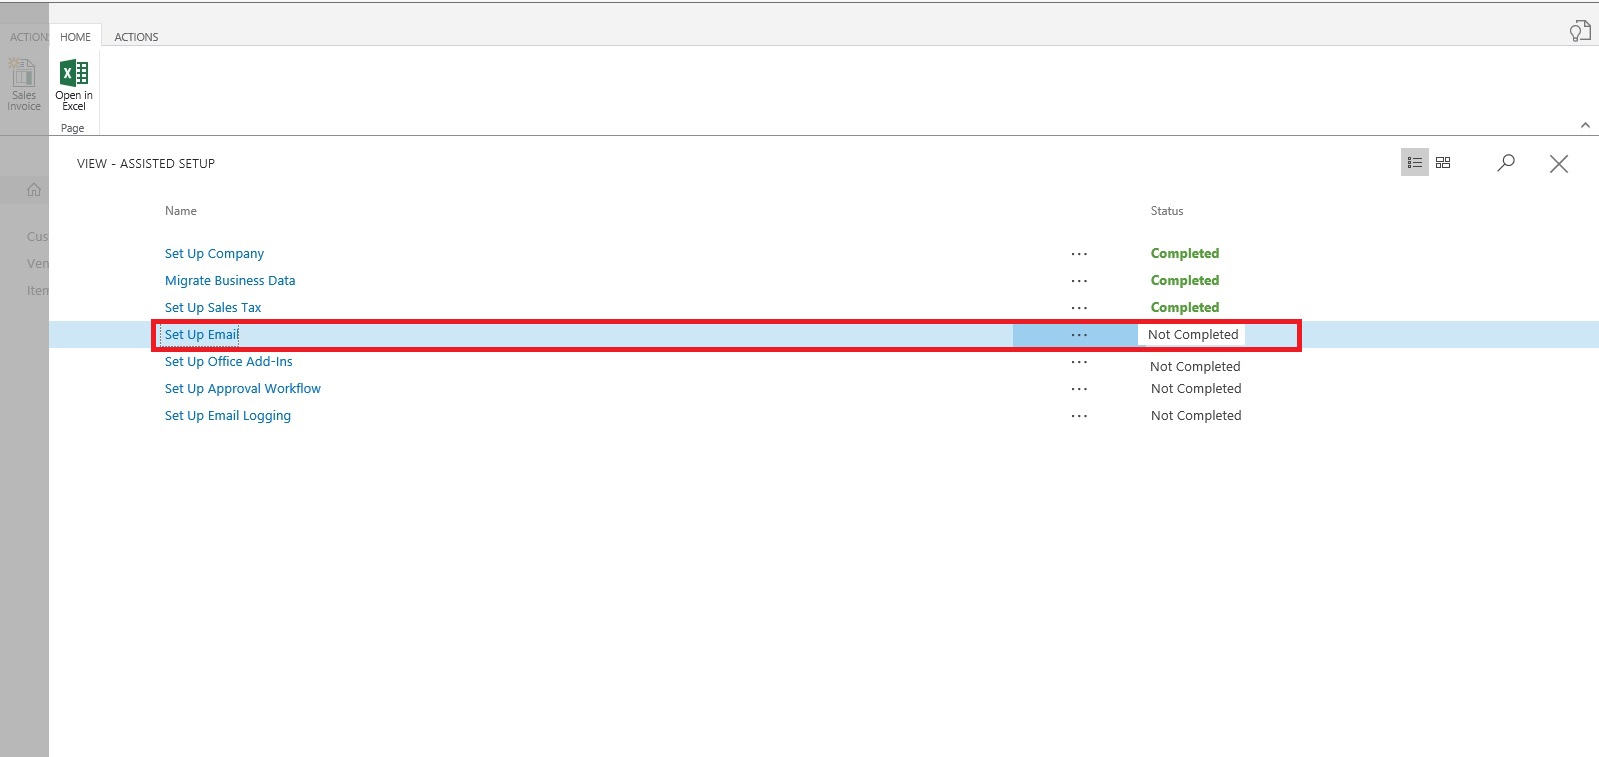
From Action Tab click on Assisted Setup & Task from the ribbon.

SetupEmail-2

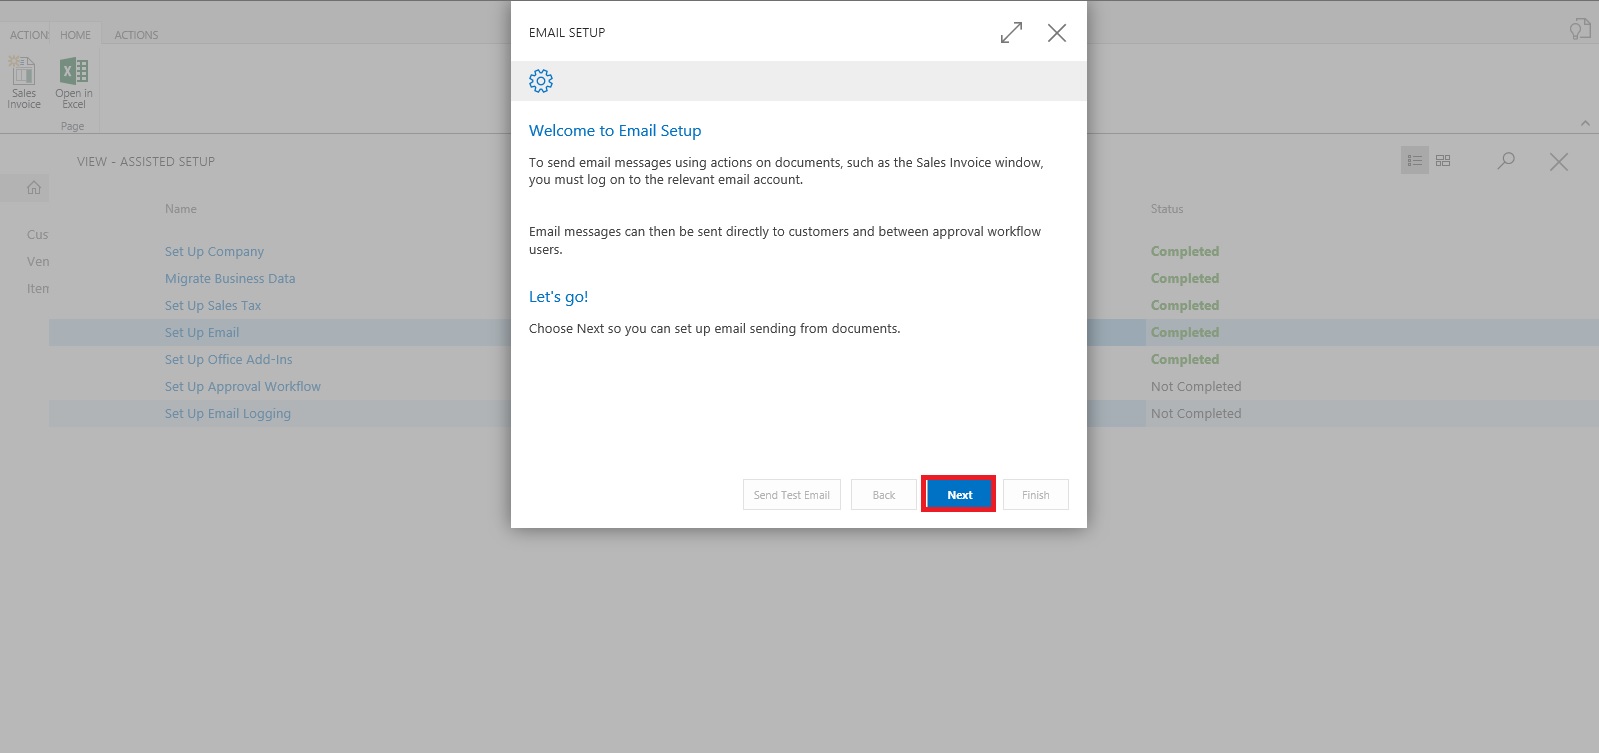
On Welcome screen click on Next Button.

SetupEmail-3

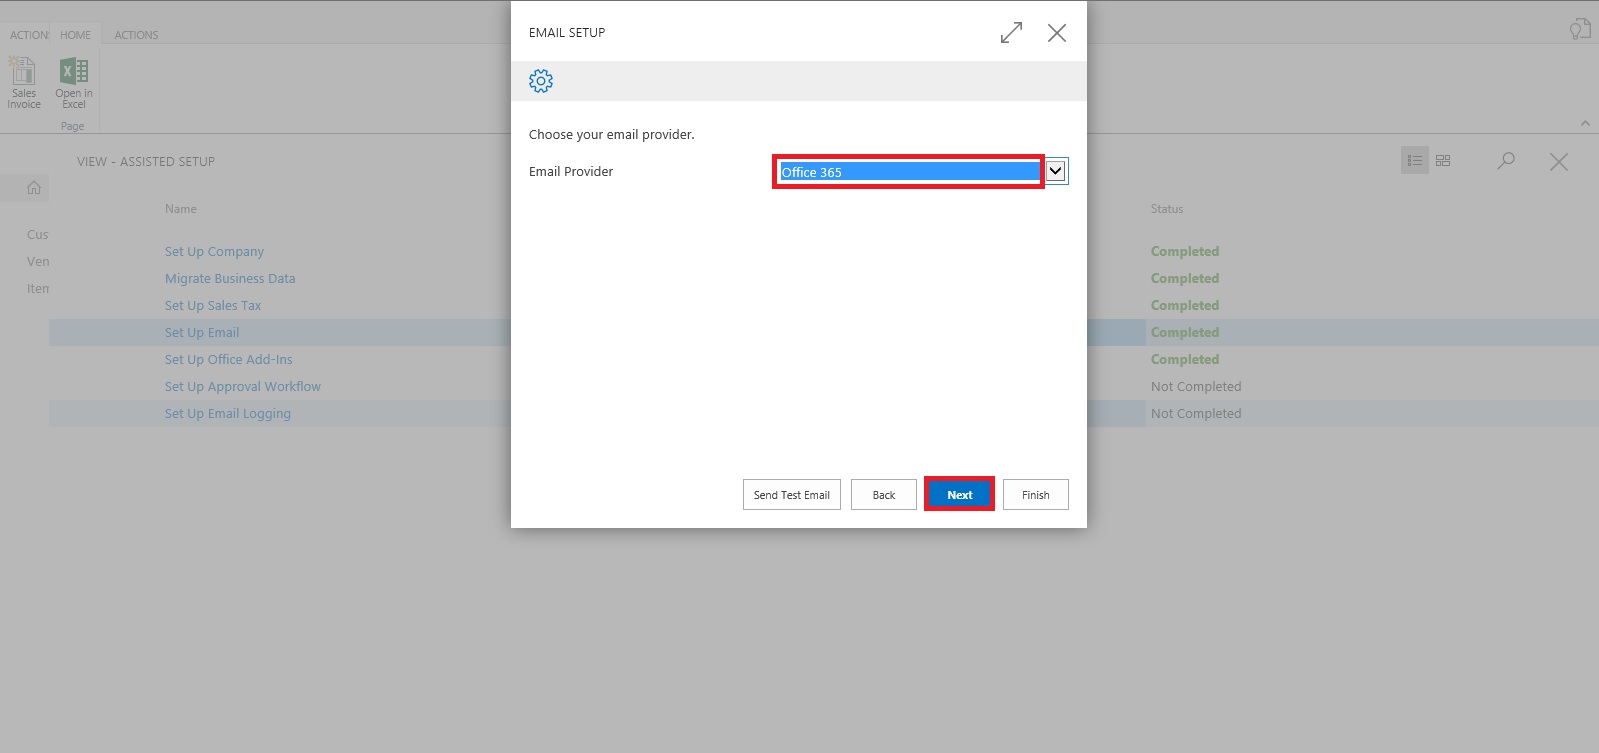
Select the Email Provider and click on Next to continue.

SetupEmail-4

Enter your Email id and password, click on Next Button.

SetupEmail-5

That's it, click on Finish.

SetupEmail-6


SetupEmail-7


Just required to enter Email id and password, setup is done.

Will come with other option in my next post.

Till then keep exploring and learning.


Assisted Setup (Sales Tax) – in Madeira

Today we will see how Sales Tax setup is done in Madeira. Since preview is limited to US so many of the information may not apply or some different options will be available for other countries. 

Whatsoever may be in final release we will see at that time when finally it will be released. Lets look what is available in this preview.

Login to Madeira using your credentials.

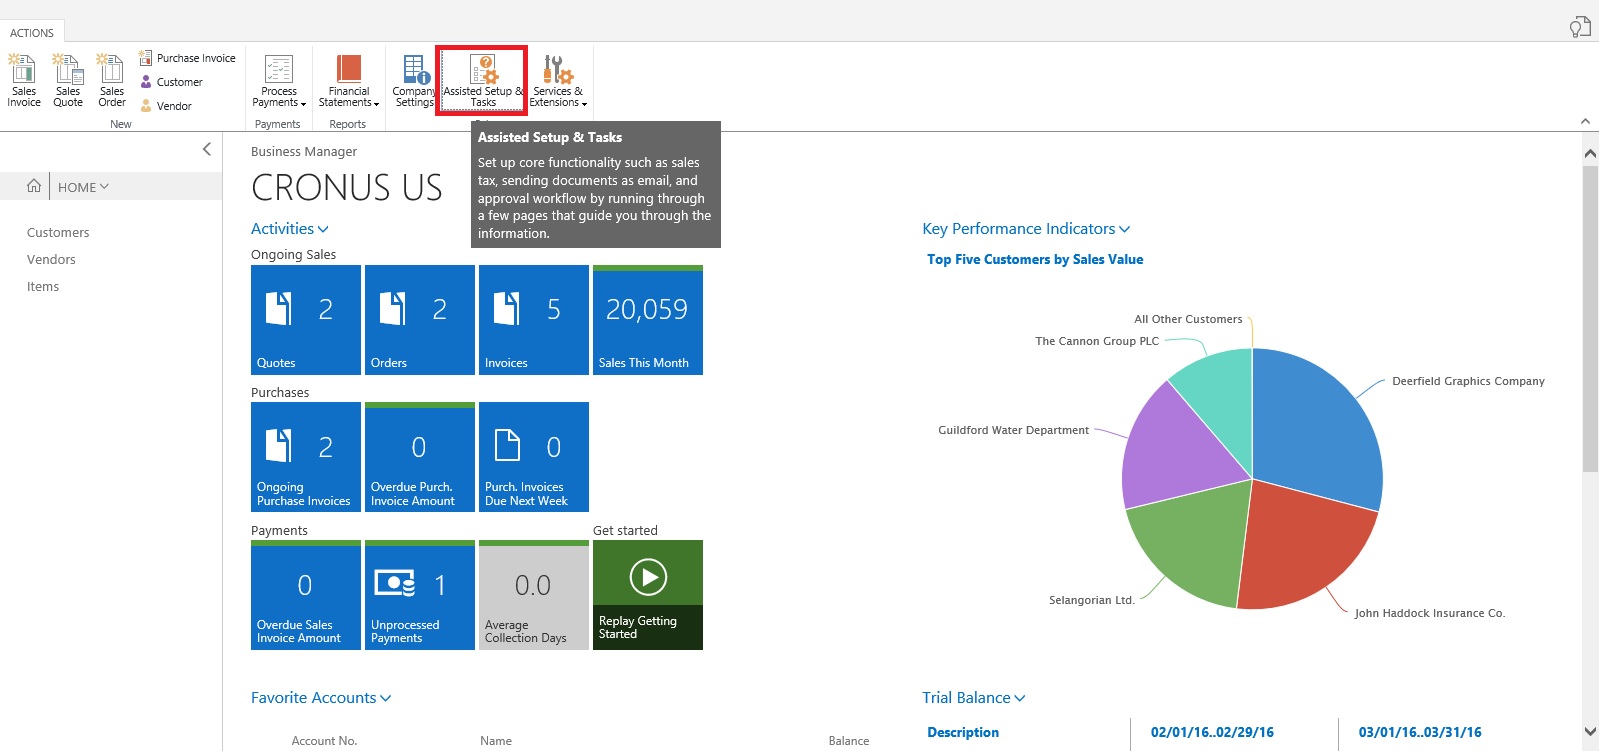
From Action Tab on landing/ Role Center Page on Ribbon click on Assisted Setup & Task.

SalesTax-1

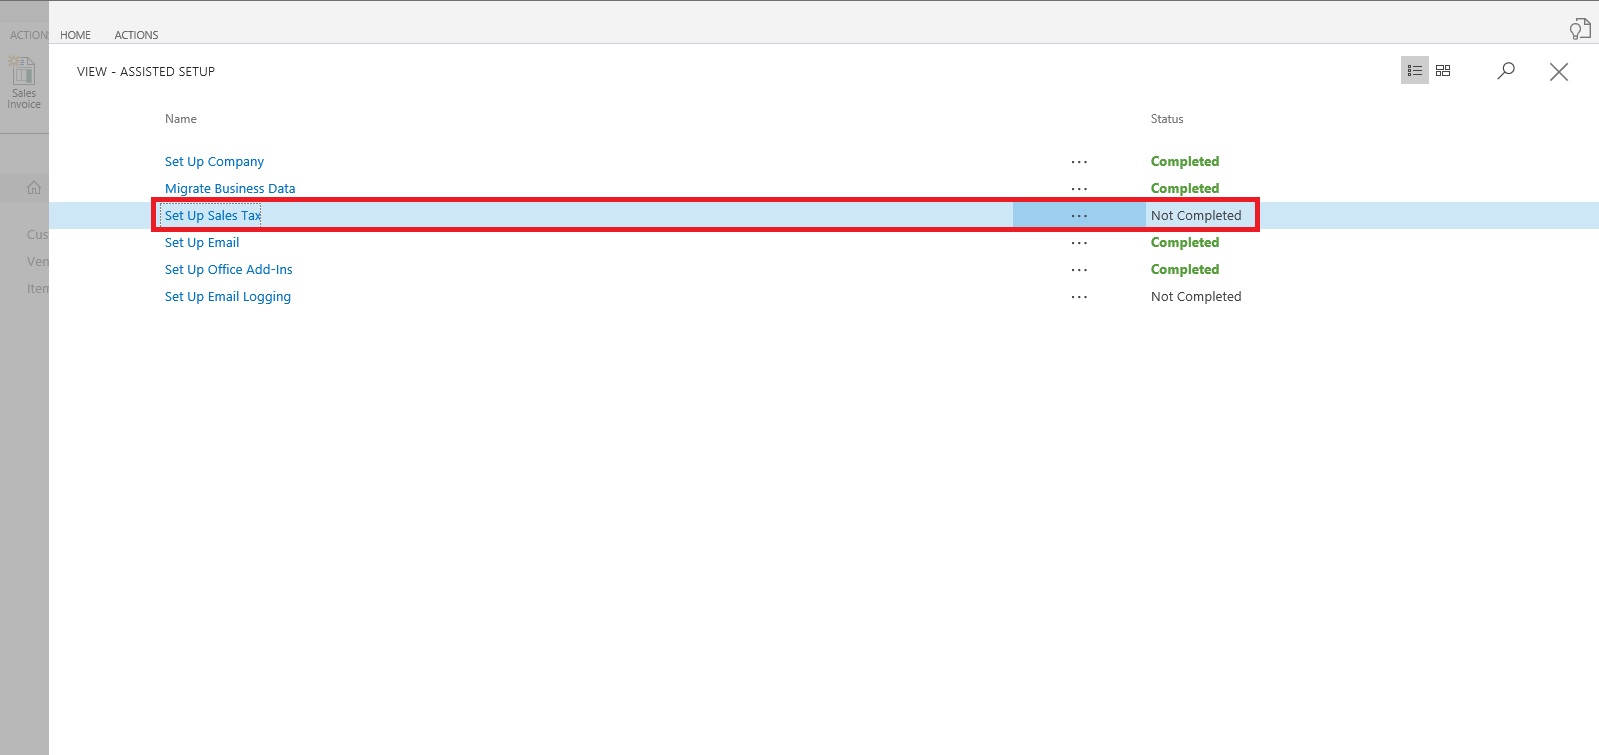
List with available options page is opened.

SalesTax-2

Select Setup Sales Tax to continue.

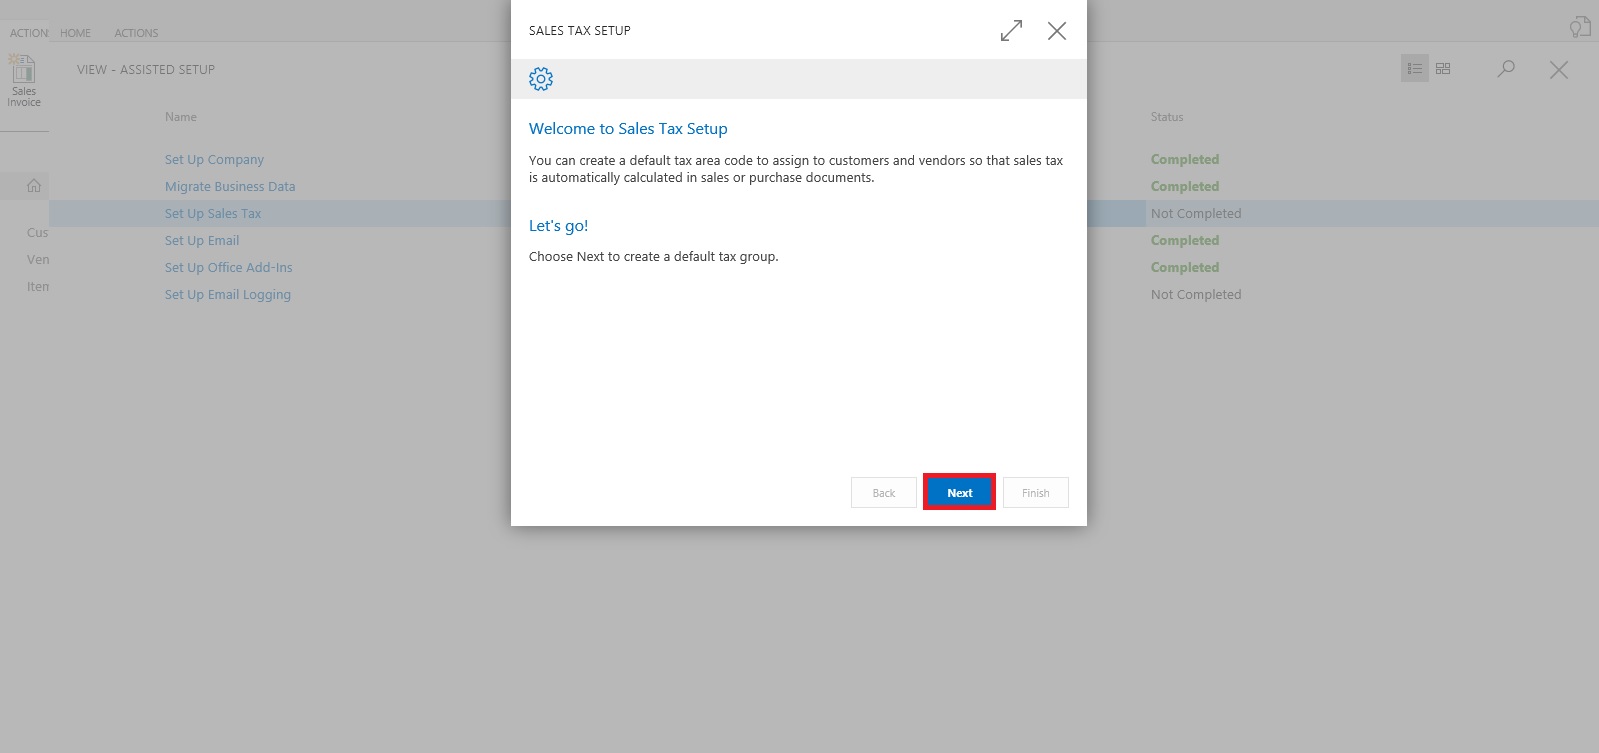
Welcome Screen appears click on Next Button.

SalesTax-3

Default tax group is created and you can start with other setup, click on Next.

SalesTax-4

We are only talking about Tax since this preview is only for US so options relevant to them only available. 

SalesTax-5

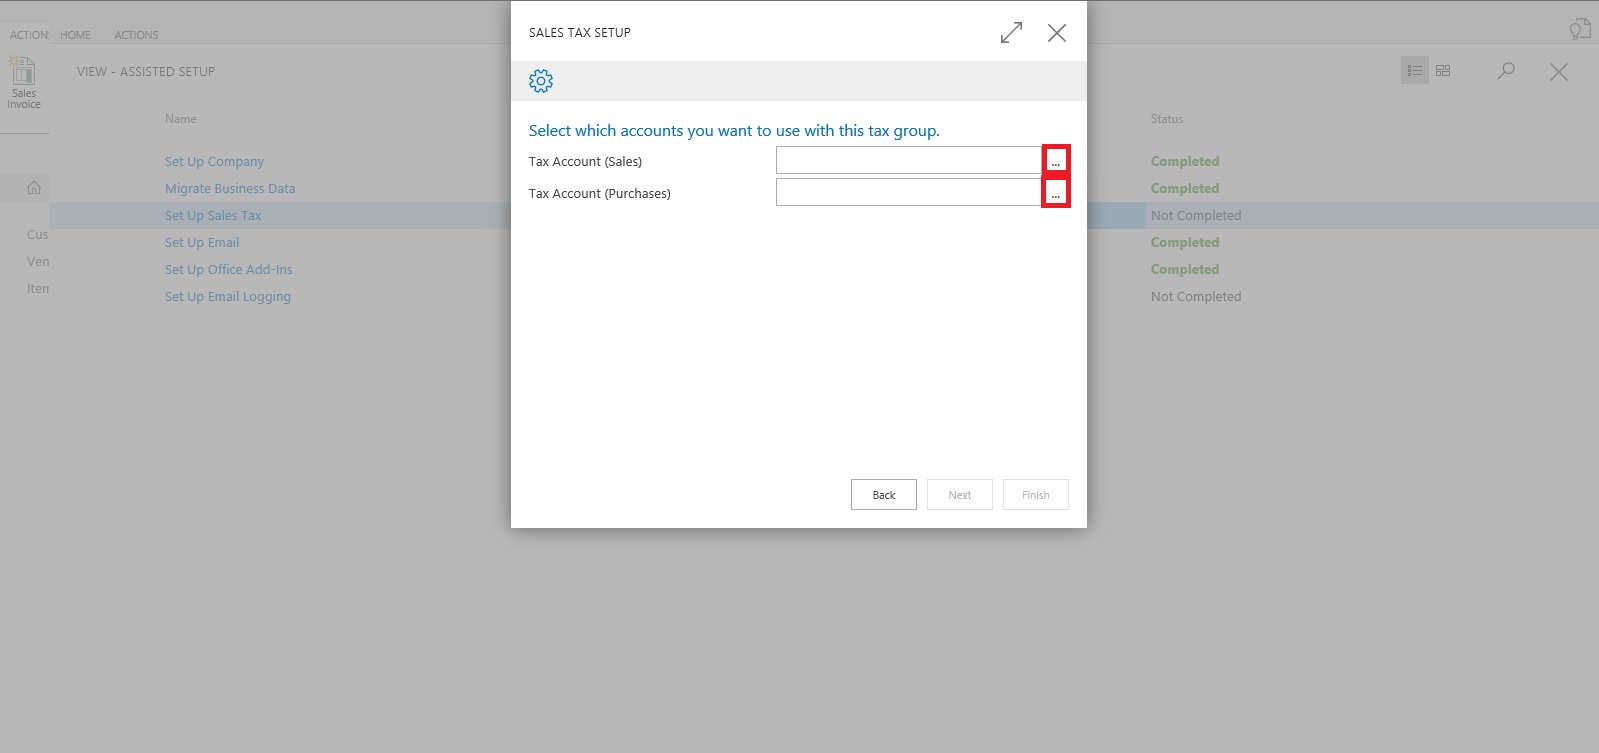
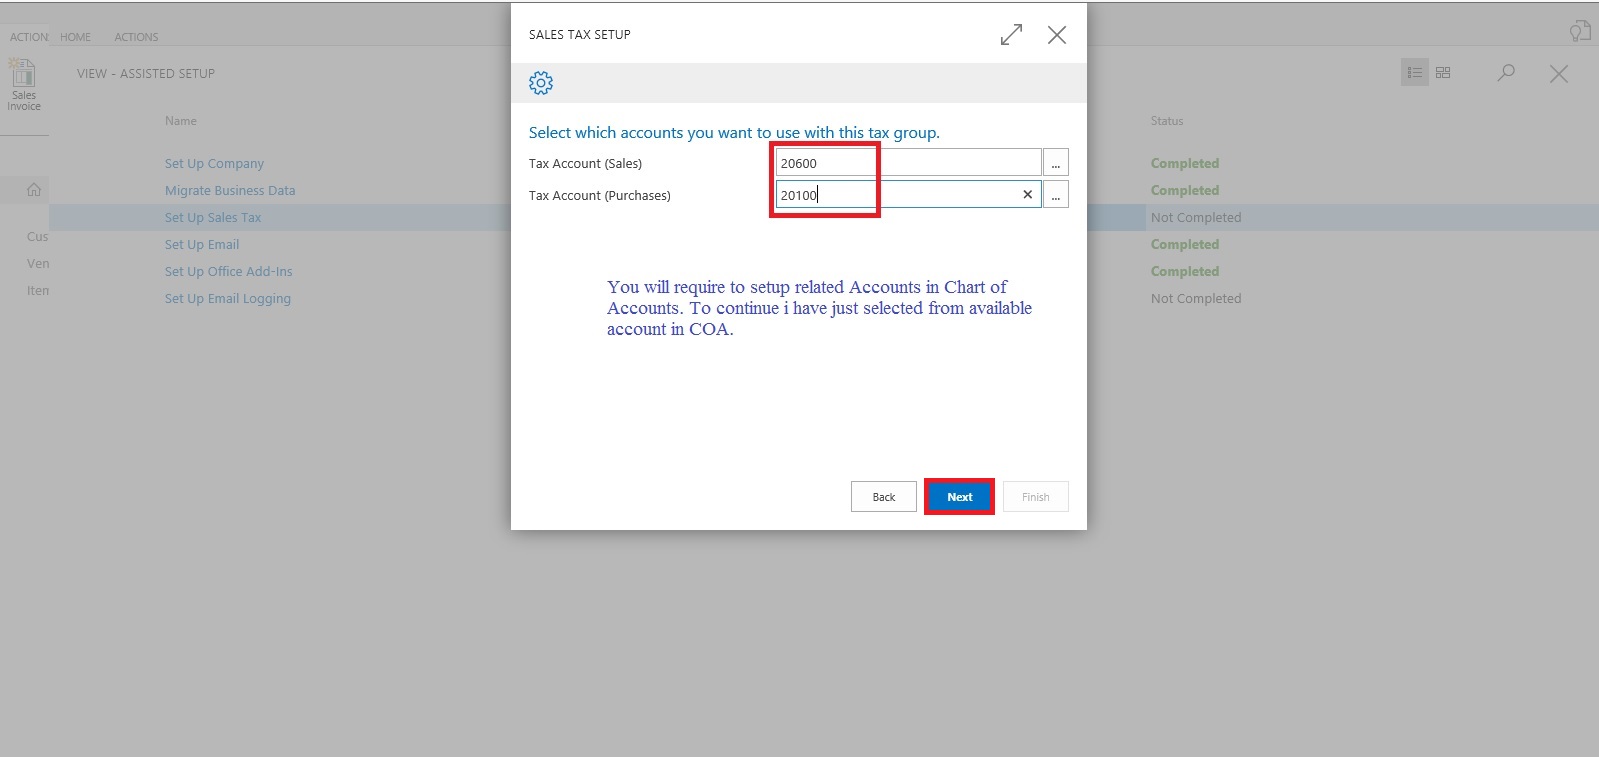
Select the Account for Tax Account (Sales & Purchase) using the Assist button which lists you the Available Accounts in COA.

SalesTax-6

Next City, Country & State related information need to be filled, and then click Next Button to proceed.

SalesTax-7

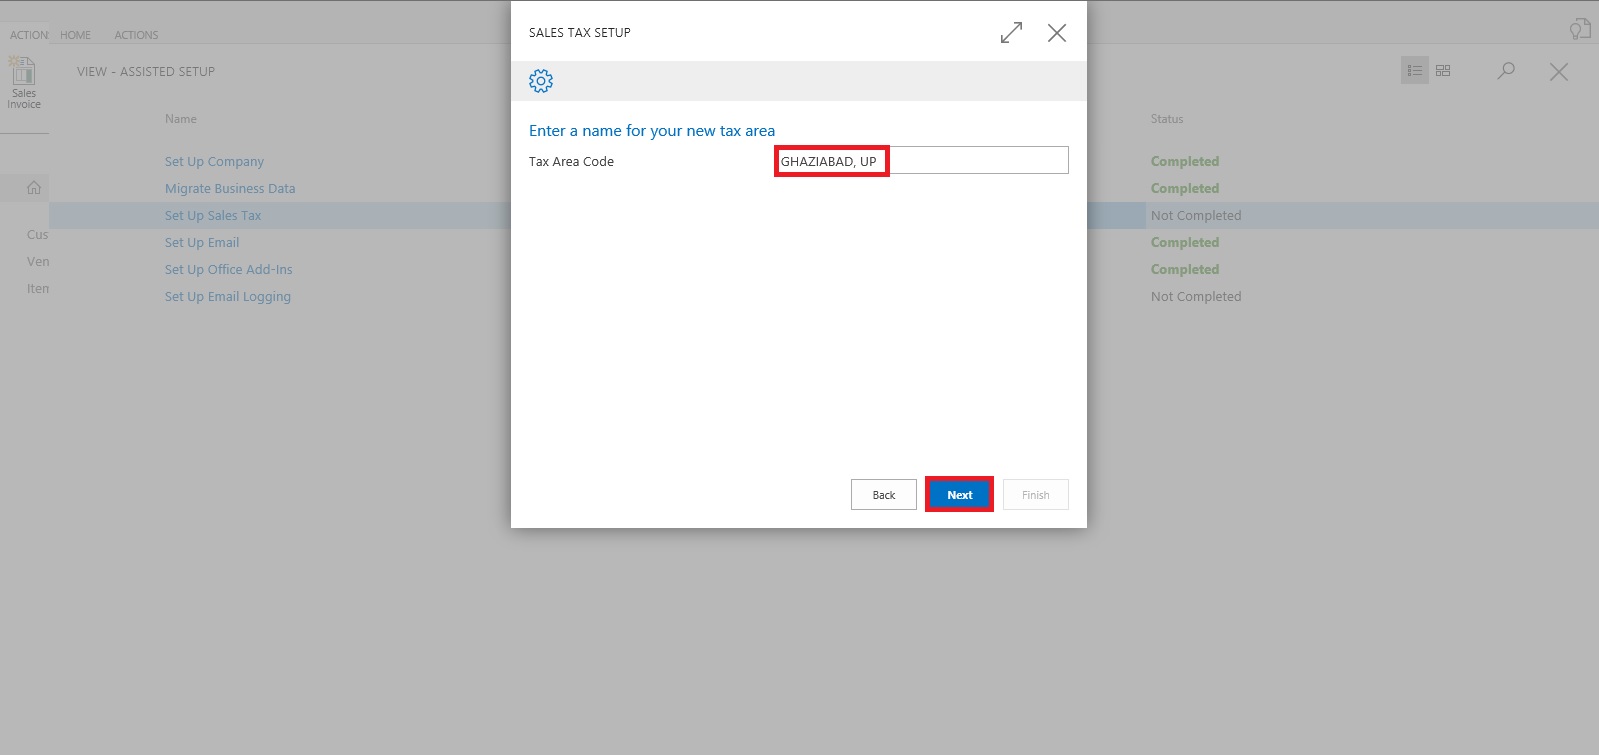
Depending upon Information provided in Previous Screen it suggests Tax Area Code, click on Next Button to continue.

SalesTax-8

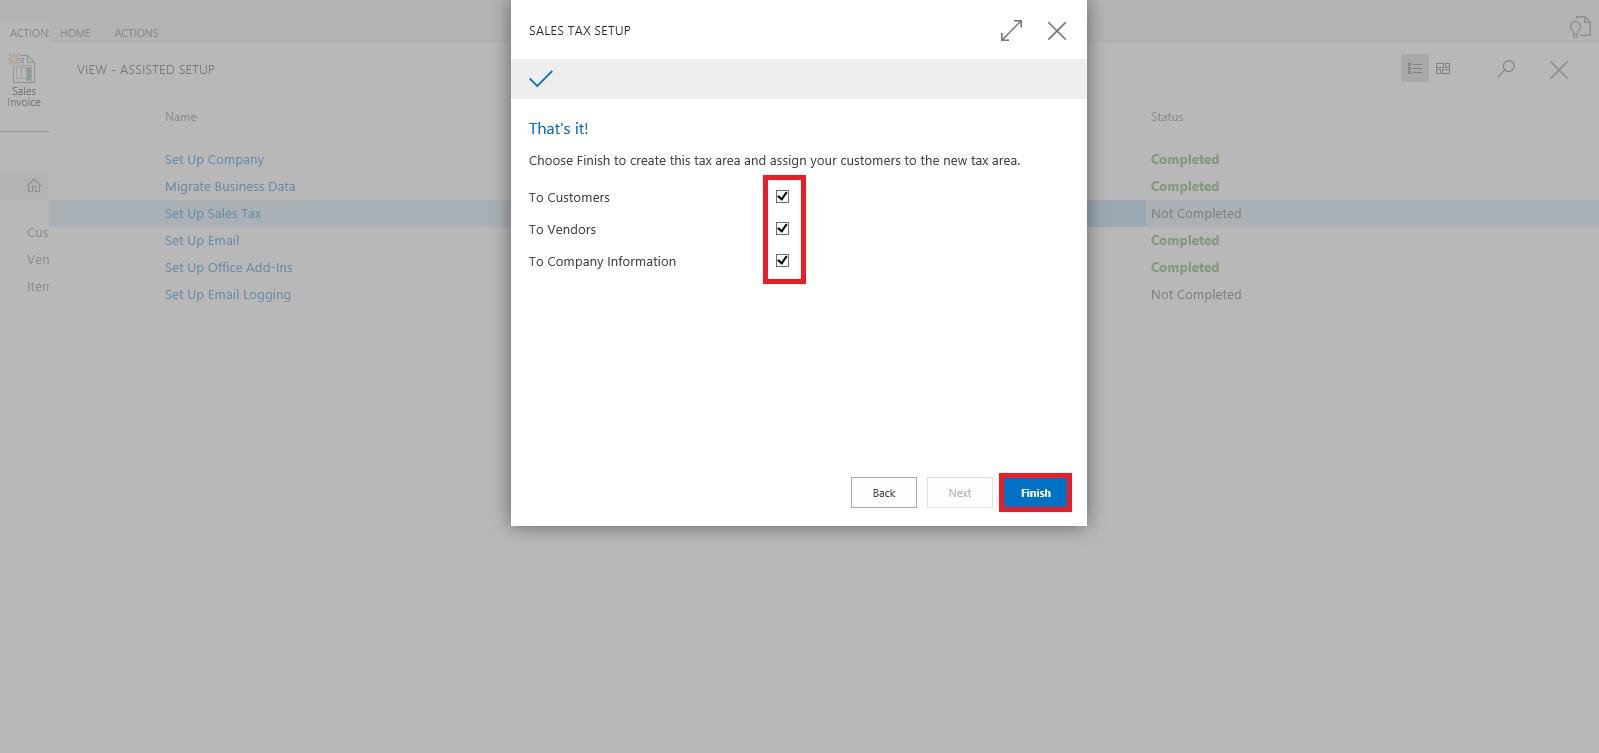
We are done with Setup now we will assign this to Customer, Vendor and Company.

Click on Next to continue.

SalesTax-9

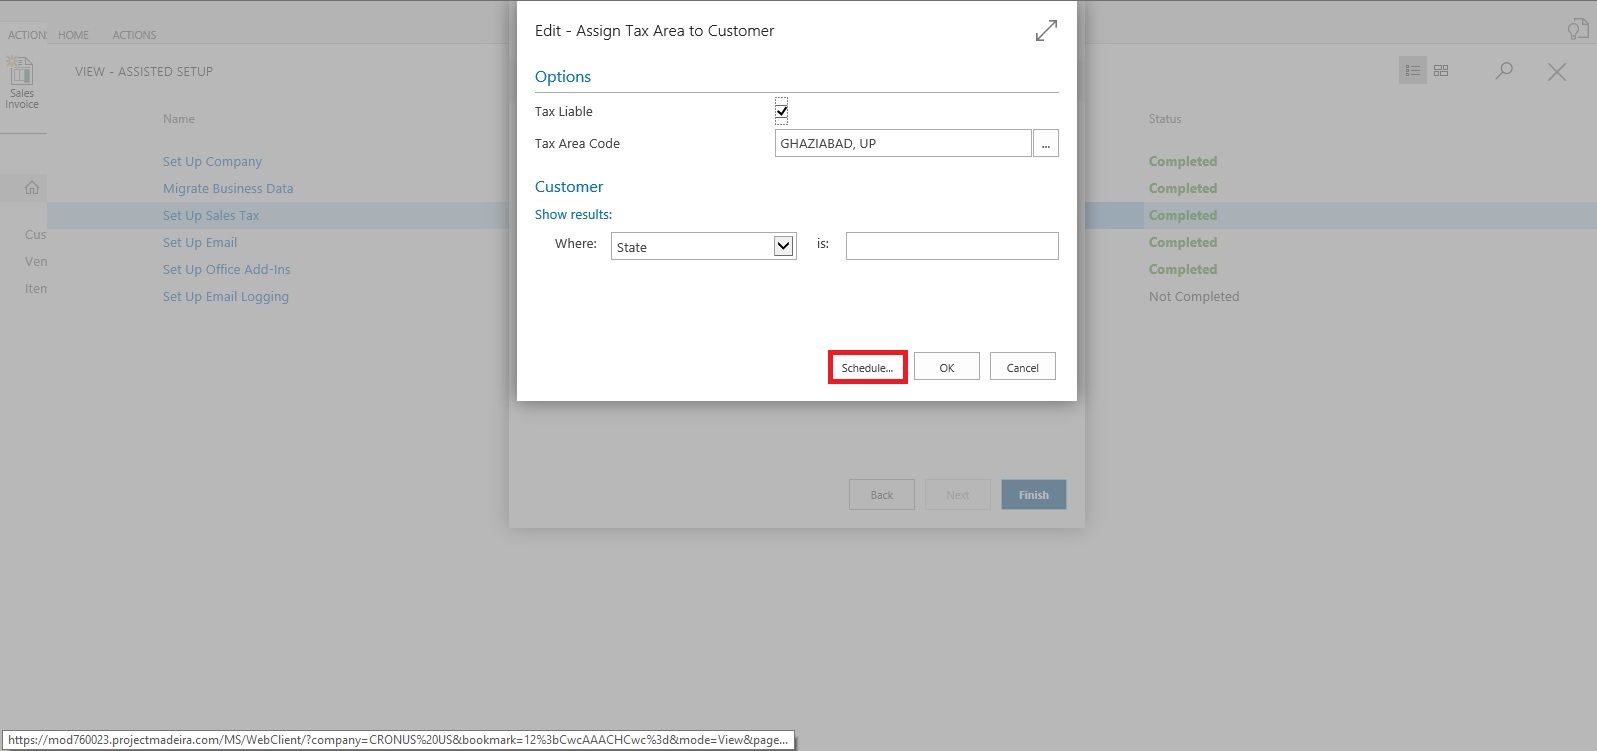
You can Assign the Tax Information to Customer as per entering simple query.

We can assign or we can leave this activity for later.

We have option to schedule a reminder for this activity. Click on Schedule to continue.

SalesTax-10

Enter the Date and Time for Start & Expiry of this reminder.

This will setup a Job for this and keep reminding you so that you have track of, that this activity is still pending and need to be completed.

Once done choose OK Button to continue.

SalesTax-11

You can see this in Jobs Entry Page.

SalesTax-11-1

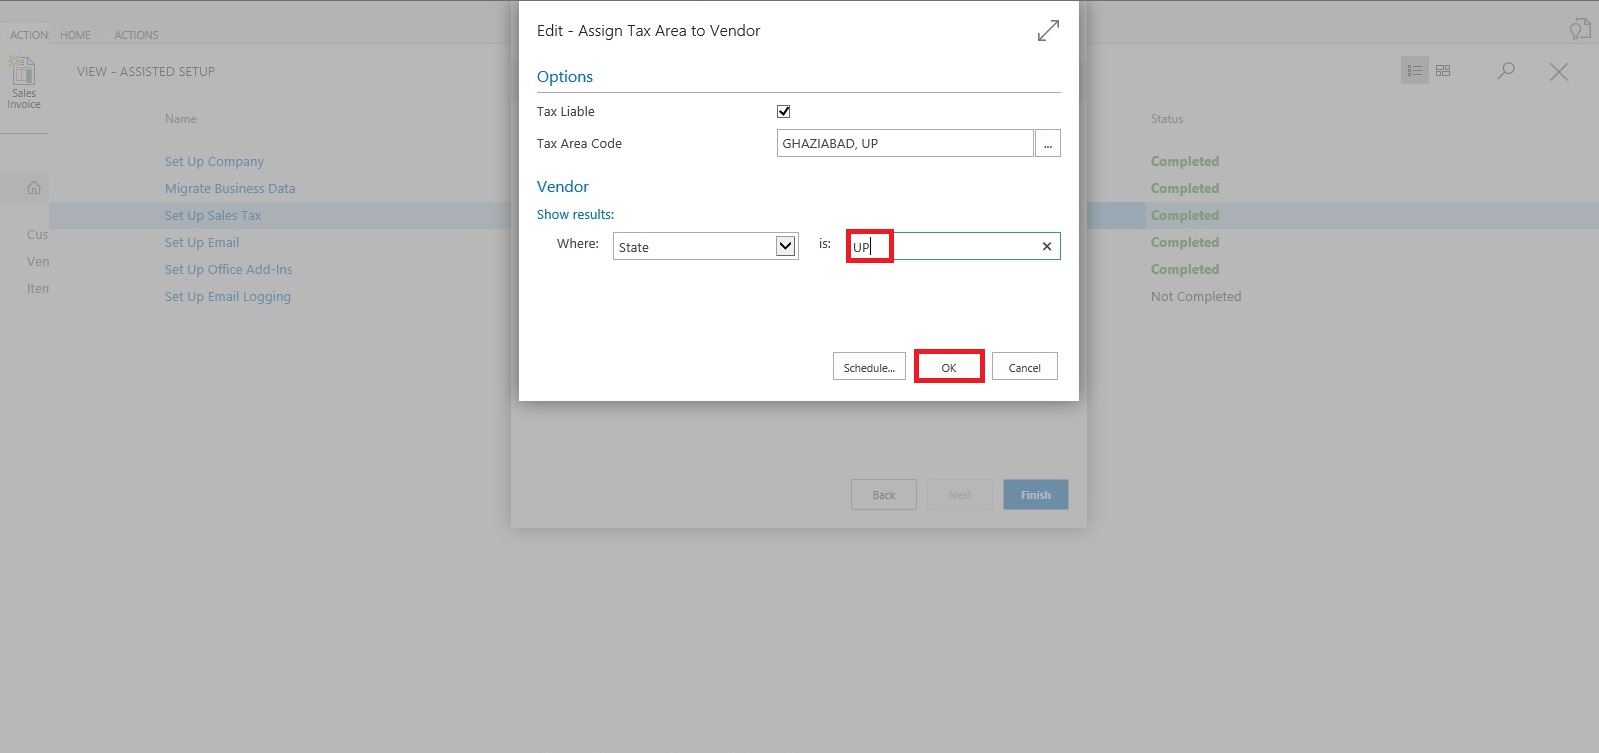
Similarly you can do for Vendor too.

SalesTax-12

For company it will be applicable if you selected, so no separate screen for same for query based assignment.

Select OK to Continue.

SalesTax-13

We are done with our Tax Setup for Company, Customer & Vendor.


That’s all for today, will come up with more information in my next post.

Till then keep exploring and learning.


Monday, 18 April 2016

Assisted Setup (Data Migration) - Madeira

Login to Madeira using your credentials.

From Home page Action Tab Ribbon choose Assisted Setup & Tasks.

AssistSetup-1.1

From Assisted Setup Window select Migrate Business Data Task to continue.

AssistSetup-2.1

From Welcome Screen select Next.

AssistSetup-3

Here you can choose source using which you want to Import Data using Assist Edit Button.

AssistSetup-4

Select Import from Excel option and say OK.

AssistSetup-5

Select Download Template file.

AssistSetup-6

Save the File to desired path.

AssistSetup-7

From Settings Select the Templates you wish to Apply to your Data for Customer, Vendor & Item and choose close to proceed.

AssistSetup-8

Below is the format of Template downloaded in above step. Fill in the data to Import.

AssistSetup-9

When we don't select any template in above step for Customer, Vendor & Item will give confirmation message as below. Choose Yes to proceed.

AssistSetup-10

From next screen Select choose button to specify the Excel file which we prepared in above step using downloaded Template.

AssistSetup-11

This will fetch the data from the file and show you no of records in each table which is going to be imported.

AssistSetup-12

Here if you are familiar with the Rapid Start you can select Advance and perform action accordingly or can skip and proceed to Next Step by selecting Next. Here I am selecting Advance to show the screen.

AssistSetup-13

Confirm with Yes to proceed.

AssistSetup-14

Your Package page will open as shown in above screen, choose Apply Package and handle any import issue with the data to complete the step.

AssistSetup-15

Confirm with Yes to continue.

AssistSetup-16

After processing it will show the status of data, review and fix the issues to continue.

AssistSetup-17

You can drilldown and review the issues and take required steps to proceed with issue fixing and importing of data. Here I choose close to return to previous step of simple import without using Package option.

AssistSetup-18

Select Next to continue with next step.

AssistSetup-19

After processing it will show status of data and errors in data. Say OK to continue.

AssistSetup-20

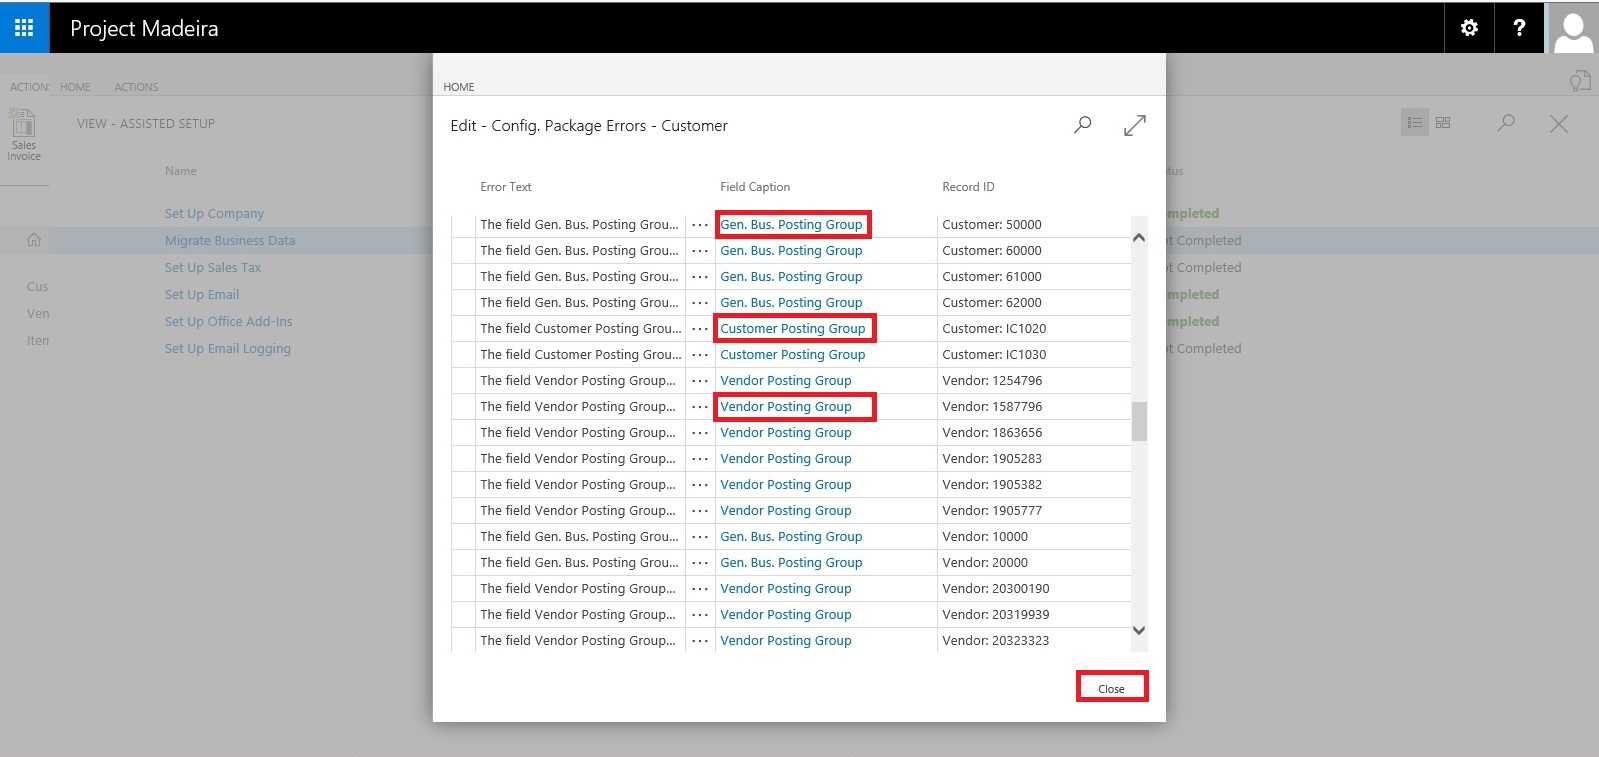
Here we can choose Show Errors to review the Errors.
AssistSetup-21

We find that in my data most of the issues is related to Gen. Bus. Posting Group, Customer Posting Group, Vendor Posting Group, etc... We can fix these issues later, so just respond Close to continue with Next step.

AssistSetup-22

Our data is now Imported with errors, we will take care of issues with data as reviewed above. Respond Finish to complete this step & Process.

AssistSetup-23

Now you can see this step is marked as completed in Status.

Our data is imported we will access the data and fix the issues accordingly.

I will come up with more details in my upcoming posts.

Till then keep exploring and Learning.