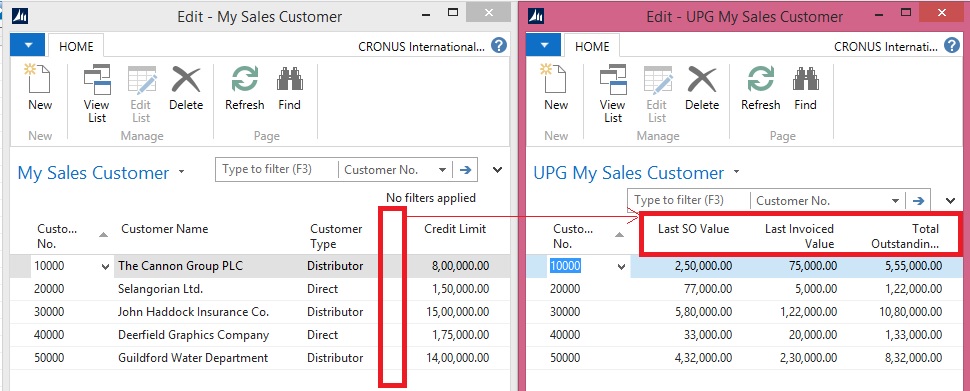
I have prepared a table with below fields and filled with some sample data.
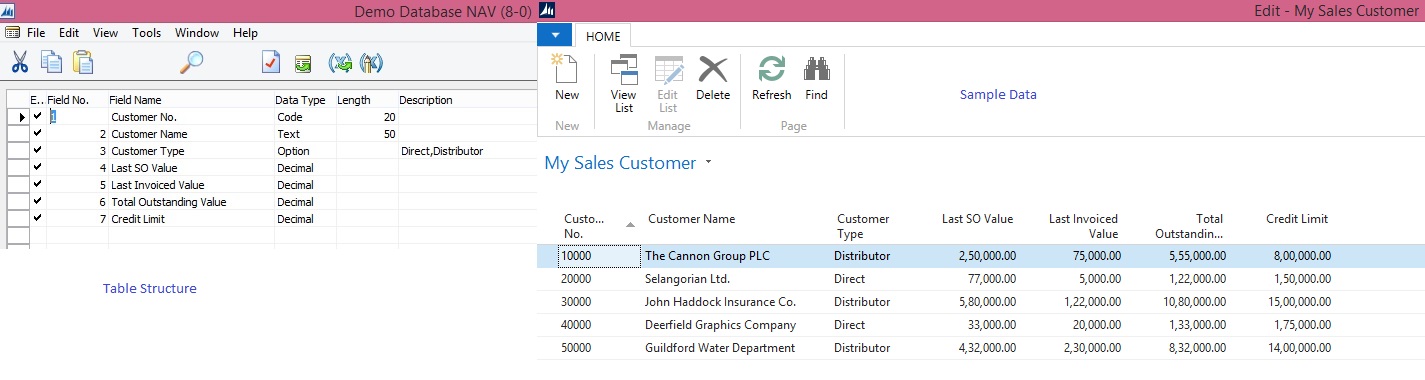
Fill in the My Sales Customer table with demo data.
Make sure you have data in all columns, preferably create several records in this table.
Now when the fields are deleted from the My Sales Customer Table and the data is saved in the UPG My Sales Customer table, we will create the new table where the data will reside in the new version (My Detailed Customer Entry) and move that data into that table using Data Upgrade action in the Dev. Environment.
Since now my project requirement is to refactor the My Sales Customer table and delete the fields which store the information about the Sales Information (“Value” fields), we need to create an intermediate upgrade table where the data from those fields will be stored until you move it into the new My Detailed Customer Entry table.
We will perform below action:
- Open the Object Designer and select table My Sales Customer
- Select the Design button to open the table in the designer.
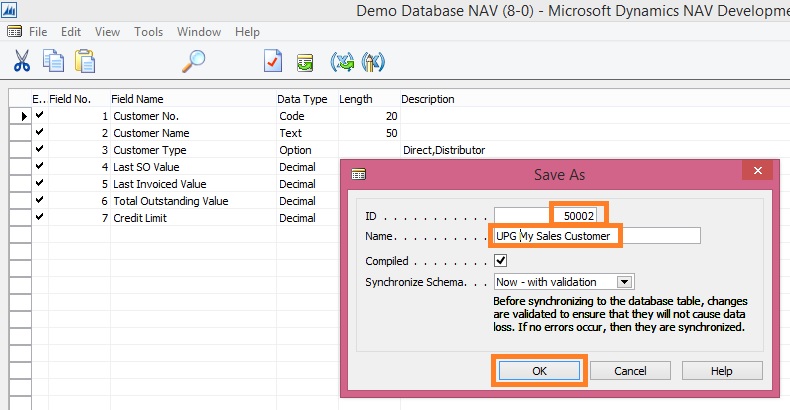
- In the Dev. Environment menu, select File-Save As… action.
- Change the ID value to New ID, change the Name to UPG My Sales Customer and select OK button to close the dialogue and create a copy of the table.
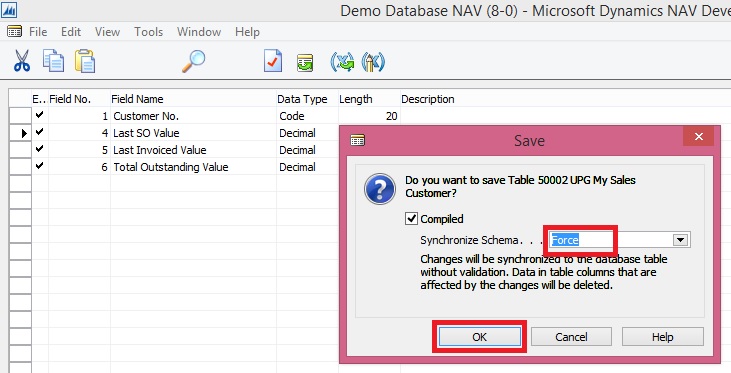
- In table UPG My Sales Customer delete fields Customer Name, Customer Type and Credit Limit.
- In the Dev. Environment menu, select File-Save action.
- On the Save dialogue, set the Synchronize Schema option to “Force” and select OK button to close the dialogue.
- In the Object Designer select the Codeunits button and then click New to start creating a new upgrade codeunit.
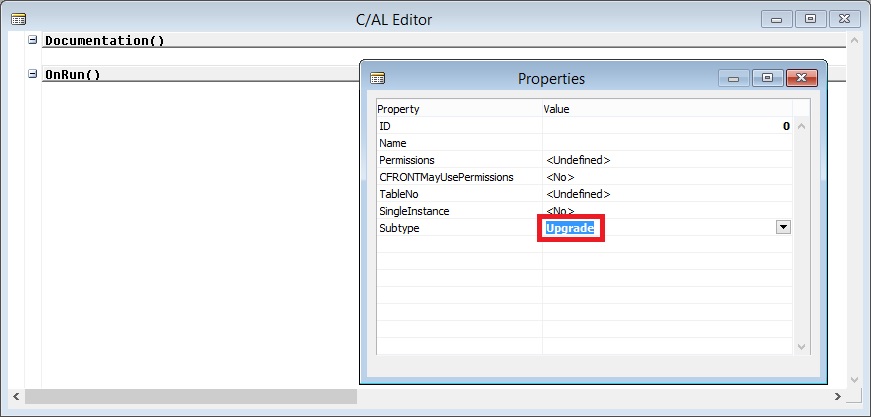
- In the Dev. Environment menu, select View-Properties action to start editing the properties of the codeunit.
- Change the Subtype property to Upgrade and close the Properties form.
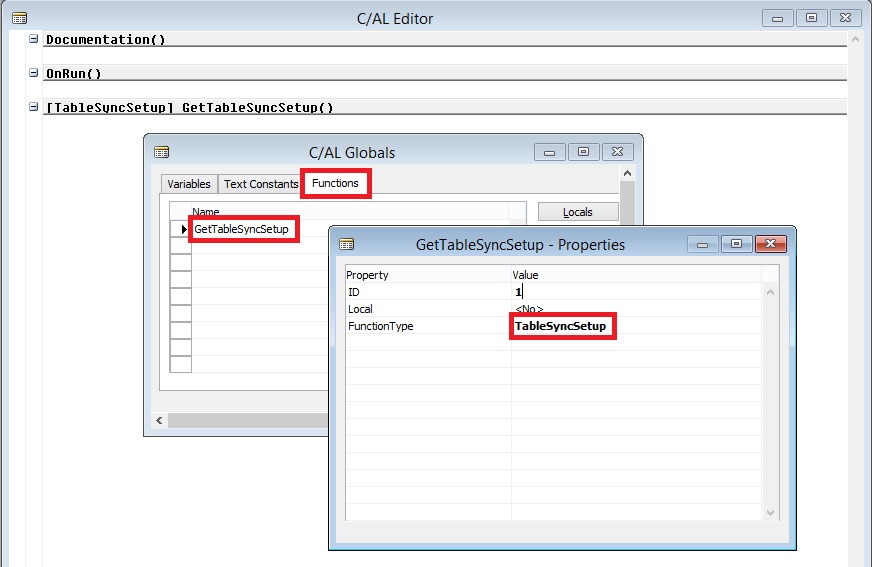
- In the Dev. Environment menu, select View-C/AL Globals action and in the form which is opened select the Functions tab.
- Enter the name of the function, e.g. GetTableSyncSetup
- In the Dev. Environment menu, select View-Properties action to start editing the properties of the function.
- Change the FunctionType property to TableSyncSetup and close the Properties form.
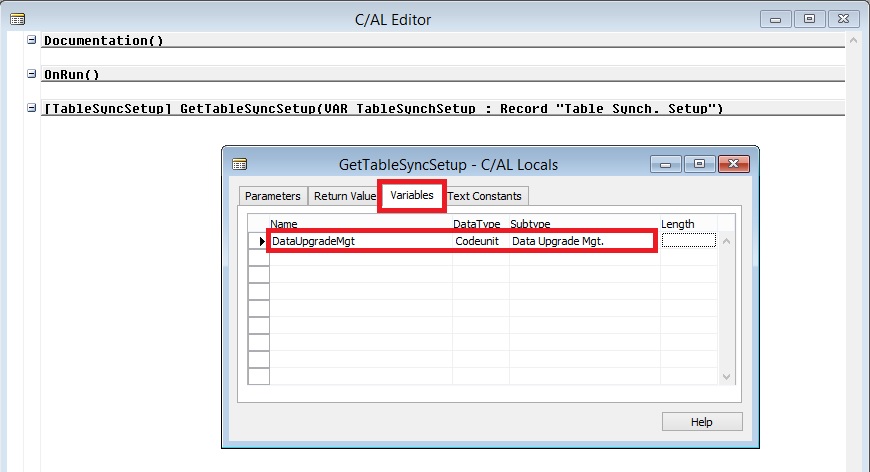
- Select the GetTableSyncSetup function on the Functions tab and then select the Locals button to define function parameters.
- Add a parameter of DataType = Record, Subtype = Table Synch. Setup, Name = TableSynchSetup, Var = Yes.

- On the C/AL Locals form, select Variables tab and add a local variable of DataType = Codeunit, Subtype = Data Upgrade Mgt.
- Close the C/AL Locals and C/AL Globals forms to return to the C/AL Editor.
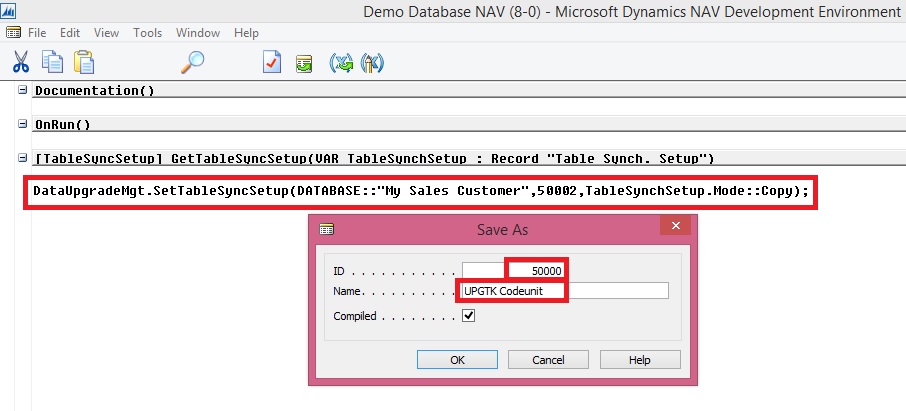
- In the GetTableSyncSetup function, add the C/AL statement as presented on the screenshot.
- In the Dev. Environment menu, select File-Save action to save the codeunit.
- On the Save dialogue, define ID , Name = UPGTK Codeunit, and select OK to save the codeunit.
- Close the codeunit editor.
[
//>>Data Upgrade Code
// To copy data from table My Sales Customer to UPG My Sales Customer table
DataUpgradeMgt.SetTableSyncSetup
(
DATABASE::"My Sales Customer",
50002,
TableSynchSetup.Mode::Copy
);
//<<Data Upgrade Code
]
- In the Object Designer, select the Tables button and then select the My Sales Customer table in the list of tables.
- Click Design to open the table in the table designer.
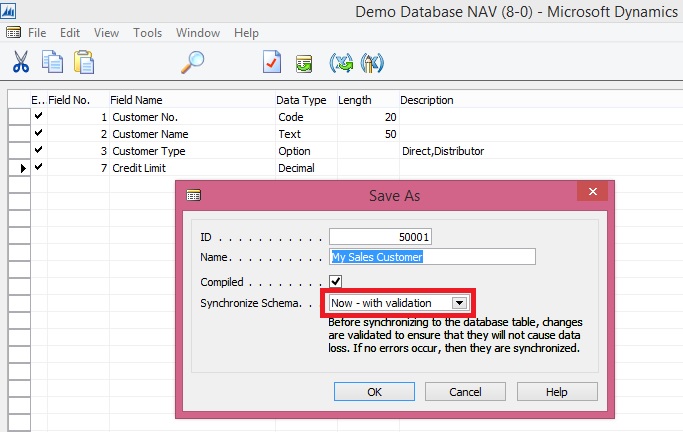
- Delete the following fields:
- Last SO Value
- Last Invoiced Value
- Total Outstanding Value
- In the Dev. Environment menu, select File-Save action.
- On the Save dialogue, notice that the Synchronize Schema option is set to “Now – with validation” and select OK button to close the dialogue.
- In the Object designer, find table UPG My Sales Customer and click Run to check if the data was copied there by the schema synchronization.
Here we are now done with the Part -1 of our exercise. Next step is to move this temp data in respective table as part of our Upgrade. We will see upgrade part in our next post.
[…] Please go through it, if not seen earlier the Data Upgrade Codeunit in Navision 2015 – Part -1 here […]
ReplyDelete[…] Please go through it, if not seen earlier the Data Upgrade Codeunit in Navision 2015 – Part -1 here […]
ReplyDelete