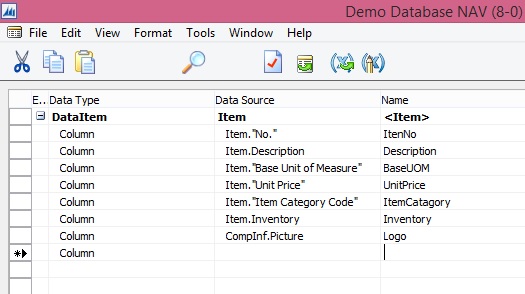
Prepare the Dataset for Report as below, to keep it simple I am creating List report for Item Inventory.
I am adding one additional field for Company Logo from Company information.
Make sure you add calcfields code for Picture from Company information.
---------------------------------------------------
I have added below piece of code in [ Item - OnPreDataItem() ]
CompInf.GET;
CompInf.CALCFIELDS(Picture);
---------------------------------------------------

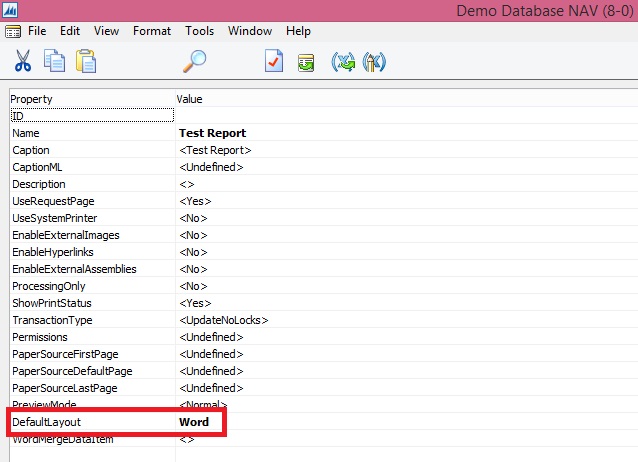
Place the cursor on Blank Line and open Report Properties and add DefaultLayout Property.

Next we will Add a Blank Word Layout to the Report, Step as below.

Confirm the action by responding OK to the Dialog Box.

Now Export this Blank Template

and save as docx file (MS Word File)

Open the Exported Template in Word.
Click on DEVELOPER Menu.
From Ribbon click on XML Mapping Pane.

You will now be able to see XML Mapping Pan which contains your Dataset for the Report.
Click to the Dropdown List and select entry containing your Report Name & ID.

Now you will be able to access your Dataset with Table & Fields details. As shown in below screen.

Place the cursor on top (or wherever desired) of the document to add Logo to the Report.
Select the Picture Filed from the Dataset -> Right Click -> Insert Content Control -> Picture.
See below screen for details:

You will see the Place holder for the Picture.
Now add Table with 2 Rows ( 1 for Header & 1 for Data) and 6 columns.
We have six columns in our dataset excluding Logo.

Add your Header for the table, We are using fixed Text Heading as of now but you can add captions from your dataset.
In current report I have not included we can check same in some other report posts.

Select Entire 2nd Row and Add Repeating Content Control for Item (Table).
As this will show records from the table Item we included in our Dataset.

Now in each column add your columns from Dataset as shown below.
Place your cursor in each column and choose Insert Content Control -> Plain Text.

Now our Report is almost ready.
May be the Report have data which may continue on several pages, in this case our Heading Row must Repeat on every new Page. To do this we will Select the entire 1st Row -> Right Click -> Table Properties.
Go to Row Tab of Property window and put a checkmark on option "Repeat as header row at the top of each page"

Save your Word Template an Import back in your report as shown below.

Now Save the Report and Execute it.
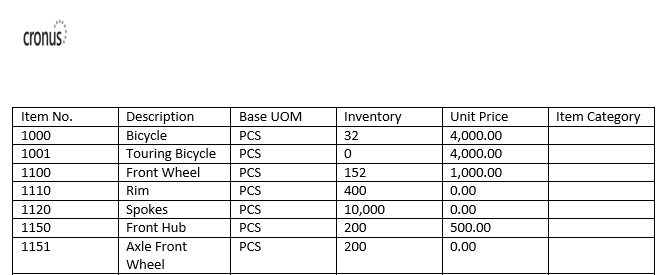
Here is the Output below of the Report.

We are done !!!
You can use formatting feature of Word to add more better look to your Report as desired.
Stay tuned for more in upcoming posts.
Don't forget to follow the Blog Site for future posts.
[…] is the Quick Link : [ Creating My First List Report in Navision 2015 […]
ReplyDelete[…] is the Quick Link : [ Creating My First List Report in Navision 2015 […]
ReplyDelete[…] Creating my first word list report in Navision 2015 […]
ReplyDelete