All other Tenants can now be created in similar fashion.
It is recommended to create a tenant template, and in turn use this template to make other tenants.
To create a template follow bellow steps:
- Remove all users leaving only Administrator Account as Super Permission.
- Remove any Transaction data specific to Company and other Setups
- Take the backup of the database and keep it as template for other tenant’s database creation. Basically we will restore this database for each new tenant we need to add.
You can restore the database and mount it to the service one by one and rename the company name manually and do other modifications. But if you need to create 100 or 1000 tenants then this process will be quite time taking. To make this step easy we can use CSV file to store all necessary information and create a Shell Script to read information from CSV file and input as parameter to the commands to make this process fast and save with unnecessary effort.
Today I am going to discuss this, as a sample I have taken bare minimum information to get our task done. In real scenario many more things you may require but you can use this as a template and design your CSV and Script accordingly.
Let’s do the Preparation:

I have created the Folder structure as shown in above screen shot.
I will keep my CSV File in TenantInfo Folder.
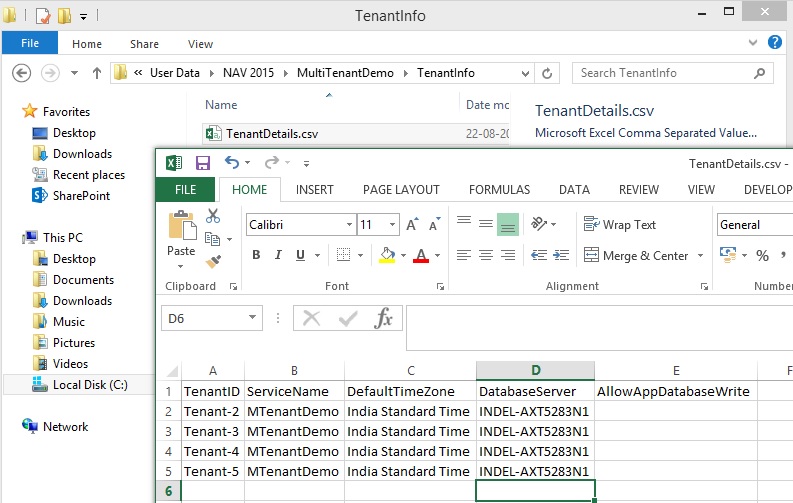
I will store my Shell Script in ShellScript Folder.
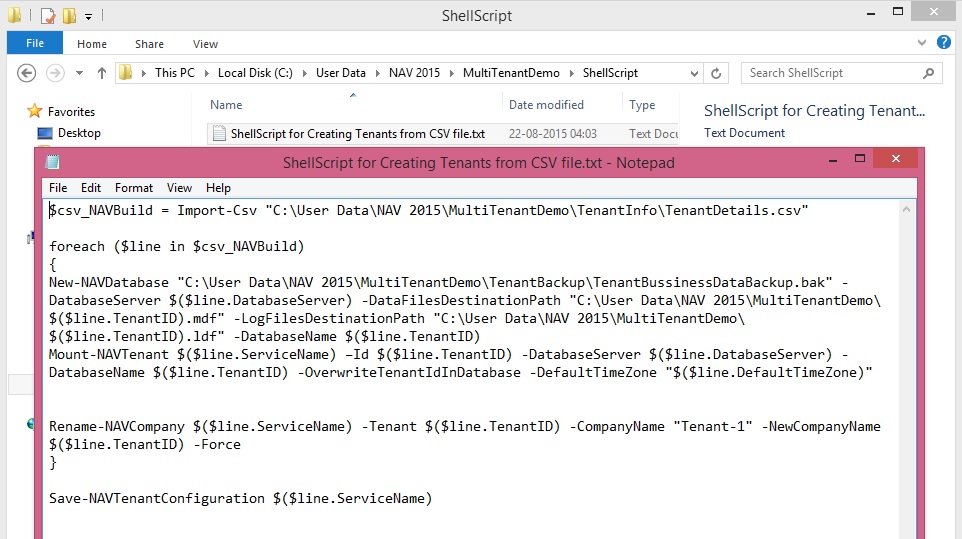
$csv_NAVBuild = Import-Csv "C:\User Data\NAV 2015\MultiTenantDemo\TenantInfo\TenantDetails.csv"
foreach ($line in $csv_NAVBuild)
{
New-NAVDatabase "C:\User Data\NAV 2015\MultiTenantDemo\TenantBackup\TenantBussinessDataBackup.bak" -DatabaseServer $($line.DatabaseServer) -DataFilesDestinationPath "C:\User Data\NAV 2015\MultiTenantDemo\$($line.TenantID).mdf" -LogFilesDestinationPath "C:\User Data\NAV 2015\MultiTenantDemo\$($line.TenantID).ldf" -DatabaseName $($line.TenantID)
Mount-NAVTenant $($line.ServiceName) –Id $($line.TenantID) -DatabaseServer $($line.DatabaseServer) -DatabaseName $($line.TenantID) -OverwriteTenantIdInDatabase -DefaultTimeZone "$($line.DefaultTimeZone)"
Rename-NAVCompany $($line.ServiceName) -Tenant $($line.TenantID) -CompanyName "Tenant-1" -NewCompanyName $($line.TenantID) -Force
}
Save-NAVTenantConfiguration $($line.ServiceName)
I will place my tenant database template file in TenantBackup Folder prepared as per above discussed step. I will take the SQL backup and place the .bak file in this folder.

Creating and Mounting Tenants
It is possible to create PowerShell scripts that aids the setup of Tenants. Basically, what the script does, is:
- Calls a CSV file (Comma separated file) with settings for all the Tenants
- Restores and creates new Tenants based on the tenant template SQL backup
- Mounts the new database as a tenant on NAV Server Instance
- Renames the default company name to the specified company name
- Saves NAV tenant configurations of NAV Server Instance
Open the Microsoft Dynamics NAV 2015 Administrator Shell, Make sure you run it as Administrator. Copy and Paste your above created script.

On completion of execution of script, Verify your Tenants are Mounted to the Service using Microsoft Dynamics NAV 2015 Administration.

Verify using SQL Server Management your all database is created.

Verify that the database Files are created in Specified Folder in the Script.

Verify that you are able to login to each Tenant database in RTC.

Now you are done with Creating the Tenants and Mounting the same to the Navision Service using CSV file and Shell Script.
Shell Script had made your life so easy, think if manually you have to do it for 5000 tenants how much time will you take to get this task done.
[…] If you missed previous post you can find it here. Adding Tenants to multitenancy Environment […]
ReplyDelete