To start with the below steps you will require 2 Accounts preferably Domain Accounts:
- An Account for running MS Dynamics Navision Service
- An Administrator account for Database & RTC
How to setup these accounts and what permissions are required for these accounts I would recommend to go through my earlier post on Provisioning the Microsoft Dynamics NAV Server Account here.
Add both the above account to Navision Database with Super permission.
In order to create a multitenant environment (here for Demo Database NAV (8-0)), the following steps need to be done:
- Take an SQL Backup of the running Demo Database NAV (8-0) database.
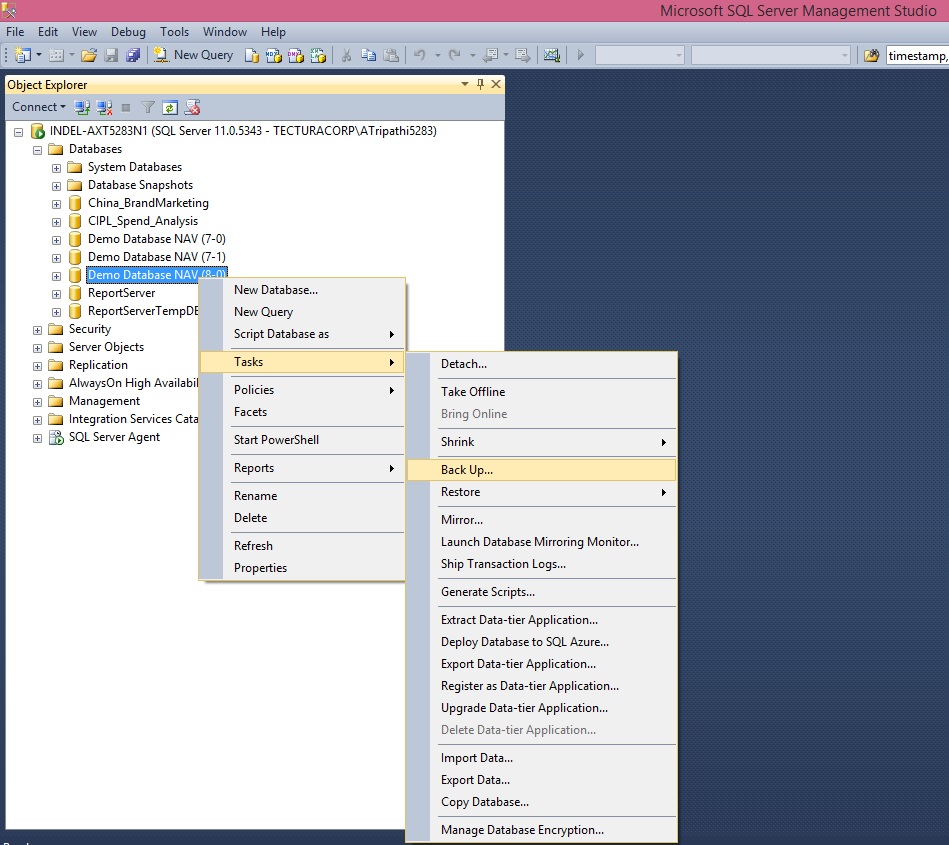
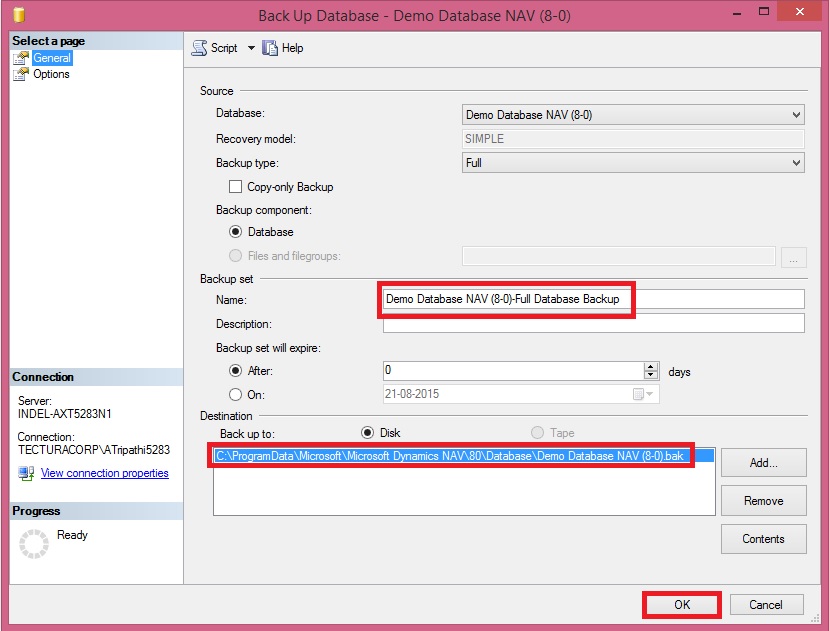
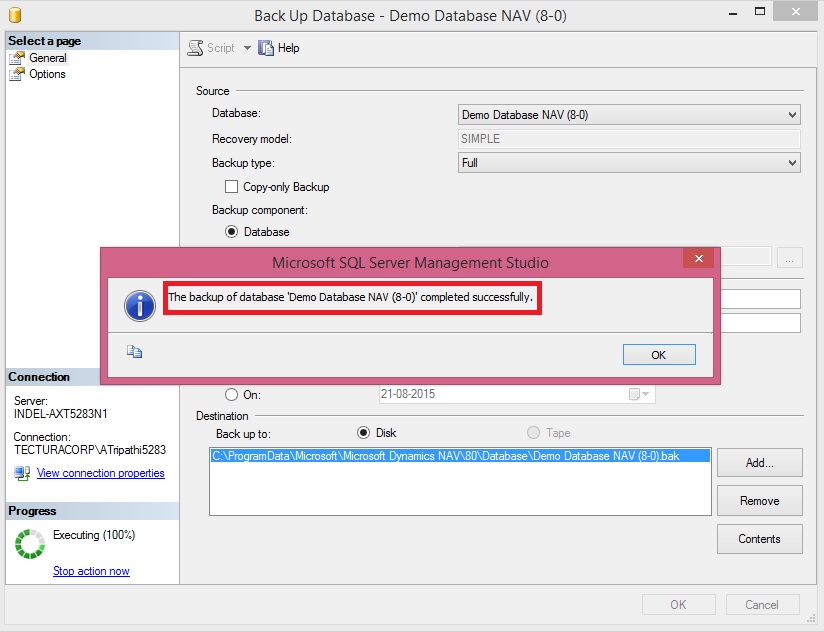
- Restore the newly made SQL Backup to a new database (MultiTenantDatabase NAV (8-0) Demo).

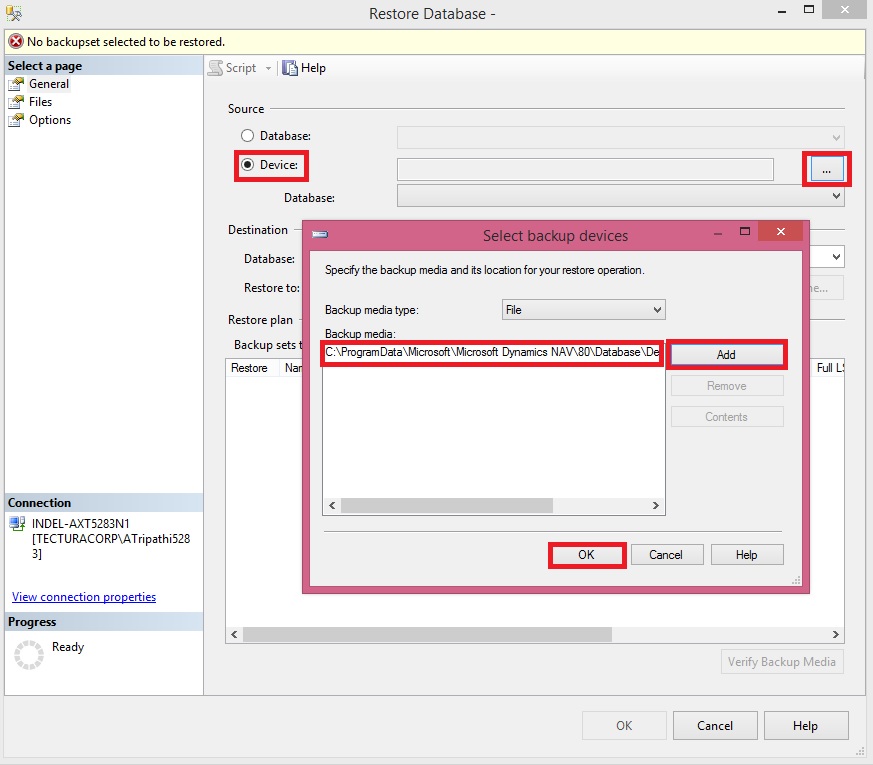
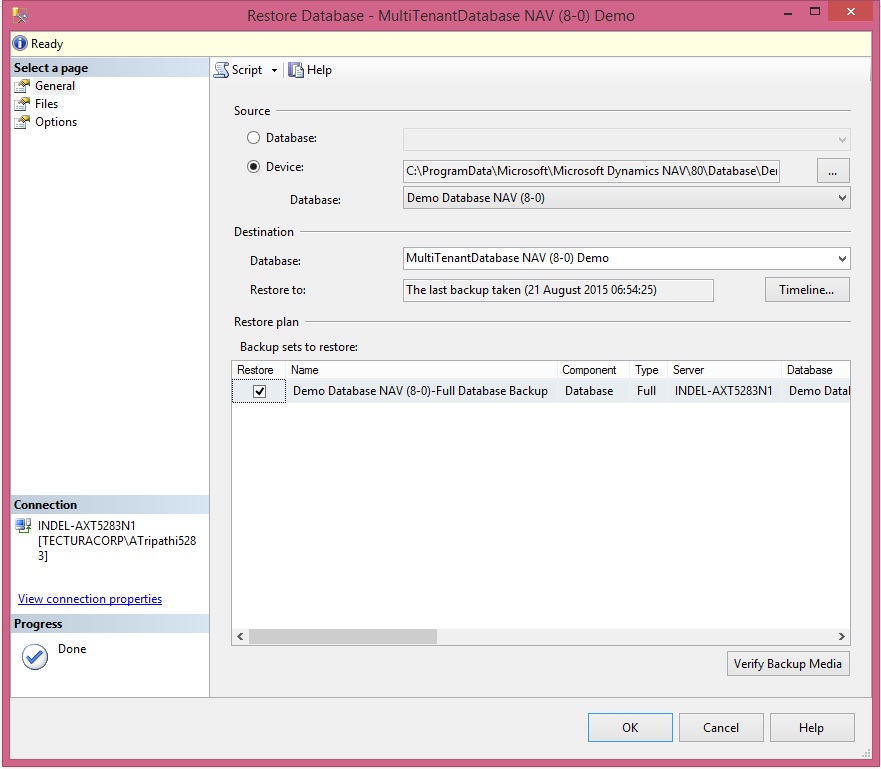

- On the NAV Server, using the NAV 2015 Administration console, create a new NAV Server Instance named MTenantDemo

- Edit the instance and set the database to newly created MultiTenantDatabase NAV (8-0) Demo database, and set the instance to be started with NAV Service user.
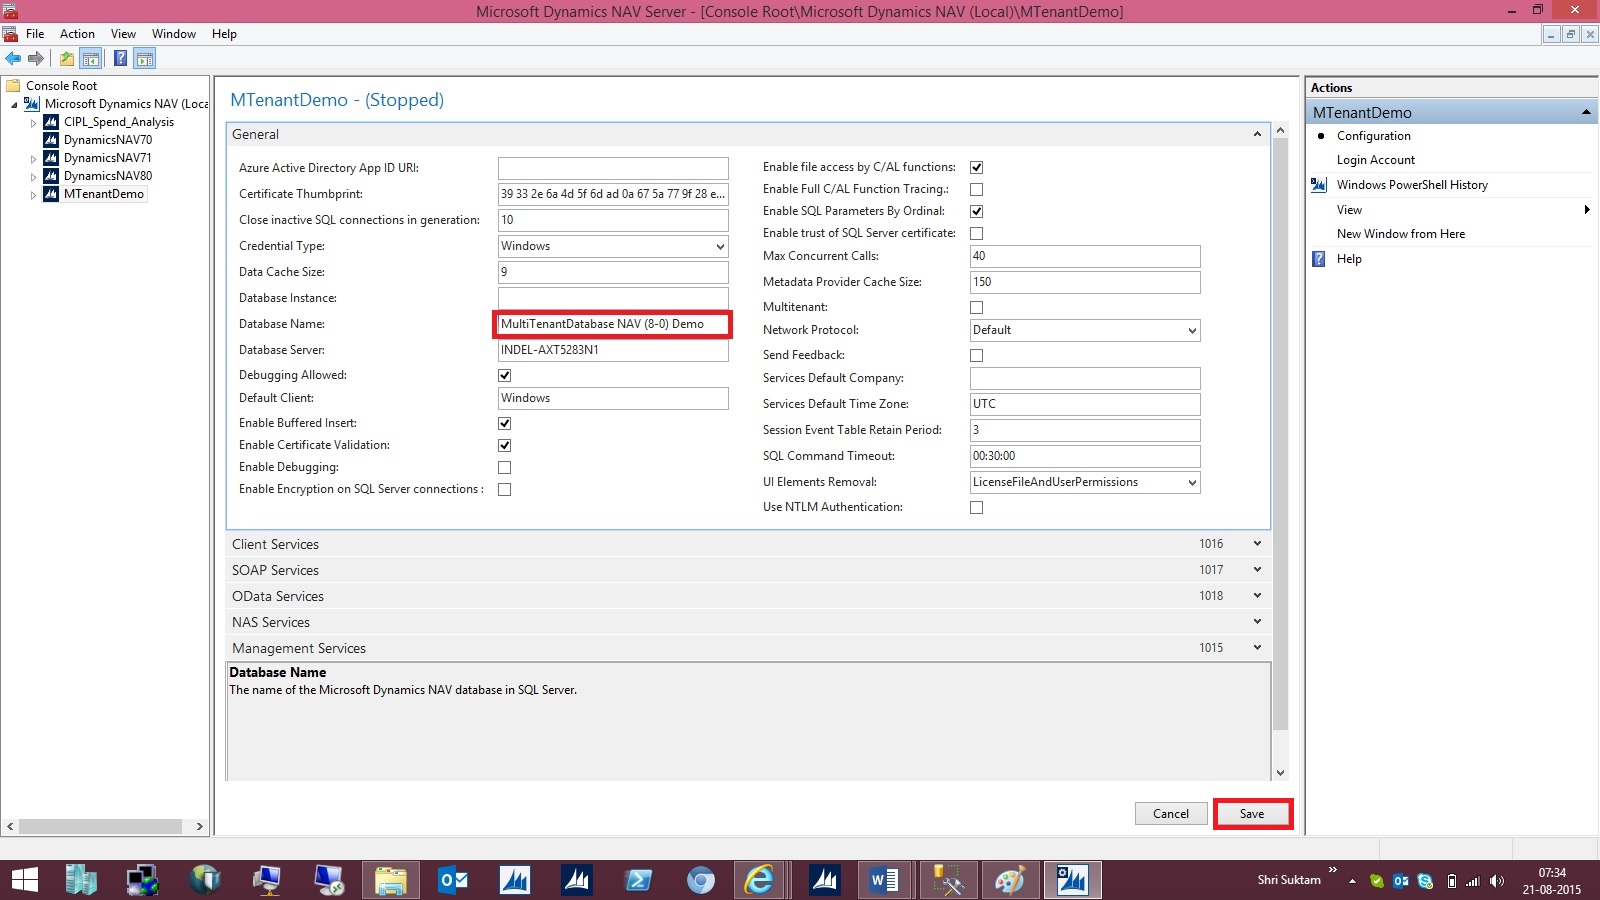

- Start MTenantDemo – and see if you can log in
- Once you have confirmed the MultiTenantDatabase NAV (8-0) Demo database and MTenantDemo is running, split the database in an application part and a data part:
- Open the NAV 2015 Administration Shell (or Windows PowerShell ISE and load the NavAdminTool)
- Export the application part from the MultiTenantDatabase NAV (8-0) Demo database to a new database (MultiTenantDatabase NAV (8-0) Demo_App):
Export-NavApplication -DatabaseServer INDEL-AXT5283N1 -DatabaseName 'MultiTenantDatabase NAV (8-0) Demo' -DestinationDatabaseName 'MultiTenantDatabase NAV (8-0) Demo_App’
- Remove the application part from the MultiTenantDatabase NAV (8-0) Demo database:
Remove-NAVApplication -DatabaseServer INDEL-AXT5283N1 -DatabaseName 'MultiTenantDatabase NAV (8-0) Demo'


- Using the NAV 2015 Administration console, edit the MTenantDemo instance and set the database to newly created MultiTenantDatabase NAV (8-0) Demo_App database

- And select Multitenant (set it to True):
- Save and restart MTenantDemo

- Either through a Powershell commandlet in the NAV 2015 Administration Shell or by using the NAV 2015 Administration console mount a tenant named Tenant-1 on the MTenantDemo NAV Instance:


- Start NAV using the new tenant:
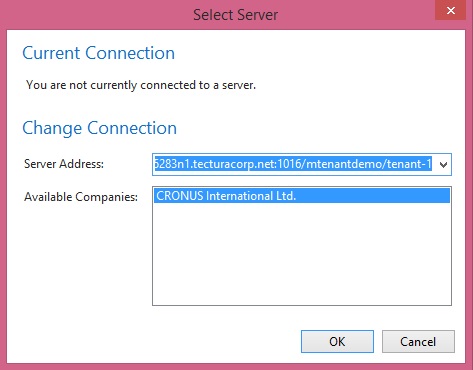
- In Companies rename the Company Name to Tenant-1
- Take an SQL Backup using the MultiTenantDatabase NAV (8-0) Demo_App database, and call it “App_template.bak”
- Take an SQL Backup using the MultiTenantDatabase NAV (8-0) Demo database, and call it “Tenant_template.bak”
You now have a template you can use when you want to create a application and a tenant.
Restore the Tenant Database as Tenant-2, Tenant-3, Tenant-4, Tenant-5 etc.
Mount the Tenant Databases to NAV Service MTenantDemo as per above steps.
Now you have One Application & 5 Business Data Tenants Mounted.
You will do development in Application Database MultiTenantDatabase NAV (8-0) Demo_App and then Sync your modifications to Business Data Databases named Tenant-1/2/3/4/5 etc.
To Sync your objects to Tenants you will use below script in NAV 2015 Administration Shell:
Set-ExecutionPolicy unrestricted –Force
Import-Module 'C:\Program Files\Microsoft Dynamics NAV\80\Service\NavAdminTool.ps1'
Sync-NAVTenant MTenantDemo -Force -Tenant ‘MultiTenantDatabase NAV (8-0) Demo’
I will explain in more detail on Creating Tenants, Synchronizing Tenants and uploading License for Tenants in more details in my next upcoming post.
[…] my previous post Creating the Multitenant Environment, We were done with the basic setup for MultiTenantDatabase NAV (8-0) Demo_App, the first Tenant […]
ReplyDelete